background image


        Page 7 of 39 


3 REQUIREMENTS FOR THE LOCATION OF OPERATION 


3.1 General requirements 


The  respective  valid  national  regulations  regarding  the  place  of  installation  must  be  observed. 
Since  the 

TONE  Nitro

  is  basically  a  dispensing  system,  please  also  observe  the  technical 

regulations  for  beverage  dispensing  systems  TRSK  400  "Installation  of  beverage  dispensing 
systems". 
 

Attention: Low voltage can damage the compressor. The same applies if several units are 
supplied with power via one power connection. 
 
The power plug must be freely accessible. 


3.2 Electrical connections  

 see technical specification 


Voltage 


230 V

 +/- 10% 50 Hz


Power  

300 W


Fuse protection


max. 16 A


3.3 Location of operation 


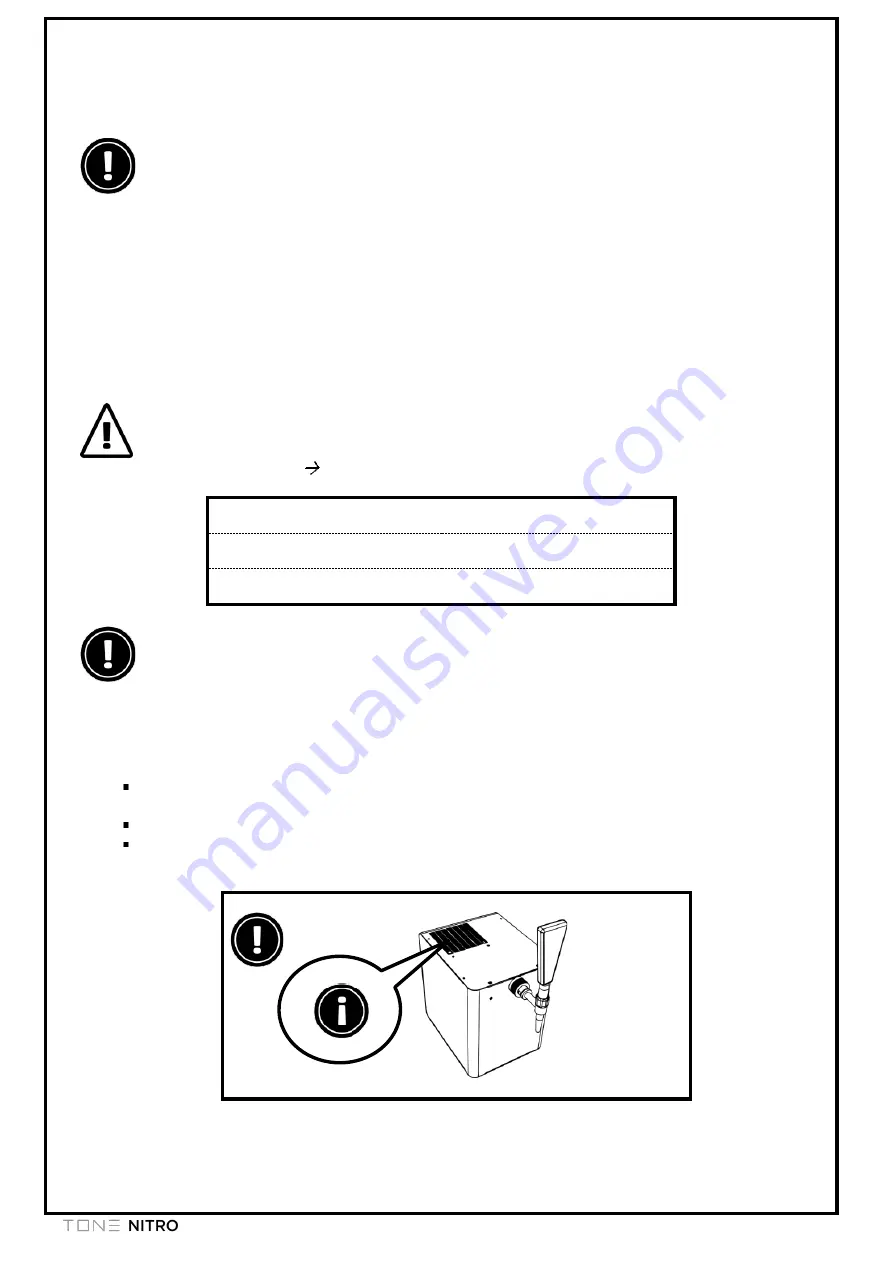
Adequate ventilation and extraction must be ensured. For this  purpose, the distance to the next 
wall should be at least 30 cm. 

 
Attention:  

  Never cover and/or block the air slots. Otherwise there will be insufficient cooling capacity 

and the cooling system may fail.  

  Never place the unit near heat sources or direct sunlight. 
  Under no circumstances should liquid enter the upper opening of the unit, otherwise there 

is a danger of short circuit! 


Summary of Contents for NITRO

Page 1: ......

Page 2: ...achbauten und oder Geräte die sich als Nitro DP bezeichnen und behält sich rechtliche Schritte vor Dieses Dokument wurde auf recycelten Papier gedruckt Wir stehen für Umweltschutz und Nachhaltigkeit Wir denken global und fertigen lokal kurze Wege auch in der Beschaffung sind uns wichtig Wir nutzen erneuerbare Energien für unsere Fertigung Herausgeber Gebrueder Schultes GmbH Co KG Am Beetacker 5 63...

Page 3: ...hing on the device Ready for operation 14 5 1 3 Adjusting the foam formation by using NITRO EASY CONTROL 15 5 1 4 NITRO oder PUR Modus 16 5 1 5 Switch cooling on off 16 6 HYGIENE AND CLEANING 17 6 1 Hygienic handling 17 6 2 Cleaning schedule 17 6 3 Equipment areas to be cleaned 18 6 4 Approved cleaning agents 18 6 5 Preparation Switch off machine and remove tap 19 6 6 Cleaning the tap 19 6 7 Clean...

Page 4: ...ance with its policy is constantly developing the products further Gebrueder Schultes GmbH Co KG therefore reserves the right to make changes and improvements to the product described in this documentation without prior notice 3 Reproduction of any kind without the prior written permission of Gebrueder Schultes GmbH Co KG is strictly prohibited All other brands and names mentioned in this document...

Page 5: ...lowed to fall into the hands of children If any defects or damage to the machine are found please inform the dealer where you purchased the machine immediately so that the matter can be dealt with 1 3 Mode of Operation The TONE Nitro combines various functionalities in one device Designed for bag in box applications sucking a beverage from a pressureless container Vacuum switch switches off automa...

Page 6: ...LE for information on cleaning related issues 1 5 Technical Data Output capacity continuous 40 l h Output capacity continuous at 17 C 7 C 25 l h Output capacity continuous at 22 C 7 C 15 l h Built in compressor YES Minimum cooling capacity 4 C Liquid Tap temperature 5 8 C 2 C Required cooling time 2 4 min Supply voltage 230 V 50 Hz Cooling liquid R 134a 68g Power Max 300 W Weight 23 5 kg Measureme...

Page 7: ...the instructions for use In particular if TONE Nitro operating or maintenance instructions are not followed or if consumables cleaning agents descaling agents water filters are used that do not meet the original specifications any warranty is also void 5 Parts subject to wear and tear e g rubber seals gaskets O rings taps valves are excluded from the warranty as are damages caused by foreign bodie...

Page 8: ...urer s warranty Check the device at least once a day for visible damage and defects Contact a qualified service technician if you need to make any changes or repair work The power cord may only be replaced by authorized service personnel Use only original spare parts and accessories Make sure that only authorized personnel work on the device and that the operating personnel is provided with operat...

Page 9: ...cuit can be as low as 10 C There is therefore a potential source of danger if maintenance servicing cleaning etc are carried out on components at the appropriate temperature without suitable protective measures 2 5 Danger due to operational heating up Do not touch the compressor condenser motors and piping as these parts can heat up during operation which may cause injury if touched 2 6 Danger fro...

Page 10: ...ied with power via one power connection The power plug must be freely accessible 3 2 Electrical connections see technical specification Voltage 230 V 10 50 Hz Power 300 W Fuse protection max 16 A 3 3 Location of operation Adequate ventilation and extraction must be ensured For this purpose the distance to the next wall should be at least 30 cm Attention Never cover and or block the air slots Other...

Page 11: ...raving 4 105010 Schlauch mit NC Anschluss Hose with NC connection for TONE Nitro systems 5 109010 Power cable EU angled L Power cable EU 6 106010 Cleaning Canister 5l Folding cleaning canister with 5l capacity and NC connection for TONE Nitro 7 107010 Cleaning powder 3X Reliable quality cleaner with active oxygen for regular alkaline cleaning 8 107014 Cleaning ball Bevi Clean Ball transparent thro...

Page 12: ...Page 9 of 39 4 2 Illustration ...

Page 13: ...ter with 10l capacity for TONE Nitro 3 106012 Wide neck canister 6 4l 6 4 Liter UV resistant wide neck canister for TONE Nitro with stainless steel adapter and NC keg closure plastic barrel with screw cap 4 106013 Wide neck canister 15l 15 Liter UV resistant wide neck canister for TONE Nitro with stainless steel adapter and NC keg closure plastic barrel with screw cap 5 106014 Wide neck canister 2...

Page 14: ...osol formation The supplied nitrogen is sufficiently cleaned by air filters To prevent the perlators from being contaminated with biofilm growth the individual perlators Perlator A green Perlator B green Perlator C green must be cleaned after use In addition the inserts 103019 Perlator spare part green should be replaced at regular intervals Read MAINTENANCE for information on cleaning In the fron...

Page 15: ...O rings Before inserting it is essential to remove the plugs 3 Screw tap unit D onto the external thread of the mixer housing C and tighten slightly Note Under no circumstances should pliers be used for tightening 4 Set device switch E1 on the rear panel to 0 OFF 5 Screw the suction hose with screw connection F1 to the rear opening G Plug the cable H of the cold appliance into the socket E2 provid...

Page 16: ...r with NC coupling 1 Open the valve at connector F2 by pulling the snap lock upwards and put it onto the coupling J Note Plug the connector F2 flush onto the coupling J Make absolutely sure that the connector F2 is plugged flush onto the coupling J otherwise the system sucks in air and the system spits air during tapping and or the valve inside the connector F2 does not open and the system does no...

Page 17: ...inutes longer 2 Turn the middle rotary knob I 90 clockwise to PUR 3 Place the glass under the tap D and pull the handle D1 forward by 90 The appliance sucks in the liquid and after a short time it flows out of the tap in a cooled manner To stop the tapping process flip the tap handle upwards again 4 As soon as the liquid flows turn the middle knob I 90 counterclockwise to NITRO Now the NITRO setti...

Page 18: ...10 between tapping from time to time and checking the result 3 Once the perfect setting has been found the NITRO K control knob can be pushed back in and locked Note Always close the tap while making the NITRO settings so that the system can build up the pressure If the system only emits air proceed as follows 1 Close tap D fold tap handle D1 upwards again 2 Turn rotary switch NITRO K at least hal...

Page 19: ...on until the PUR setting has been completely adopted 5 1 5 Switch cooling on off 1 Turn the right hand Thermostat I2 on the back of the unit counterclockwise for less cooling and clockwise for more cooling Note Do not set the thermostat to MAX as the unit may freeze To switch off the cooling completely turn the rotary switch all the way counterclockwise until a click is heard I I2 ...

Page 20: ...ng work wear protective goggles gloves and appropriate clothing 6 2 Cleaning schedule Please note that different cleaning intervals apply depending on the beverage and that the device must be rinsed regularly with water The national legal requirements and regulations apply Description How When Description 1 Cold Brew Coffee pasteurized Cold Brew without additives pasteurised in Bag in Box with CMB...

Page 21: ...ning 5 Perlator unit D Warm water when using fresh drinks daily pasteurized drinks weekly 6 Device opening G inside and outside Disinfection spray Whenever the bag in box is reconnected and reconnected especially after pipe cleaning 7 Complete system A chemical cleaning agent At least every 14 days 6 4 Approved cleaning agents Picture Article Nr Name Manufacturer Information 1 107010 TM Desana Max...

Page 22: ...ssure even after the power is turned off It is essential to continue with step 2 2 Place the glass under the tap D and pull the handle D1 forward by 90 Continue tapping until only air escapes from the tap 6 6 Cleaning the tap 1 Unscrew tap unit D from the external thread of the mixer housing C 2 Unscrew outlet nozzle D2 from tap D D1 11 D D E1 D2 D1 ...

Page 23: ...erneath in order to catch any leaking liquid 2 Unscrew individual perlator rings B and place them in a suitable cleaning solution Note With some chemical cleaners the stainless steel rings may become slightly discolored Note Make sure that the O rings red and black at the front perlator are firmly seated 3 Clean mixer housing C mechanically using the cleaning brush M supplied and then rinse with c...

Page 24: ...ster N Always wear gloves when working with cleaning agents Note Prepare the cleaning liquid with lukewarm water according to the manufacturer s instructions on the packaging 4 Fill lukewarm water into the cleaning canister N 5 Carefully release the remaining air from the canister Put the NC connection N1 back into the opening provided for it and screw it tight using the plastic union nut N2 Note ...

Page 25: ...e D1 forward by 90 The cleaning liquid is sucked in As soon as the cleaning solution comes out of the tap stop tapping and allow the cleaning liquid to soak in for five to ten minutes Repeat the procedure until the cleaning fluid has the desired color 4 Then fill lukewarm water into the cleaning canister N and connect it to the machine again 5 Rinse the system with at least five liters of clear wa...

Page 26: ...de the connector F2 will not open and the system will not suck in liquid 2 Turn the middle rotary knob I 90 clockwise to PUR 3 Set the unit switch E1 on the rear panel to 1 ON The system starts automatically 4 Place the glass under the tap D and pull the handle D1 forward by 90 Continue tapping until only air escapes from the tap Then switch the appliance switch E1 on the back to 0 OFF and release...

Page 27: ... O ring set hose O ring set silicone for suction hoses The transparent O ring gasket should be replaced if it becomes too hard over time and thus a sufficient seal can no longer be guaranteed but after 12 months at the latest 4 102011 Outlet Nozzle Nozzle et of the tap or its inner rubber seals should be replaced depending on how it is used but after 18 months at the latest 5 103019 Perlator spare...

Page 28: ...ner as any dust that may be deposited will considerably reduce the performance of the system Do not use liquid 8 FLOW CHART AND CIRCUIT DIAGRAM 8 1 Flow chart 1 Tap unit 2 Perlator unit 3 Mixer housing 4 Pressure regulating valve 5 Compressor 6 Pressure switch 7 Bag in box 8 Pump 9 Cooling unit 10 Air filter 11 Throttle check valve 8 2 Circuit diagram ...

Page 29: ...the screw connection of the suction hose present OK No No Yes Yes Yes No Switch on the system Attach the connector flush Remove the Perlator unit and clean it thoroughly Switch off cooling and wait for approx 10 min If necessary remove Perlator unit and rinse individual rings with warm water Replace suction hose Insert or replace the transparent O ring seal There is one piece as replacement in the...

Page 30: ...NITRO EASY CONTROL Dry clean the system and use other beverage liquid Too little protein or sugar or too much alcohol can prevent proper foaming System dispenses drink too warm Is the cooling switched on Does the system have enough space Are all ventilation slots free and the condenser not covered Does the outside temperature or the temperature of the beverage to be drawn in the bag in box Nitro D...

Page 31: ...rawn from a pressureless container bag in box nitro canister For example Cold Brew Coffee tea etc Where are TONE Nitro systems manufactured We are an owner managed medium sized family business and manufacture exclusively in Germany in Bessenbach and Goldbach near Aschaffenburg Made in Germany is not an empty phrase for us but an attitude We try to cover as much as possible with our own production ...

Page 32: ...d stone fruit notes Coffee becomes a soft drink with lots of caffeine How is Cold Brew made COLD BREW 1 Grind the roasted beans grinding degree as for filter coffee 2 Put ground beans in water 80g 1000ml at 15 20 C 3 Slow extraction 2h 4h 4 Filter out suspended particles min 5 micron 5 Fill into Nitro DP wide neck canister connect to Nitro DP and serve as NITRO Why bag in box COLD BREW The cold br...

Page 33: ... Tap directly onto the ice cube to avoid swirling in the glass and to prevent the liquids from mixing so easily Which cocktails drinks with NITRO Coffee can I serve See 9 3 Recipe and menu suggestions Can I also mix cocktails before tapping Yes cocktails such as an espresso martini can be mixed together in one of the available wide neck TONE Nitro canisters and then tapped with the TONE Nitro Note...

Page 34: ...ons 9 3 Recipe and menu suggestions 9 3 1 Cold Brew Drinks without alcohol 1 COLD BREW TIPP Optional Step 4 Add some syrup COLD BREW FLAVOR EXAMLE COLD BREW Vanille syrup COLD BREW VANILLA 1 2 3 Take a glass Add ice cubes Use TONE Nitro in PUR mode 2 NITRO TIPP Optional Step 4 Add some syrup COLD BREW FLAVOR EXAMLE COLD BREW Vanille syrup COLD BREW VANILLA 1 3 Take a glass Use TONE Nitro in PUR mo...

Page 35: ...milk Rice milk Hemp milk Oat milk 1 2 3 4 Take a glass Add ice cubes 4 NITRO FLAVORED LATTE TIPP Recommended flavours for syrup Caramel Hazelnut chocolate Vanilla Coconut Popcorn Brownie 1 2 3 4 5 Take a glass Add ice cubes 5 NITRO TONIC TIPP Alternative for tonic water Bitter Lemon Ginger Spice 1 2 3 4 ...

Page 36: ...Page 33 of 39 Take a glass Add ice cubes 6 NITRO FLAVORED TONIC TIPP Serve with a slice of lemon TIPP Recommended flavours for syrup Pink Grapefruit 1 2 3 4 5 Take a glass Add ice cubes ...

Page 37: ...ith alcohol 7 NITRO LICOR TIPP Liqueurs Likör43 Baileys Tia Maria Batida de Coco Amararetto 1 2 3 4 Take a glass Add ice cubes 8 NITRO GIN TONIC TIPP Alternatives to tonic water Bitter Lemon Ginger Spice 1 2 3 4 5 Take a glass Add ice cubes ...

Page 38: ...ee leaf tea on 1l of hot water and let it steep for 6 minutes 2 3cl sugar syrup 3 3cl lemon juice 4 Shock cool over 1 5 l ice cubes 5 Connect to TONE Nitro 1 2 3 Use TONE Nitro in NITRO mode Take a glass Add ice cubes Shock cooling is very important for the preservation of the aromas 11 NITRO TEA LEMONADE TIPP Alternatives to Limoade Bitter Lemon Ginger Spice Tonic Water 1 2 3 4 Take a glass Add i...

Page 39: ... Juice Orange juice Mango juice apple juice cherry juice 1 2 3 4 Take a glass Add ice cubes 9 3 4 NITRO Tea with alcohol 13 NITRO TEA GIN TONIC TIPP Alternatives to tonic water Bitter Lemon Ginger Spice 1 2 3 4 5 Take a glass Add ice cubes ...

Page 40: ...sic terminology methodology DIN EN ISO 12100 2 Safety of machinery Technical principles DIN EN ISO 13849 1 Safety related parts of control systems General principles for design DIN EN ISO 14121 1 Safety of machinery Principles of risk assessment DIN EN 60204 1 Electrical equipment of machines General requirements DIN EN 62079 Preparation of instructions Structuring content and presentation DIN 665...

Page 41: ...Page 38 of 39 Appendix Cleaning proofs for TONE Nitro Model Shop Postcode City Street Type of cleaning maintenance Date Daily Dry cleaning Maintenance Signing ...

Page 42: ......

Page 43: ......

Reviews: