


6
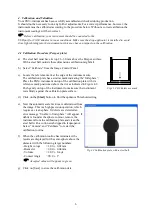
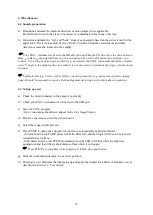
Fig 4.1 PGX Reference mark
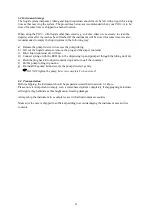
Fig 4.2 Calibration plate with a steel ball
4. Calibration and Validation
Your
PGX+
instrument has been carefully assembled and checked during production.
It should not be necessary to do any further adjustments. For a correct performance, however, the
instrument must be calibrated according to the procedure below. Without a correct calibration the
instrument readings will be incorrect.
Before calibration, your instrument should be connected to the
USB port for 30-60 minutes in room conditions. Make sure the drop applicator is installed to avoid
stray light shining into the instrument as this may have an impact on the calibration.
4.1
Calibration Procedure (Perspex plate)
a)
The steel ball must have its top 2.6-3.0 mm above the Perspex surface.
With a steel ball outside these dimensions calibration might fail.
b)
Select “Calibrate” from the Image Control Panel.
c)
Locate the reference mark at the edge of the instrument sole.
The calibration plate has a similar mark indicating the”full sphere”.
Place the PGX+instrument on top of the calibration plate with its
reference mark positioned above the dot as indicated in Figure 4.2.
Push gently on top of the instrument to make sure the instrument
rests firmly against the calibration plate surface.
d)
Click on the
[Start]
button to find the optimum Threshold setting.
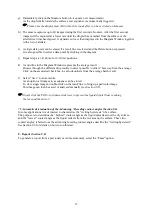
e)
Next the automatic scale factors are determined from
the image. This is a high precision operation, which
requires a clean sphere. If defects are detected an
error message ”Unable to find sphere” will appear. If
debris is found at the sphere contour, remove the
instrument from the calibration plate and clean the
steel ball with a cotton swab dipped in Isopropanol.
Select “Camera” and “Calibrate” to restart the
calibration routine.
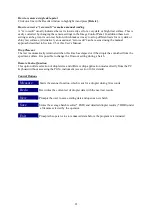
f)
When the calibration routine has terminated, the
results are displayed for the semi-sphere above the
diameter with the following target numbers:
- Height (c-top)
= 1,00 ± 0.02 mm
- Diameter
= 2.00 ± 0.04 mm
- Volume
= 2.09 ± 0.4 µl
- Contact Angle
= 90.0 ± 1°
Accepted values will appear in green.
g)
Click on [Save] to store the calibration data.