


Tiger Box Assembly Guide
System Restore: System Restore
21
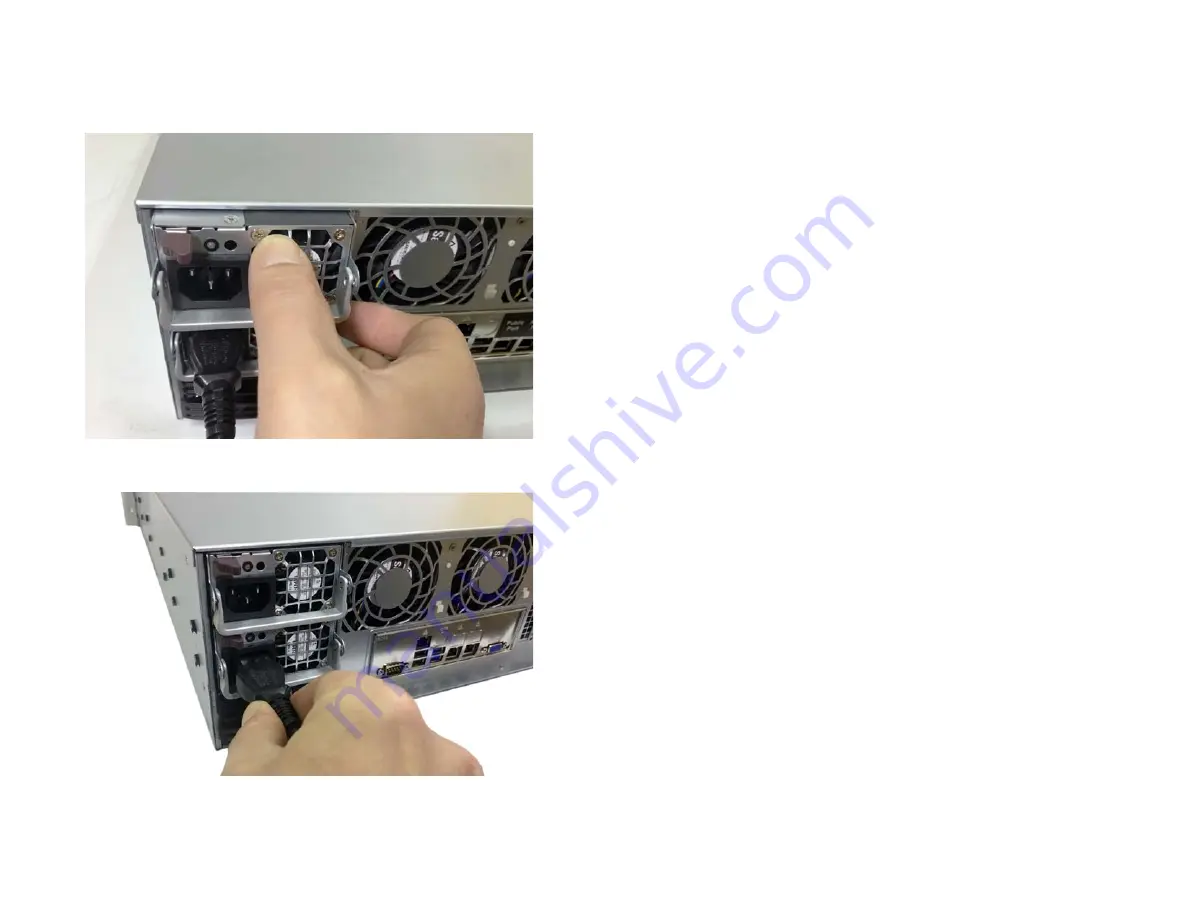
4.
Slide in the new power module and hear the side tab click into the bay.
5.
Push back the lever of the power module to lock it.
6.
Plug the power cable in the module's socket and power on the appliance.
System Restore
Use the USB flash drive included in your Tiger Box appliance shipment to restore the
appliance to the factory default settings in case of system malfunction or failure.
Important:
All your settings (IP addresses, defragmentation preferences, password
for the web interface, etc.) will be lost after restoring the system to the default factory
settings.
Follow the instructions below or contact Tiger Technology support for assistance at:
[email protected]
To perform system restore:
1.
Shut down the appliance.
2.
Plug the USB flash drive in the USB port of the appliance and press the power
button to start it.
When the system restore finishes, the appliance automatically shuts down.
3.
Unplug the USB flash drive and press the power button of the appliance to start it.
4.
Wait several minutes until the appliance node shuts down again and then press the
power button to start it.
Note:
On appliances shipped before 20 December 2016, the system restarts
automatically instead of shutting down one last time before the appliance is ready.
To ensure that the system restore is finalized, wait between 5 and 10 minutes
before attempting to access it.
Initial Setup of the Appliance
Before you begin work with the product on a Tiger Box appliance, you need to perform
its initial setup. The initial setup includes the following procedures:
•
Configure the IP address of each network port of the appliance (see “Configure the
IP Addresses of the Appliance” on page 24).
•
Change the name of the appliance (see “Change the Name of The Appliance” on page
•
Specify the time and date settings of the appliance (see “Specify The Time and Date


