General Grill Cleaning
• Do not mistake brown or black accumulation of grease and
smoke for paint. Interiors of gas grills are not painted at the
factory (and should never be painted). Apply a strong solution
of detergent and water or use a grill cleaner with scrub brush
on insides of grill lid and bottom. Rinse and allow to
completely air dry.
Do not apply a caustic grill/oven cleaner
to painted surfaces.
•
Side Shelves:
Wash with warm soapy water and wipe dry.
s
Do not use citrisol, abrasive cleaners, degreasers or a
concentrated grill cleaner on plastic side shelves. Damage to
and failure of shelves can result.
• Non-Stick Cooking Surface:
Turn grill off before cleaning.
While still warm, pour a cup of water over cooking surface to
loosen grease and food particles and to speed cool-down.
Wipe cooking surface with a paper towel or sponge. Once
completely cool, cooking surface can be removed and washed
with warm soapy water or placed in dishwasher.
• Cooking Surface:
If a bristle brush is used to clean any of the
grill cooking surfaces, ensure no loose bristles remain on
cooking surfaces prior to grilling. It is not recommended to
clean cooking surfaces while grill is hot.
CAUTION
• Putting out grease fires by closing the lid is not
possible. Grills are well ventilated for safety
reasons.
• Do not use water on a grease fire. Personal injury
may result. If a grease fire develops, turn knobs
and LP cylinder off.
• Do not leave grill unattended while preheating or
burning off food residue on HI. If grill has not been
regularly cleaned, a grease fire can occur that may
damage the product.
CAUTION
FACT:
Sometimes spiders and other small insects climb
into the burner tubes attached to the burners. The
spiders spin webs, build nests and lay eggs. The
webs or nests can be very small, but they
are very strong and can block the flow
of gas. Clean burners prior to use after
storing, at the beginning of grilling season
or after a period of one month not being used.
NATURAL HAZARD • SPIDERS
Spider guards are on the air intakes in an effort to
reduce this problem, but it will not eliminate it! An
obstruction can result in a "flashback" (a fire in the
burner tubes). The grill may still light, but the obstruction
does not allow full gas flow to the burners.
IF YOU EXPERIENCE THE FOLLOWING:
1.
Smell gas.
2.
Burner(s) will not light.
3.
A small yellow flame from burner (should be blue).
4.
Fire coming from around or behind control knob.
STOP!
Immediately turn off gas at LP cylinder!
SOLUTION:
Wait for grill to cool.
Follow the “
Cleaning the Burner Assembly
” instructions.
Clean burners often. Use a 12” pipe cleaner to clean out
the burner tubes. You may also force a stream of water
from a hose nozzle through burner tubes to clean them.
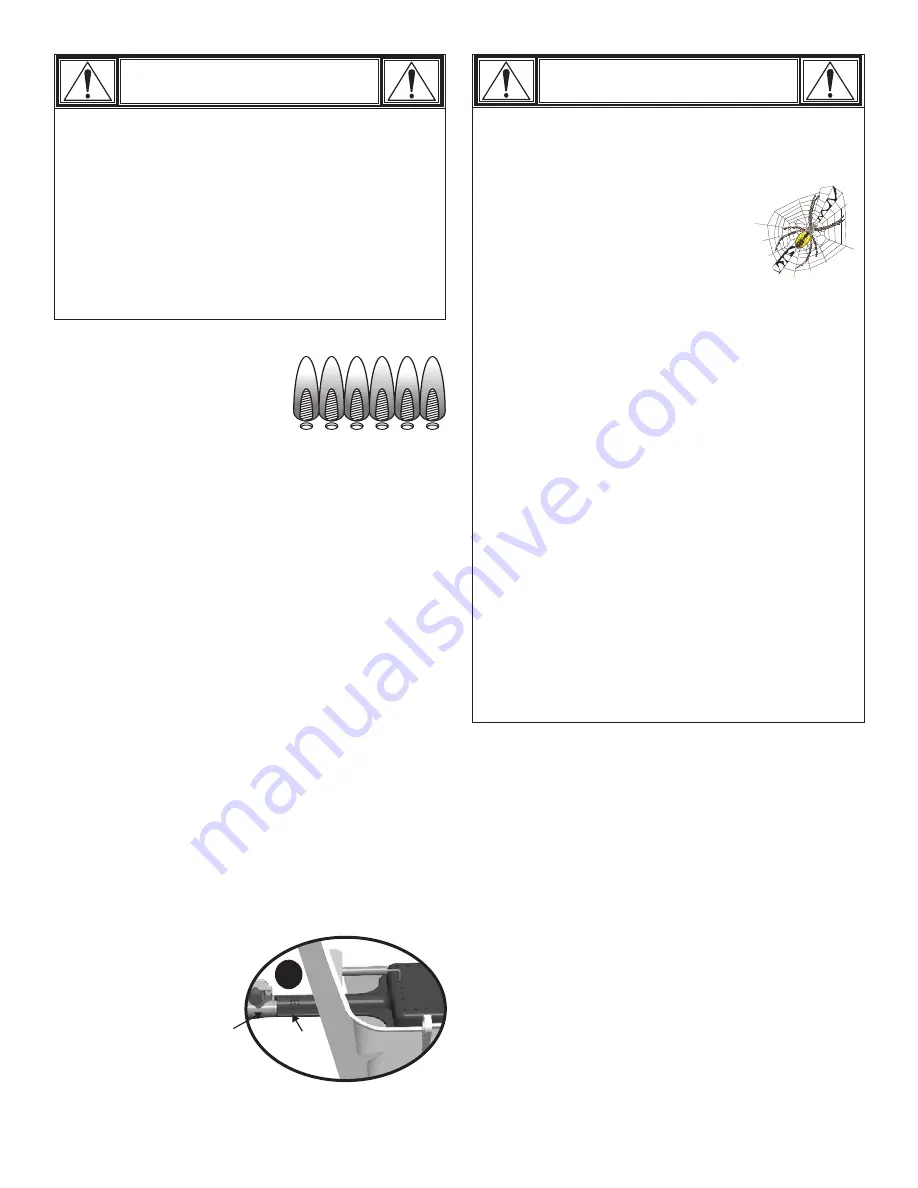
Burner Flame Check
Light burner. Make sure burner stays
lit while rotating the control knob
from HIGH to LOW. Always check
flame prior to each use.
Cleaning The Burner Assembly
1.
Turn gas off at control knobs and LP cylinder.
2.
Remove cooking grids and vaporizer tents.
3.
Remove pal nuts on burners. Unscrew electrode and move
to the side to remove burner.
NOTE: Do not pull electrode
out.
4.
Under grill remove grease tray. Clean with soap and water.
5.
Wipe ceramic electrode with rubbing alcohol and cloth.
6.
Clean burners exterior with soap and water. Lay burners on
flat surface, insert garden hose (preferably with nozzle), into
burner tubes forcing water through tubes. Make sure water
comes out of every porthole. Open clogged portholes with a
thin wire.
Shake out excess water
and examine porthole.
Due to normal wear and corrosion some portholes may
become enlarged, if so replace burner. If any horizontal
cracks appear from porthole to porthole or large holes (other
than portholes) are found replace burner.
7.
If grill is to be stored, coat burners lightly with cooking oil.
Wrap in protective cover to keep insects out. If not storing
use following steps.
VERY IMPORTANT: Burner tubes must engage valve
openings as shown (A).
8. Reattach burners and electrodes.
9.
Reposition cooking grids and vaporizer tents. Place clean
grease tray into grill bottom.
10. Before cooking again on grill,
perform a
“Leak Test”
and
“Burner Flame Check”
.
Burner
Tube
Valve
A
Burner tubes correctly
engaged in valves
7
Summary of Contents for GRILL2GO Advantage 07401407
Page 1: ...07401407 80008949 05 23 08 ...
Page 25: ......


