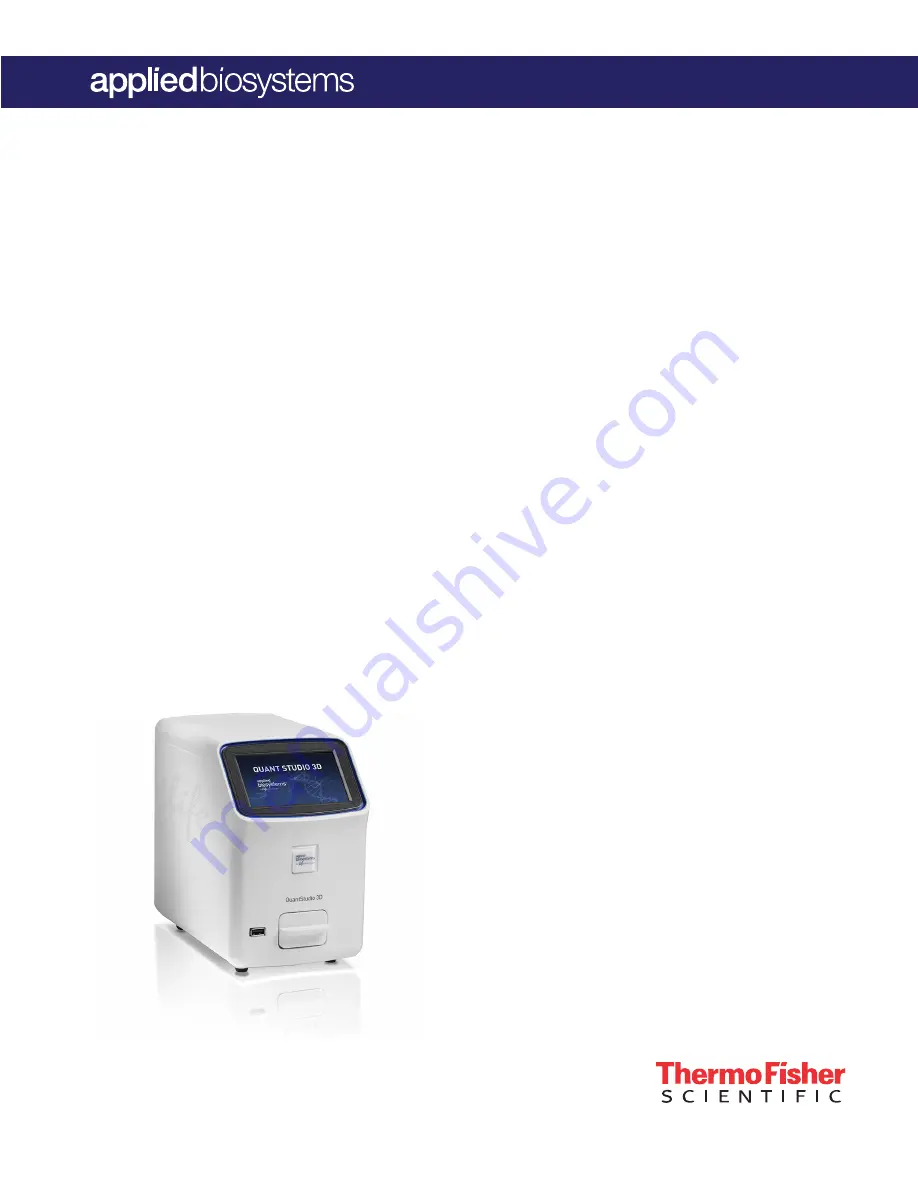
background image

For Research Use Only. Not for use in diagnostic procedures.

QuantStudio

 3D Digital PCR System

USER GUIDE

for use with:
QuantStudio

 3D Digital PCR Instrument

ProFlex

 2 × Flat PCR System or Dual Flat Block GeneAmp

 PCR

System 9700
QuantStudio

 3D Digital PCR 20K Chip v2

QuantStudio

 3D Digital PCR Master Mix v2

QuantStudio

 3D Digital PCR Chip Loader

Catalog Number  

A29154

Publication Number  

 MAN0007720

Revision  

 E.0

Summary of Contents for Applied Biosystems QuantStudio

Page 1: ... for use with QuantStudio 3D Digital PCR Instrument ProFlex 2 Flat PCR System or Dual Flat Block GeneAmp PCR System 9700 QuantStudio 3D Digital PCR 20K Chip v2 QuantStudio 3D Digital PCR Master Mix v2 QuantStudio 3D Digital PCR Chip Loader Catalog Number A29154 Publication Number MAN0007720 Revision E 0 ...

Page 2: ...0 on page 73 D 0 15 July 2015 Updated for v2 chips lids and master mix Also updated with changes to instrument firmware including adjusting for the different well volumes between v1 and v2 chips Includes improvements to the chip loading and imaging workflows C 0 February 2015 Updated for firmware and software revisions including changes to instrument networking thermal cycling chip analysis mainte...

Page 3: ...requirements 13 About the chip 14 CHAPTER 2 Getting Started 15 Operational workflow 16 Connect the QuantStudio 3D Digital PCR Instrument to a network 17 Connect the QuantStudio 3D AnalysisSuite Software 17 Choosing a thermal cycler 17 Compatible thermal cyclers 17 CHAPTER 3 Prepare the digital PCR reaction and load the chips 19 Guidelines for loading and sealing chips 19 Prepare the DNA samples 20...

Page 4: ...cycle the chips 32 Materials required 32 Prepare the thermal cycler 32 Guidelines for handling loaded chips 35 Perform the PCR 36 Unload the thermal cycler 38 CHAPTER 5 Image and analyze the chips 40 About imaging and primary analysis 40 QuantStudio 3D System data flow 40 About the instrument interface 41 Chip imaging 42 Materials required 42 Guidelines for imaging multiple chips 42 Specify the da...

Page 5: ... and place the GeneAmp PCR System 9700 Base Module 73 Unpack and install the Dual Flat Block Module 74 Install the Tilt Base and Chip Adapter 75 Set up the GeneAmp PCR System 9700 75 APPENDIX B Specifications and Layout 79 Component dimensions and weights 79 QuantStudio 3D Digital PCR Instrument layout and connections 80 Instrument clearances 80 Electrical specifications 81 Environmental requireme...

Page 6: ...ding and sealing chips 106 Materials required 107 Prepare the syringe containing the Immersion Fluid 107 Load and seal the chips manually 108 Fill the chip case with Immersion Fluid 111 Seal the chip case with the label 112 APPENDIX F Safety 113 Symbols on this instrument 113 Conformity symbols 114 Safety alerts on this instrument 115 Location of safety alerts on the instrument 115 Safety informat...

Page 7: ... Documentation and support 123 Related documentation 123 Customer and technical support 123 Limited product warranty 124 Contents QuantStudio 3D Digital PCR System User Guide 7 ...

Page 8: ...t analysis and post processing to yield relative or absolute quantification results from the raw imaging data 1 4 3 6 7 8 5 9 10 2 12 11 Figure 1 Components of the QuantStudio 3D Digital PCR System 1 QuantStudio 3D Digital PCR Thermal Pads 2 QuantStudio 3D Digital PCR Chip Adapters 3 ProFlex 2 Flat PCR System or Dual Flat Block GeneAmp PCR System 9700 4 QuantStudio 3D Tilt Base 5 QuantStudio 3D Di...

Page 9: ...stem 9700 4486414 1 base QuantStudio 3D Digital PCR Chip Adapter Kit for Flat Block Thermal Cycler 4485513 1 adapter QuantStudio 3D Extended Arm WiFi Adapter A28598 1 wireless adapter QuantStudio 3D Digital PCR 20K Chip Kit v2 and Master Mix v2 includes 8 12 packs of v2 chips chip lids and QuantStudio 3D Digital PCR Sample Loading Blades 24 syringes of Immersion Fluid plus tips 1 5 mL of QuantStud...

Page 10: ... 12 chips A26361 1 kit Required materials not supplied This system uses common molecular biology equipment supplies and reagents Unless otherwise indicated all materials are available through thermofisher com MLS indicates that the material is available from fisherscientific com or another major laboratory supplier Item Source Clean room grade low lint polyester wipes Fisher Scientific Cat No NC03...

Page 11: ...tered MLS Water deionized MLS Isopropanol MLS Required for manual chip loading only Heated block capable of maintaining 40 1 C MLS Chapter 1 Product information Required materials not supplied 1 QuantStudio 3D Digital PCR System User Guide 11 ...

Page 12: ...ctuations About the instrument The QuantStudio 3D Digital PCR Instrument consists of the components shown in the following figure 1 2 3 4 5 6 7 8 1 Touchscreen Provides access to the instrument functions such as data transfer and instrument operation 2 Chip tray Conveys the QuantStudio 3D Digital PCR 20K Chip v2 to and from the imaging stage in the interior of the instrument 3 USB port Provides US...

Page 13: ...that is optimized for the Applied Biosystems FAM ROX and VIC dyes About the software The QuantStudio 3D Digital PCR System includes a software suite used to analyze and manage digital PCR data generated by the QuantStudio 3D Digital PCR Instrument The QuantStudio 3D AnalysisSuite Software includes a server and Connect cloud based platform deployment options that can satisfy a broad range of labora...

Page 14: ...hip Lid v2 The lid used to seal the chip for thermal cycling and imaging 2 QuantStudio 3D Digital PCR 20K Chip v2 A 10 mm2 chip with 20 000 wells that contain the individual PCR reactions 3 Chip case The thermal conductive base that secures and protects the chip 4 Chip ID A unique alphanumeric ID on the chip lid 5 Fill port The hole in the chip case lid through which Immersion Fluid is injected on...

Page 15: ...Getting Started For system installation instructions see Appendix A Install the QuantStudio 3D Digital PCR System 2 QuantStudio 3D Digital PCR System User Guide 15 ...

Page 16: ... the lid load the assembly with Immersion Fluid then seal the loading port q Perform the PCR using the ProFlex 2 Flat PCR System or Dual Flat Block GeneAmp PCR System 9700 q Read the chip using the QuantStudio 3D Digital PCR Instrument q Review the results on the instrument touchscreen q Store or discard the chip q Analyze the data using the QuantStudio 3D AnalysisSuite Software q Finish Note See ...

Page 17: ... a thermal cycler IMPORTANT Due to the unique physical characteristics of the QuantStudio 3D Digital PCR 20K Chip v2 the ProFlex 2 Flat PCR System and the GeneAmp PCR System 9700 are the only thermal cyclers approved to run prepared chips The QuantStudio 3D Digital PCR Instrument can image the QuantStudio 3D Digital PCR 20K Chip v2 prepared using the ProFlex 2 Flat PCR System or the Dual Flat Bloc...

Page 18: ... 9700 POWER ProFlex PCR System 1 3 2 4 5 6 3 ProFlex TM Instrument GeneAmp TM Instrument 1 USB port 2 Touchscreen 3 Heated cover 4 LCD display 5 Keypad 6 Power button Chapter 2 Getting Started Choosing a thermal cycler 2 18 QuantStudio 3D Digital PCR System User Guide ...

Page 19: ... gloves Oils from your hands can contaminate the components and interfere with thermal cycling and imaging Hold the chip and lid gently by their sides If you accidentally touch the chip surface discard the chip If you accidentally touch the chip lid window clean it using a laboratory wipe that has been sprayed with isopropanol then dry by wiping in one direction using a clean low lint wipe 443MPJ ...

Page 20: ...with an optimized protocol salting out procedures and crude lysates are not recommended Does not contain PCR inhibitors Has an A260 230 and A260 280 ratio between 1 7 and 1 9 The ratio of absorbance at 260 nm and 280 nm is used to assess the purity of DNA and RNA A ratio of 1 8 is generally accepted as pure for DNA a ratio of 2 0 is generally accepted as pure for RNA If the ratio is appreciably lo...

Page 21: ...pies of the target sequence For example 1 Assuming 3 3 pg copy of a given gene in the human genome and a reaction well volume of 755 pL 2 Dilute the stock gDNA in a given sample to 1 045 copies μL or 3 45 ng μL in the final reaction resulting in 0 73 copies per reaction well Determine the target copy number per genome To determine the copy number per genome 1 If the source or species of the gDNA i...

Page 22: ...ng 0 5 mL or 1 5 mL TE Buffer 1X Molecular Biology Grade Vortex mixer Water DNase free sterile filtered When preparing samples for dPCR amplification Use a positive displacement pipette or aerosol resistant pipette tips and follow proper pipette dispensing techniques to prevent aerosols Wear clean gloves and a clean lab coat not previously worn while handling amplified PCR products or used during ...

Page 23: ...uge the DNA sample c Using a permanent marker label a 0 5 or 1 5 mL reaction tube with the sample name 3 When the master mix has warmed to room temperature gently invert the tube 10 times or gently vortex on low medium speed 4 In a 0 5 or 1 5 mL low bind tube prepare the following dPCR reaction mix at room temperature Scale the volumes appropriately depending on the number of samples Table 1 dPCR ...

Page 24: ...Digital PCR Chip Loader This procedure assumes that you have prepared your PCR reactions as explained in Prepare the dPCR reaction mix for each sample on page 23 Before proceeding see Guidelines for loading and sealing chips on page 19 The following materials are required to load and seal chips Prepared digital PCR reactions QuantStudio 3D Digital PCR 20K Chip v2 QuantStudio 3D Digital PCR Chip Li...

Page 25: ...s the load button and record the sequence of colors displayed 3 Contact technical support see Customer and technical support on page 123 IMPORTANT Wear powder free gloves while preparing chips IMPORTANT The QuantStudio 3D Digital PCR Chip Loader must be placed on a level surface to ensure consistent loading across the chips 1 Plug in and power on the chip loader 2 Fold back the chip loader arm the...

Page 26: ...embled syringe Place it on a clean surface and proceed to the next steps IMPORTANT Confirm that the tip is locked firmly in place before proceeding IMPORTANT Open only one syringe at a time Use all of the Immersion Fluid within 60 minutes of uncapping the syringe After a syringe is opened you cannot recap it for later use 2 1 3 4 1 hour 1 Immersion Fluid syringe 2 Cap remove 3 Syringe tip push to ...

Page 27: ...al PCR Sample Loading Blade into the loader head IMPORTANT Press the blade firmly against the loader head to confirm that the blade is properly seated 2 1 1 Loading blade lever 2 Loading blade 4 Grasping the lid by its sides peel away the red protective film from the back of the chip lid Avoid contact with the exposed sticky surface 5 Press the lid nest button and carefully place the lid with the ...

Page 28: ...pipette so that the tip meets the loading port at a sharp angle and so it does not deflect either blade forward or rear Do not depress the pipette to the second stop Doing so increases the chance of introducing an air bubble to the blade Avoid creating air bubbles Note Although the master mix may not distribute evenly in the loading blade immediately after loading the fluid will spread across the ...

Page 29: ...y fluid from the edges of the chip case with a low lint wipe that has been sprayed with isopropanol IMPORTANT Expel the fluid slowly to avoid flushing out the reactions in the chip wells Do not allow the syringe tip to touch the chip surface Cover the entire surface of the chip or reactions in the exposed wells may evaporate Do not fill the entire chip case with fluid A small amount of fluid runni...

Page 30: ...d 1 Hold the chip and lid assembly by its edges at a 45 angle so that air can escape from the fill port as you fill it 2 Hold back the top half of the chip lid label to expose the fill port 443 MP J 443 MP J Figure 3 QuantStudio 3D Digital PCR Chip Lid v2 3 Carefully dispense Immersion Fluid into the port until the chip case contains an air bubble slightly larger than the fill port 2 3 mm in diame...

Page 31: ...nd lid Bubbles Check for large or multiple bubbles inside the chip case One small air bubble is acceptable Correct lid orientation Confirm that the lid is correctly aligned on the chip If the sealed chip fails any of the criteria above discard it and prepare another chip The sealed chip cannot be opened and resealed 5 Store the prepared chip in a clean dry dark location until you are ready to load...

Page 32: ...epare the thermal cycler Before running each batch of chips perform the following to ensure efficient thermal cycling Confirm that clean QuantStudio 3D Digital PCR Thermal Pads are available for use IMPORTANT If a Thermal Pad becomes dirty clean the pad using a low lint wipe sprayed with isopropanol then let it dry Fluids debris and other contaminants that adhere to the pad can transfer to the chi...

Page 33: ...nfirm the thermal cycler is running the correct firmware version number to thermal cycle chips ProFlex 2 Flat PCR System The version number displayed in the About Instrument screen must be 1 1 4 or later About Instrument Wired IP Address Wireless IP Address Instrument Serial Number Block Serial Number Firmware Version 10 0 2 15 12345678 12345678 1 1 4 b1765c31bd08370ba632d35ea56c505b UUID 1 1 v1 1...

Page 34: ... C before loading the chips Excessive heat from the heated cover may cause the chips to leak during thermal cycling Table 2 ProFlex 2 Flat PCR System PCR Method PCR protocol Cover temp Reaction volume Stage 1 Stage 2 Stage 3 96 0 C 60 0 C 98 0 C 60 0 C 10 0 C 70 0 C 1 nL 1 1 6 C sec 1 6 C sec 1 6 C sec 1 6 C sec 1 6 C sec 0 10 00 0 02 00 0 00 30 0 02 00 1x Hold 39x Cycles 1x Hold 1 33 nL for firmw...

Page 35: ... the chip within it Do not touch the window of the chip lid If you accidentally touch the window clean it using a laboratory wipe that has been sprayed with isopropanol then dry by wiping in one direction using a clean low lint wipe Note Debris or excess sample on the lid can interfere with thermal uniformity during thermal cycling or fluoresce during imaging Thermal cycle chips within 2 hours aft...

Page 36: ...dry 2 Confirm that the Tilt Base is installed and Chip Adapters are installed in both sample blocks even if you are using only one block 3 Place the chips onto the sample block so that the fill ports on the chips are positioned toward the front of the thermal cycler The fill port must be elevated during thermal cycling to ensure that any bubbles float to the top of the case X0300036 Front of instr...

Page 37: ...minants that adhere to the pad can transfer to the chips during thermal cycling and fluoresce during imaging 5 Close and engage the heated cover of the thermal cycler 6 Use the thermal cycler to select and start the pre programmed run for the chips See the user guide for your thermal cycler for more information on running methods Chapter 4 Thermal cycle the chips Perform the PCR 4 QuantStudio 3D D...

Page 38: ...ips wait until the block reaches room temperature 1 If you programmed the thermal cycler to perform a 10 C hold after cycling do the following to prevent condensation a Confirm the final extension step at 60 C is complete then stop the run ProFlex PCR System Press Stop Run then press OK GeneAmp PCR System 9700 Press STOP twice then press Exit b Allow the thermal cycler to sit for at least 10 minut...

Page 39: ...e chip surface by wiping in one direction If necessary use a low lint wipe sprayed with isopropanol to remove any dried residue Make sure the surface is thoroughly clean The chip is now ready to be imaged IMPORTANT Store chips in a clean dry dark location until you are ready to image them Prolonged exposure to light can diminish the fluorescence of the photosensitive dyes in the chips Note If a ch...

Page 40: ...initial evaluation of the imaging data collected during the run and displays the results on the instrument touchscreen For each imaged chip the QuantStudio 3D Instrument generates and saves a single experiment eds file that contains the processed imaging data and the results from the preliminary analysis on the instrument Depending on the chosen data destination the instrument transfers the saved ...

Page 41: ... touch Data Destinations to select a location 4 Settings button Touch to open the Instrument Settings menu that allows you to set the system date and time the network connection the data destination and perform other maintenance and configuration tasks 5 Chip presence indicator Indicates whether the instrument is ready to load a chip The instrument immediately begins processing when a chip is load...

Page 42: ...o a USB the Connect cloud based platform or a network destination as described below 1 From the Main Menu of the touchscreen touch to open the Settings menu then touch Instrument Settings followed by Data Destinations 2 In the Data Destinations screen touch the desired option Select Instrument to only save data on the instrument Select My Cloud Profile the Connect cloud based platform or My Networ...

Page 43: ...uantStudio 3D Digital PCR Instrument Note If you are unsure of the firmware version see Check the instrument firmware on page 87 1 If you selected USB in the Data Destinations screen as described above insert a USB device into the USB port on the front of the instrument The touchscreen displays the USB drive icon when the QuantStudio 3D Instrument has mounted the drive Image the chips Chapter 5 Im...

Page 44: ...or remove the USB drive if present while the instrument displays the countdown Doing so will invalidate the data and require you to repeat the run Note You can stop the run at any time by touching Cancel 4 Optional During the run touch the Add Prefix field to enter a prefix for each experiment eds file name Note The file prefix is an alphanumeric string that can be used to further identify and gro...

Page 45: ...or you can open the chip tray and remove the chip Note If the run fails because the instrument is unable to read the chip inspect the chip for problems and read the chip again If the run fails repeatedly discard the chip and prepare a replacement 6 Optional You can read another chip without waiting for analysis to complete To begin the next run remove the imaged chip and load another chip Chapter ...

Page 46: ...ns The instrument retains a copy of the imaged chip data that you can access from the Run History screen Note The instrument can store approximately 600 experiment files before it begins purging the files from memory When the instrument reaches the limit it replaces the oldest file exported from the cache with the data from the current run Primary analysis After the QuantStudio 3D Digital PCR Inst...

Page 47: ...centration estimate Displays the estimated concentration in copies per µL calculated from the fluorescence signal generated by amplification of the nucleic acid sequence targeted by the FAM and or VIC dye labeled probes The instrument also displays a flag next to each concentration estimate color coded to indicate the data quality 4 Network status icon Represents the status of the instrument conne...

Page 48: ...uality 0 5 is 25 For each chip the QuantStudio 3D Digital PCR Instrument stores the processed imaging data and the results of the preliminary analysis in a single experiment eds file The instrument names each experiment file uniquely by combining the ID of the chip and the date time of the run according to the following formula 2 3 1 4 1 File prefix The optional user specified text 2 Date stamp Th...

Page 49: ...eriment files to a USB drive for storage or manual transfer This may be necessary if the network connection failed or the USB drive was full during an run 1 Insert a USB drive into the port on the front of the instrument 2 In the touchscreen touch in the Main Menu 3 In the Settings Menu touch Run History to view the results for the past experiments Note The QuantStudio 3D Digital PCR Instrument ca...

Page 50: ... instrument file transfer not required Export Failed The instrument was unable to transfer the file to the selected destination Run Failed The instrument was unable to process the imaging data for the chip 5 In the Results Details screen touch Export then touch Export again to transfer the file to the USB drive 6 When finished touch several times to return to the Main Menu then remove the USB driv...

Page 51: ...ned on If you cannot access the website contact customer support 3 Sign into the software using your Connect platform user name and password or follow the instructions to create a new user account Note If you cannot sign in to the software contact customer support System requirements The QuantStudio 3D AnalysisSuite Software is a web based application that is recommended for use with the following...

Page 52: ...t your computer has a network connection and that it is connected to the same network as the server Note If your computer does not have a network connection contact a Thermo Fisher Scientific sales representative for information about available AnalysisSuite Software deployment options 2 Open a browser window and go to http server IP address quantstudio3d using the server IP address you received f...

Page 53: ...atures a Help system that describes how to use each feature of the user interface You can use the Help system to find topics of interest by Reviewing the table of Contents in the sidebar Searching for a specific topic Enter your search term in the Search field in the upper right then click Enter The search results will appear under the Search tab in the sidebar To access the Help system click from...

Page 54: ...rawn across the chip too quickly or at an angle shallower than 70 80 If possible use the AnalysisSuite Software to filter the low quality data points or discard the chip and run the sample again To prevent leaving excess PCR reaction on the chips Install the Tilt Base on the thermal cycler You must thermal cycle the chips at an 11 angle Manual load only Ensure that the heated block used to load th...

Page 55: ...chip leaked during thermal cycling or imaging A large bubble was present in the chip insufficient Immersion Fluid Excess Immersion Fluid is present on the chip lid If present remove excess Immersion Fluid from the chip lid and run the chip again If possible use the AnalysisSuite Software to filter the low quality data points To minimize leakage Leave a small bubble when filling chips with Immersio...

Page 56: ...on Fluid immediately before use 1 Ensure that the cap is on securely 2 Pull the syringe plunger to 3 mL to create a partial vacuum in the syringe 3 Hold the syringe plunger at the 3 mL mark and shake vigorously for 30 seconds 4 Hold the syringe vertically tip up remove the cap then use the plunger to push any air out of the syringe 5 Use the Immersion Fluid immediately If you are sealing chips man...

Page 57: ... with Immersion Fluid even the edges Note When adding Immersion Fluid the fluid can overflow into the chip base but do not allow it to spread onto the sides of the chip lid Immersion Fluid was not applied to the chip immediately after loading evaporation of the PCR reaction Debris or other contaminants are present on the chip lid during imaging No action required The AnalysisSuite Software can com...

Page 58: ... improve noticeably If condensation is visible Using a low lint wipe remove any condensation or Immersion Fluid from the surface of the chip by wiping in one direction If needed use a low lint wipe sprayed with isopropanol to remove any dried residue The loading blade was not seated correctly within the loader arm Before pressing the loading button confirm that the loading blade is firmly seated a...

Page 59: ... the chip In the AnalysisSuite Software check the copies per reaction and dilute the sample accordingly so that it is within the digital range Chapter 6 Troubleshooting Troubleshooting chip images using the Chip View 6 QuantStudio 3D Digital PCR System User Guide 59 ...

Page 60: ...tom image was generated by firmware v2 0 or later In v2 0 or later the overloaded sections of the chip appear in white and these regions are filtered out and removed from analysis Ensure that you are loading only 14 5 µL of reaction mix into the loading blade Chapter 6 Troubleshooting Troubleshooting chip images using the Chip View 6 60 QuantStudio 3D Digital PCR System User Guide ...

Page 61: ...nd to connect the QuantStudio 3D Digital PCR Instrument to your network confirm that the site contains a viable connection that meets the networking requirements explained in Appendix D Networking IMPORTANT Confirm that the QuantStudio 3D Digital PCR Instrument is unloaded before you power off and move the instrument If the instrument is moved while loaded the chip inside may become dislodged from...

Page 62: ... if used Immersion Fluid Amplified DNA Work Area PCR post PCR room PCR amplification Chip reading and storage ProFlex 2 Flat PCR System or Dual Flat Block GeneAmp PCR System 9700 QuantStudio 3D Digital PCR Instrument Choose the instrument locations Instrument location can affect performance To prevent vibration place instruments on a solid stable level surface that allows free airflow overhead and...

Page 63: ...t Block QuantStudio 3D Digital PCR Tilt Base appropriate for your thermal cycler QuantStudio 3D Digital PCR Chip Loader If you have not received any of the items listed above contact customer support see Customer and technical support on page 123 3 If you plan to connect your instrument to a network confirm that you have one of the following Wired network Category 6 Ethernet cable Wireless network...

Page 64: ...ter which is located on the underside of the adapter 2 Unplug the instrument 3 Turn the instrument over then use your fingers to carefully pry open the rear panel IMPORTANT The rear panel is secured to the instrument by three pegs that require significant force to decouple If necessary insert a flathead screwdriver into the slot at the base of the panel to pry it from the instrument chassis 4 Unca...

Page 65: ...d connect your instrument to the network following the installation Touch Connect to Network to connect the instrument to a wired or wireless network that supports DHCP Go to the next step Touch Skip Network Connection if you do not want to connect to a network if you want to connect the instrument at a later time or if your network requires static IP assignment or advanced network settings 10 In ...

Page 66: ...e WPA WEP or WPA2 3 If your selected wireless hotspot is secure enter the required authentication information user name password then touch OK None no network connection Offline to configure the instrument to save data to a local USB drive The instrument is connected to the network when the touchscreen displays the Network Complete screen Appendix A Install the QuantStudio 3D Digital PCR System In...

Page 67: ...phens but not as the first or last characters in the name Cannot include spaces or special characters Note By default the Instrument Name is set as the serial number of the instrument Touch the Time Zone field then select the correct continent and region from the list Touch the Date field enter the current date then touch Enter Touch the Time field enter the appropriate time units then touch Enter...

Page 68: ...ring the ProFlex 2 Flat PCR System for use For complete instructions see the ProFlex PCR System User Guide Pub No MAN0007697 Note For information on preparing the Dual Flat Block GeneAmp PCR System 9700 see Set up the GeneAmp PCR System 9700 on page 75 1 Open the package containing the Base Module 2 Remove the packing crate from the package and verify that it contains all of the parts listed on th...

Page 69: ... in case you need to ship the instrument for service 1 Clear a space to the right or left of the instrument then place the drop cloth over the area to provide padding for the instrument during the installation of the risers 2 Unpack the Tilt Base Kit packages then place the contents near the instrument 3 Load an empty consumable onto the sample block of the instrument then close the lid 4 Power of...

Page 70: ...o its footings 5 Lift the front end of the instrument then slide the Tilt Base underneath the front footings of the instrument IMPORTANT Before removing your hands from the instrument ensure that the front footings are securely seated within the Tilt Base as shown in the following figures 2 1 2 1 1 Instrument at optimal angle 2 Properly installed Tilt Base Appendix A Install the QuantStudio 3D Dig...

Page 71: ...er into the instrument to ensure that the module is locked into place If not the base module may fail to detect the sample block module and generate an error when powered on for the first time 4 Use compressed air to remove any particles from the sample blocks that may have collected on them during transportation 5 Close the heated cover 1 Open the package containing the Chip Adapters and install ...

Page 72: ...ex PCR System settings as described in the ProFlex PCR System User Guide Pub No MAN0007697 4 For optimal results create a new method from the existing 3D template supplied with the ProFlex PCR System and verify the pre defined method for thermal cycling the chips Table 4 ProFlex 2 Flat PCR System PCR Method PCR protocol Cover temp Reaction volume Stage 1 Stage 2 Stage 3 96 0 C 60 0 C 98 0 C 60 0 C...

Page 73: ...CR System 9700 Base Module User Manual Pub No 4303481 or the GeneAmp PCR System 9700 Dual Flat Block User Manual Pub No 4307808 Note For information on preparing the ProFlex 2 Flat PCR System see Install the ProFlex 2 Flat PCR System on page 68 1 Open the package containing the Base Module 2 Remove the packing crate from the package and verify that it contains all of the parts listed on the shippi...

Page 74: ... and appearance of the damage then contact customer support for assistance 1 Open the package containing the Dual Flat Block Module 2 Pull the lever out from the GeneAmp PCR System 9700 Base Module F1 F2 F3 F4 1 2 3 4 5 6 7 8 9 ENTER STOP 0 CE F5 GeneAmp PCR System 9700 POWER Lever 3 Remove the Dual Flat Block Module from the package remove the protective cover place it onto the Base Module then p...

Page 75: ...t about 30 seconds The cooling fan powers up and the start up screens appear The thermal cycler is ready to use when the Main Menu displays 08 00 AM 4 25 13 25 0 C GeneAmp PCR System 9700 F1 F3 F4 F5 F2 Run User Util Edit Create Name tc001 User pe Version 3 12 IMPORTANT If the thermal cycler does not start check the position of the Dual Flat Block Module The instrument cannot be powered on if the ...

Page 76: ...lities Diag Instrument diagnostics TmCalc Calculates melting temp Config Instrument configuration F1 F3 F4 F5 F2 Diag Exit More Config TmCalc 5 From the Instrument Configuration screen set the instrument time a Use the Circular Key Pad to select the Time field b Press the 24 Hr F2 or PM AM F3 soft keys until the format you want for the current time displays in the Time field c Use the numeric keys...

Page 77: ...rsion 3 12 b Press New F2 to add a new name to the list Select User Name F1 F3 F4 F5 F2 Accept Cancel Delete Edit New pe adrian doug peter c In the User Name field enter an alphanumeric name up to six characters in length then press Accept F1 to accept a name Use ENTER key to select a character User Name F1 F3 F4 F5 F2 Accept Cancel Backsp abcdefghi jklmnopqrj stuvwxyz The name you add or the name...

Page 78: ...s Table 5 GeneAmp PCR System 9700 PCR Method PCR protocol Run speed Reaction volume Stage 1 Stage 2 Stage 3 96 0 C 56 0 C 98 0 C 60 0 C 10 0 C Standard 20 μL 1 10 min 2 min 30 sec 2 min 1x Hold 39x Cycles 1x Hold 1 The reaction volume on the instrument display does not refer to the reaction volume on the chip and should not be changed 2 Holds 2 Tmp 39 Cycles 1 Hold 96 0 10 00 60 0 2 00 60 0 2 00 9...

Page 79: ...e 6 Uncrated dimensions and weights Component Height Length depth Width Weight QuantStudio 3D Digital PCR Instrument 21 cm 8 3 in 23 3 cm 9 2 in 13 5 cm 5 3 in 2 4 kg 5 3 lbs QuantStudio 3D Digital PCR Chip Loader 11 cm 4 3 in 27 cm 10 6 in 1 14 cm 5 5 in 3 0 kg 6 1 lbs ProFlex 2 Flat PCR System assembled 27 2 cm 10 7 in 56 5 cm 22 in 33 0 cm 13 in 19 6 kg 43 2 lbs Dual Flat Block GeneAmp PCR Syst...

Page 80: ... Instrument clearances The instruments require the following additional clearances IMPORTANT For safety the outlet used to power the instruments must be accessible at all times Component Top Front Sides Back QuantStudio 3D Digital PCR Instrument 30 48 cm 12 in 30 48 cm 12 in 15 2 cm 6 in 15 2 cm 6 in QuantStudio 3D Digital PCR Chip Loader 25 4 cm 10 in 15 2 cm 6 in 15 2 cm 6 in 25 4 cm 10 in ProFl...

Page 81: ...igeration units The following table provides electrical specifications for the instrument and associated devices For all indicated input voltages a 15A circuit is required Device Rated voltage Rated frequency Rated current Rated power QuantStudio 3D Digital PCR Instrument 100 240 VAC 1 50 60 Hz 150 mA 10 VA QuantStudio 3D Digital PCR Chip Loader 12 VDC 2 5 A max ProFlex 2 Flat PCR System See the P...

Page 82: ...f II The instrument may only be installed in an environment that has nonconductive pollutants such as dust particles or wood chips Typical environments with a Pollution Degree II rating are laboratories and sales and commercial areas The noise output of the instrument is 0 dB at idle Other conditions Ensure the room is away from any vents that could expel particulate material on the system compone...

Page 83: ...ss must be reserved for the instrument The configured DNS server must resolve internet domain names such as apps lifetechnologies com and pool ntp org The names of any local file servers used as data destinations must also be available through DNS or optionally WINS If the instrument will transfer experiment eds files directly to the QuantStudio 3D AnalysisSuite Software then the instrument must h...

Page 84: ...igital PCR Instrument Procedures other than those described in this document must be performed by a qualified Service Engineer Cleaning the chip tray and sample block If a chip leaks during thermal cycling or during a run perform the following procedure to eliminate any residual contaminants from the chip tray or the thermal cycler Cotton or nylon swabs and lint free cloths Deionized water Isoprop...

Page 85: ...re 1 Power off and unplug the QuantStudio 3D Instrument or thermal cycler 2 Open the QuantStudio 3D Instrument chip tray or open the thermal cycler heated cover to expose the sample block 3 If you are cleaning the thermal cycler remove the Chip Adapters and Thermal Pads from the sample block 4 If the contamination remains clean the chip tray or sample block using isopropanol a Pipet a small volume...

Page 86: ...n touch Instrument Settings 2 In the Instrument Settings menu touch Instrument Name 3 In the Instrument Name screen touch the Instrument Name field 4 In the Edit Instrument Name screen enter up to a 16 character name for the instrument then touch Enter IMPORTANT The instrument name is an alphanumeric string used to identify the QuantStudio 3D Instrument on the network The instrument name Can be up...

Page 87: ...Touch the Time Zone field then select the correct continent and region from the lists b Touch the Date field enter the current date then touch Enter c Touch the Time field enter the appropriate time units then touch Enter 4 Touch OK when done to save the setting Check the instrument firmware Imaging and analysis of the QuantStudio 3D Digital PCR 20K Chip v2 requires firmware version 3 0 or later o...

Page 88: ...ide of the Instrument Management dashboard c In the Software Downloads page select QuantStudio 3D Digital PCR Software from the Digital PCR menu d In the product page for your instrument click the Download QuantStudio 3D Digital PCR Software link to download the instrument firmware and save it on a USB drive e On the same page click on User Instructions to download and review the release notes for...

Page 89: ... you power off and pack the instrument If the instrument is moved while loaded the chip inside may become dislodged from the chip tray and obstruct the chip tray mechanism To return your instrument for service 1 Contact your local customer care center or technical support group see Customer and technical support on page 123 to obtain a copy of the Certificate of Instrument Decontamination a servic...

Page 90: ...tal PCR Instrument fail perform the following procedure to replace them Fuses 1 6A Time Lag T 250VAC 5 20 mm 2 Safety glasses Powder free gloves Screwdriver flathead Replace the fuses CAUTION FIRE HAZARD For continued protection against the risk of fire replace fuses only with listed and certified fuses of the same type and rating as those currently in the QuantStudio 3D Digital PCR Instrument 1 P...

Page 91: ...supplied power to the QuantStudio 3D Digital PCR Instrument To prevent further failures consider installing an electrical protective device such as a UPS or surge protector Calibrate the touchscreen Calibrate the instrument touchscreen periodically as part of the routine maintenance of your instrument if you observe a decrease in screen responsiveness over time or if prompted after updating the in...

Page 92: ...or troubleshooting instrument errors If the QuantStudio 3D Digital PCR Instrument encounters an error during operation the log is written to the experiment eds file which can be exported and sent to technical support see Customer and technical support on page 123 If the instrument does not generate a file then you can export the instrument log for distribution as explained below 1 From the Main Me...

Page 93: ...rt then wait for the instrument to export the log to a text file on the drive 5 When you are finished touch then touch to return to the Main Menu Appendix C Maintenance View the instrument log C QuantStudio 3D Digital PCR System User Guide 93 ...

Page 94: ...l hardware other than what is shipped with the instrument The instrument can be configured for wireless networking through the installation of a wireless adapter which is sold separately see Materials required on page 96 The QuantStudio 3D Digital PCR Instrument is designed to integrate into a standard Local Area Network LAN both wired and wireless The instrument features a Gigabit Ethernet port t...

Page 95: ...CR Instrument uniquely While not critical to network function unique instrument names can aid with sample tracking and instrument troubleshooting Note The serial number of the QuantStudio 3D Digital PCR Instrument is the default instrument name The QuantStudio 3D Digital PCR Instrument does not test the uniqueness of the instrument name when it is set Name QuantStudio 3D Digital PCR Instruments us...

Page 96: ...sh Connection Materials Wired CAT6 Ethernet cable of sufficient length with RJ45 connectors for a 1000Mbit s network connection or a CAT5 for a 100Mbit s connection Wireless QuantStudio 3D Extended Arm WiFi Adapter Cat No A28598 Before beginning the installation collect from a network administrator your network policy for obtaining IP addresses DHCP or static IP If your network requires a static I...

Page 97: ...following information for the local wireless hotspot Wireless local area hotspot name Security policy requirement for the wireless hotspot WPA WEP or WPA2 Network credentials for the wireless hotspot password and user account if necessary Appendix D Networking Connect the instrument to the network D QuantStudio 3D Digital PCR System User Guide 97 ...

Page 98: ...ed to the instrument by three pegs that require significant force to decouple If necessary insert a flathead screwdriver into the slot at the base of the panel to pry it from the instrument chassis 4 Turn the instrument over then uncap the WiFi Adapter and insert it into the USB port inside the instrument Firmly push on the adapter to ensure that it is plugged in completely The internal USB port i...

Page 99: ...touch Edit in the network setup screen 5 Wireless connection only If you are connecting your instrument to a wireless network a In the Network Setup screen touch Change Connection Type b In the Choose Connection Type screen touch Wireless c In the Available Wireless Network screen touch the desired wireless hotspot Note The signal strength of a wireless hotspot is indicated by the number of bars p...

Page 100: ...P properties for the QuantStudio 3D Instrument a In the Network Setup screen touch Edit Settings b In the Network Setup settings touch the IP Configuration field touch the setting appropriate for your network Static IP or DHCP then touch OK DHCP Select to allow your network DHCP server to automatically assign an IP address to the instrument Static IP Select if you have a static IP address to assig...

Page 101: ...he value d Touch then configure the domain name service DNS settings DNS Domain Enter the domain name of the DNS server that you want the instrument to use DNS Server Enter the IP addresses for the primary top and secondary bottom DNS servers IMPORTANT DNS settings are required if you Specify the Connect cloud based platform as a data destination for your QuantStudio 3D AnalysisSuite Software proj...

Page 102: ...pecified in the top most field If unavailable the instrument uses the server specified in the bottom most field f When you are finished configuring your network settings touch OK The touchscreen displays Network Complete when the instrument successfully connects to the network 7 In the Network Complete screen touch OK then touch to return to the Main Menu After the instrument has successfully conn...

Page 103: ... 3D AnalysisSuite Software for direct upload or for local Windows operating system based or SAMBA file servers for later import You can create an unlimited number of destinations and select from them prior to each run 1 From the Main Menu of the touchscreen touch 2 In the Settings menu touch Data Destinations 3 In the Edit Destinations screen touch Add to add a data destination Note To edit an exi...

Page 104: ...rs within the Destination Selection and Export screens User Name Enter the user name that the instrument should use when authenticating to the Connect platform Password Enter the password that the instrument should use when authenticating to the Connect platform LAN data destination fields Target Name Enter a name to identify the LAN data destination Note The target name appears within the Destina...

Page 105: ...dd additional data destinations as needed Upon saving the data destination the QuantStudio 3D Instrument automatically attempts to connect to the specified location The instrument saves the destination only if the connection is successful 7 When you are finished adding data destinations touch to return to the Main Menu Appendix D Networking Connect the instrument to the network D QuantStudio 3D Di...

Page 106: ... chips To ensure proper processing and analysis of loaded chips handle them according to the following guidelines Always wear powder free gloves when loading and sealing chips IMPORTANT Never handle chips or chip lids without gloves Oils from your hands can contaminate the components and interfere with thermal cycling and imaging Hold the chip and lid gently by their sides If you accidentally touc...

Page 107: ...hours after loading them Materials required The following materials are required to load and seal chips for use on the QuantStudio 3D Digital PCR System Prepared digital PCR reactions from the previous section QuantStudio 3D Digital PCR 20K Chip v2 QuantStudio 3D Digital PCR Chip Lid v2 QuantStudio 3D Digital PCR Sample Loading Bladess Immersion Fluid Immersion Fluid tip Isopropanol Gloves powder ...

Page 108: ...you cannot recap it for later use 2 1 3 4 1 hour 1 Immersion Fluid syringe 2 Cap remove 3 Syringe tip push to attach 4 Low lint wipe Load and seal the chips manually IMPORTANT Wear powder free gloves while preparing the chips 1 Preheat the heated block to 40 C the optimal temperature for loading chips Note The loading surface should be a flat temperature controlled surface that is large enough to ...

Page 109: ...loading b While holding the loading blade by its edges carefully dispense the reaction into the sample loading port After loading gently tap the top of the loading blade to spread the reaction across the full length of the blade While filling the loading blade Hold the pipette so that the tip meets the sample loading port at a sharp angle and so it does not deflect either blade forward or rear Do ...

Page 110: ...etting the chip If not adjust the angle slightly 40 1 C 70 80 10 sec d Confirm that the loading blade contains no residual fluid indicating that the reaction has been completely loaded onto the chip IMPORTANT Do not apply the loading blade to the chip more than once e Allow the chip to sit on the heated block for 20 seconds while the PCR reaction stabilizes within the chip f Add several drops of I...

Page 111: ...ensure a tight seal Note You can remove the chip from the loading surface when you apply pressure to seal it 443MPJ 443MPJ 10 sec 4 4 3 M P J Proceed to filling the chip case with Immersion Fluid Fill the chip case with Immersion Fluid 1 Hold the chip and lid assembly by its edges at a 45 angle so that air can escape from the fill port as you fill it 2 Hold back the top half of the chip lid label ...

Page 112: ... out of the chip wells 3 Gently run your fingers over the entire label to seal the remainder of the label 4 Inspect the sealed chip for potential problems Leaks Confirm that no fluid is leaking from the fill port or from the seal between the chip and lid Bubbles Check for large or multiple bubbles inside the chip case One small air bubble is acceptable Correct lid orientation Confirm that the lid ...

Page 113: ...t Symbols may be found on the instrument to warn against potential hazards or convey important safety information In this document the hazard symbol is used along with one of the following user attention words CAUTION Indicates a potentially hazardous situation that if not avoided may result in minor or moderate injury It may also be used to alert against unsafe practices WARNING Indicates a poten...

Page 114: ... suite de l élimination de déchets électroniques ne pas éliminer ce déchet électronique avec les déchets usuels non soumis au tri sélectif Se conformer aux ordonnances locales sur les déchets municipaux pour les dispositions d élimination et communiquer avec le service à la clientèle pour des renseignements sur les options d élimination responsable Conformity mark Description Indicates conformity ...

Page 115: ...ata Sheets SDSs before handling CAUTION Produits chimiques dangereux Lire les fiches signalétiques FS avant de manipuler les produits Rear instrument panel CAUTION Hazardous waste Refer to SDS s and local regulations for handling and disposal CAUTION Déchets dangereux Lire les fiches signalétiques FS et la réglementation locale associées à la manipulation et à l élimination des déchets Location of...

Page 116: ...for the safe use of these products Instrument safety General CAUTION Do not remove instrument protective covers If you remove the protective instrument panels or disable interlock devices you may be exposed to serious hazards including but not limited to severe electrical shock laser exposure crushing or chemical exposure Appendix F Safety Safety information for instruments not manufactured by The...

Page 117: ...ion of the instrument AVERTISSEMENT Veiller à utiliser une alimentation électrique appropriée Pour garantir le fonctionnement de l instrument en toute sécurité Brancher le système sur une prise électrique correctement mise à la terre et de puissance adéquate S assurer que la tension électrique est convenable Ne jamais utiliser l instrument alors que le dispositif de mise à la terre est déconnecté ...

Page 118: ...quées dans la documentation du fabricant destinée aux utilisateurs L opérateur ou toute autre personne responsable est tenu d assurer le respect des exigences suivantes Ne pas utiliser d agents de nettoyage ou de décontamination susceptibles de réagir avec certaines parties de l appareil ou avec les matières qu il contient et de constituer de ce fait un DANGER L instrument doit être correctement d...

Page 119: ...e 2004 108 EC European Union EMC Directive EN 61326 1 Electrical Equipment for Measurement Control and Laboratory Use EMC Requirements Part 1 General Requirements FCC Part 18 47 CFR U S Standard Industrial Scientific and Medical Equipment AS NZS 2064 Limits and Methods of Measurement of Electromagnetic Disturbance Characteristics of Industrial Scientific and Medical ISM Radiofrequency Equipment IC...

Page 120: ...After emptying a waste container seal it with the cap provided Characterize by analysis if necessary the waste generated by the particular applications reagents and substrates used in your laboratory Ensure that the waste is stored transferred transported and disposed of according to all local state provincial and or national regulations IMPORTANT Radioactive or biohazardous materials may require ...

Page 121: ...s locales nationales et communautaires en matière de confinement des récipients Une fois le récipient à déchets vidé il doit être refermé hermétiquement avec le couvercle fourni Caractériser par une analyse si nécessaire les déchets générés par les applications les réactifs et les substrats particuliers utilisés dans le laboratoire Vérifier que les déchets sont convenablement stockés transférés tr...

Page 122: ...les Individuals should be trained according to applicable regulatory and company institution requirements before working with potentially biohazardous materials Follow all applicable local state provincial and or national regulations The following references provide general guidelines when handling biological samples in laboratory environment U S Department of Health and Human Services Biosafety i...

Page 123: ...o 3D AnalysisSuite Software Help Base module server MAN0009634 Note For additional documentation see Customer and technical support on page 123 Customer and technical support Visit thermofisher com support for the latest service and support information Worldwide contact telephone numbers Product support information Product FAQs Software patches and updates Training for many applications and instru...

Page 124: ... the Life Technologies General Terms and Conditions of Sale at www thermofisher com us en home global terms and conditions html If you have any questions please contact Life Technologies at www thermofisher com support Documentation and support Limited product warranty 124 QuantStudio 3D Digital PCR System User Guide ...

Page 125: ......

Page 126: ...thermofisher com support thermofisher com askaquestion thermofisher com 18 March 2020 ...

Reviews: