Bigwater 780e
CL-W0169
English
English
17
18
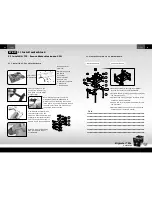
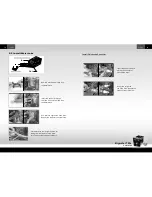
>> Install the Main Unit
2.6 Install the Main Unit
Remove the drive bay cover
from the selection position.
(The following duagrams are the
Thermaltake Armor plus case.)
Note:
If you use other cases, please install
the Bigwater 780e follow original
5.25" device installation.
You can also sesure the Bigwater 780e
by screws(M).
Bigwater 780e is highly recommended to be installed in the top 3 drive
bays of Thermaltake Xaser VI and Armor Plus Chassis.
Insert the Bigwater 780e
into 5.25 drive bay.
Pull the right-hand side of the lever
to remove the 5.25" device.
Installation complete.
STEP2
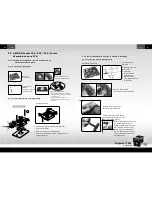
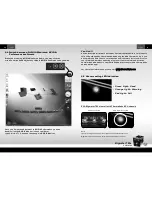
2.7 ESA PCB Introduction
a
b
d
e
f
g
h
i
c
a. Power connector : Connect the 4-pin power connector .
b. Case LED :Connect to ESA Watercooling LED connector marked in Figure 1(P19).
It is not necessary to connect to chassis if you are not using Thermaltake ESA-compliant
chassis system.
c. LED : Connect LED connector
d. PWM pump : Connect to PWM pump.
e. PWM fan : Connect to PWM fan.
f. USB connector : Connect to USB connector on the motherboard.
g. Water Temp sensor(1) : Connect to Flow TX (Inlet) temperature sensor.
h. Water Temp sensor(2) : Connect to Flow TX (Outlet) temperature sensor.
i. Water Level sensor : Connect to Water Level sensor on the tank .


