25
3. Building the Dome
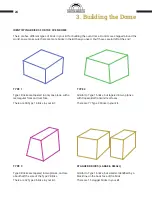
IDENTIFYING THE ENTRY AND VENT ARCHES
The bricks that make up the walls of the Entry and Vent Arch are shown below. Put these aside to avoid damage,
as there are no spares for these. The Entry Arch column bricks are marked L1 to L5 and R1 to R5. The Vent
Arch Column bricks are not numbered but should be easy to identify if you have seen the video instructions.
TIPS FOR BUILDING THE DOME
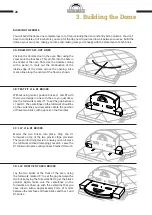
When laying the dome courses, start at the back in the center and work to the front. This keeps the brickwork
you’ll see through the oven mouth neat and symmetrical, and keeps the stagger bricks hidden. Position your
stagger bricks as per the course design, we have modeled the best possible spots for them.
When you reach the end of a row, there will be a gap that needs to be filled; the keystone for each course. Two
options are available to you; grind a brick down to make it fit the gap, or fill the gap with the refractory mortar.
Remember, the mortar is able to fill gaps up to 75mm width, and typically these gaps are out of sight.
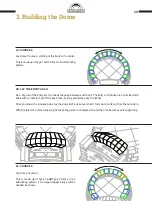
The dome bricks butt up against the Entry Arch columns, but do not interlock with them. The joints between the
dome brick courses will not line up with the joints in the Entry Arch columns - this is part of the design.
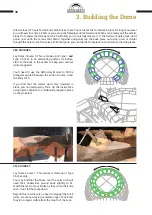
Once you have laid Dome Course 7 there is no longer any need to offset the vertical joints, besides aesthetics.
Continue laying the dome courses starting at the back in the center; most of your visible joints will be offset.
ENTRY ARCH FRONT
VENT ARCH FRONT
ENTRY ARCH BACK
VENT ARCH BACK
Summary of Contents for D95
Page 1: ...D95 Brick Oven D95 PRECUT BRICK OVEN KIT Instruction Booklet ...
Page 44: ...44 Examples ...
Page 45: ...45 Examples ...


