Infrared Gas Analyzer
Operation 4
4-7
Teledyne Analytical Instruments
4.3.3 Password Protection
Before a unique password is assigned, the system assigns
TAI
by default.
This password will be displayed automatically. The operator just presses the
Enter key to be allowed total access to the instrument’s features.
If a password is assigned, then setting the following system parameters can
be done only after the password is entered: alarm setpoints, AUTO-CAL
setup. ZERO/SPAN calibration assigning a new password, range/application
selections, and curve algorithm linearization. (APPLICATION and ALGO-
RITHM are covered in the programming section.) However, the instrument can
still be used for analysis or for initiating a self-test without entering the password.
To defeat security the password must be changed back to
TAI
.
NOTE: If you use password security, it is advisable to keep a copy of
the password in a separate, safe location.
4.3.3.1
Entering the Password
To install a new password or change a previously installed password, you
must key in and
ENTER
the old password first. If the default password is in
effect, pressing the
ENTER
button will enter the default
TAI
password for you.
Call out MAIN MENU setup by selecting any controls
Use the UP or DOWN key to scroll the blinking over to
PSWD
, and press
Enter
to select the password function. Either the default
TAI
password or
AAA
place holders for an existing password will appear on screen depending on
whether or not a password has been previously installed.
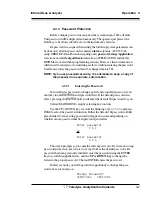
Enter password:
T A I
or
Enter password:
A A A
The screen prompts you to enter the current password. If you are not using
password protection, press Enter to accept TAI as the default password. If a
password has been previously installed, enter the password using the ENTER
key to scroll through the letters, and the UP or DOWN key to change the
letters to the proper password. The last ENTER enters the password.
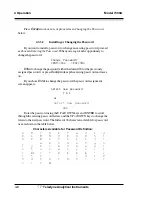
In a few seconds, you will be given the opportunity to change this pass-
word or keep it and go on.
Change Password?
<ENT>=Yes <ESC>=No
Summary of Contents for 7300A
Page 4: ...iv Model 7300A Teledyne Analytical Instruments ...
Page 12: ...1 4 1 Introduction Model 7300A Teledyne Analytical Instruments ...
Page 26: ...2 Installation Model 7300A 2 14 Teledyne Analytical Instruments ...
Page 36: ...3 Start up and Theory of Operation Model 7300A 3 10 Teledyne Analytical Instruments ...
Page 80: ...5 Maintenance Model 7300A 5 10 Teledyne Analytical Instruments ...


