●
22
Four Channel VSM
When a four (4) channel VSM is on the system, up to four (4)
cameras can be installed. Only Cameras A, B, C and D will be
available for setup.
1. Press SYSTEM SETUP TAB
2. Press VIDEO ICON .
3. Select
►
Camera A
A
►
Camera B
B
►
Camera C
C
►
Camera D
D
OR
Press PAGE RIGHT ARROW to cycle through all cameras.
4. Select the appropriate check box(s):
►
Normal –
►
Reverse –
►
Upside Down –
►
Reverse & Upside Down –
5. Press PAGE RIGHT ARROW to cycle through remaining
cameras.
6. Press
►
CHECKERED FLAG to complete Video Setup.
►
SYSTEM SETUP TAB to return to main System Setup
screen.
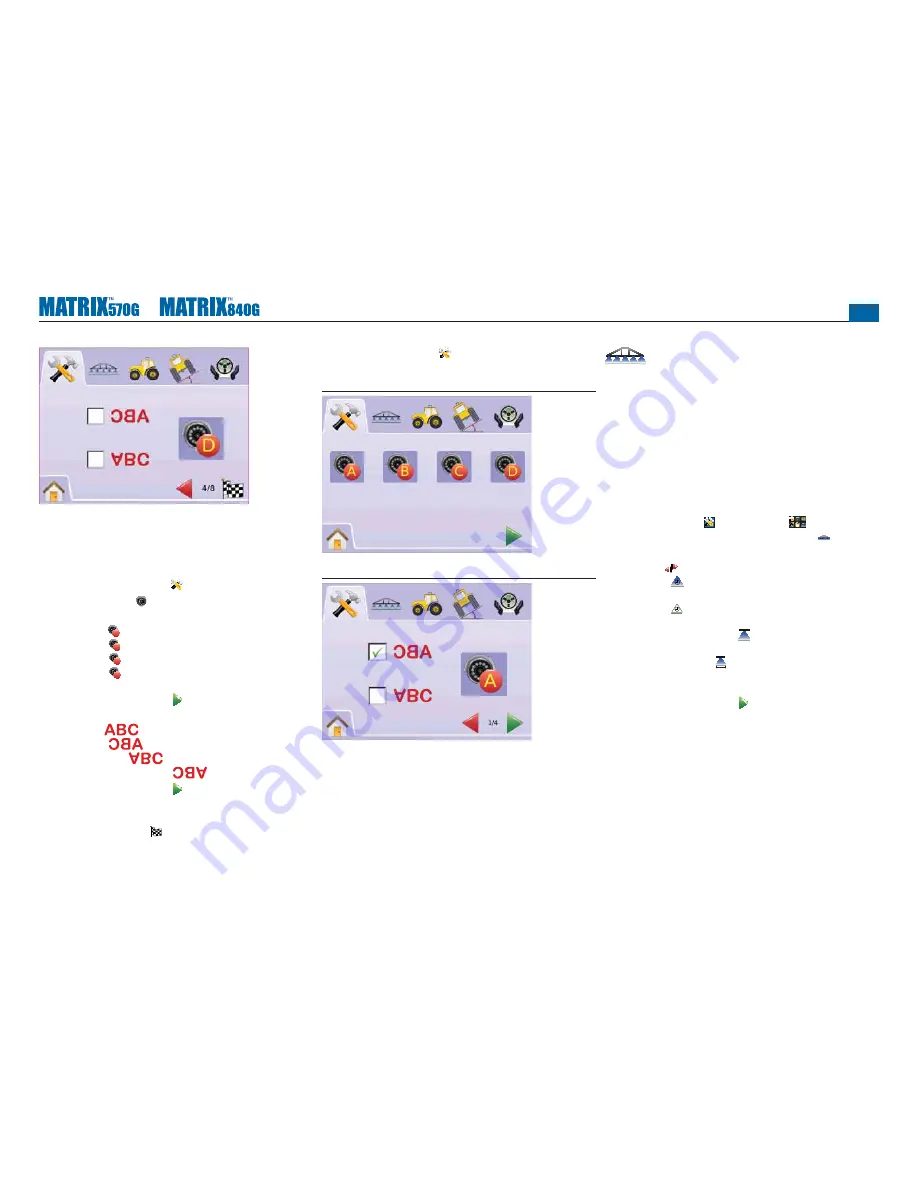
Figure 2-36: Video w/Four Channel VSM
Figure 2-37: Camera Configuration
BOOMPILOT/SINGLE BOOM SETUP
BoomPilot Setup is used to con
fi
gure Overlap, Delay On,
Delay Off, Number of Boom Sections, and Boom Section
Width settings.
Single Boom Setup is available when a SmartCable or Section Driver
Module (SDM) is not present. Con
fi
gurations for Overlap, Delay On,
Delay Off, Number of Boom Sections will not be available, and only
one boom section width can be entered.
BoomPilot Setup
If a SmartCable or Section Driver Module (SDM) is present, up to 15
boom section widths can be entered.
1. Select UNIT SETUP from Home Menu
.
2. Press BOOMPILOT/SINGLE BOOM SETUP TAB
3. Select from:
►
Overlap – determines the amount of overlap allowed
►
Delay On – establishes the timing for the boom section
valves to switch on
►
Delay Off – establishes the timing for the boom section
valves to switch off
►
Number of Boom Sections
#
– establishes the number of
available boom sections
►
Boom Section Width – establishes the width of each boom
section
OR
Press PAGE RIGHT ARROW to cycle through all settings.
NOTE: Options labels are current settings. While in a setting screen,
press icon to view available factory settings and setting
ranges.
NOTE: BoomPilot settings are only visible and necessary if a
SmartCable or SDM is present. If neither is present, see
Single Boom Setup section.


