User’s manual
101
EN
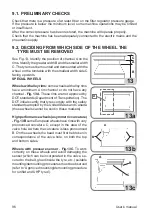
vertical and horizontal arms (Fig.21a). In this case
the tool will be automatically positioned at a security
distance from the rim edge.
- Make the head go down on the rim (push button
1 fig. 21a).
- For correct tool positioning, the insert must be at
the end position with the rim edge (Fig. 22a), where
the vertical wall begins.
ATTENTION : Use the handle 2 (Fig. 21a) to achieve
the correct tool positioning on the rim.
- Press the block 1 (Fig. 21a) to fix the tool position.
The distance between rim and tool head will remain
unchanged till the control button is in locking posi
-
tion.The operator can tilt the vertical post (i.e. when
handling a set of tyres having same dimensions)
without repositioning the tool on the rim.
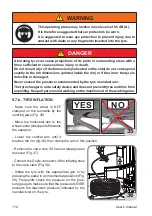
ATTENTION: Risk of hand crushing between de
-
mounting / mounting tool and the wheel.
9.5.b. Upper tyre bead coupling
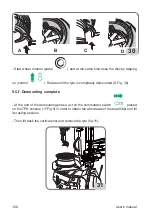
- Position the TPH roller (Fig. 23) on the right side
of the mounting tool at a distance of 2/3 mm from
the rim edge, create enough space between the rim
and the tyre with the roller to allow the demounting
tool to tilt.
- Operate control
for demount tool (A-B)
tilting. (Fig. 24)
1
2
23
2
A
B
C
1
2
21a
21b
B
22a
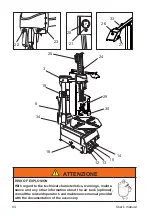
Summary of Contents for TECO 36 TOP
Page 14: ...14 Manuale Operatore 01 05 02 18 04 08 06 07 10 11 12 14 15 16 16 19 17 ...
Page 66: ...Note ...
Page 67: ...Note ...
Page 80: ...80 User s manual 01 05 02 18 04 08 06 07 10 11 12 14 15 16 16 19 17 ...
Page 132: ...Note ...
Page 133: ...Note ...
Page 146: ...146 Manuel d utilisation 01 05 02 18 04 08 06 07 10 11 12 14 15 16 16 19 17 ...
Page 198: ...Note ...
Page 199: ...Note ...
Page 212: ...212 Betriebsanleitung 01 05 02 18 04 08 06 07 10 11 12 14 15 16 16 19 17 ...
Page 264: ...Note ...
Page 265: ...Note ...
Page 278: ...278 Manual de uso 01 05 02 18 04 08 06 07 10 11 12 14 15 16 16 19 17 ...


