background image

7

Resetting and adjusting the  

MSC-18BL ESC

FeAtuReS

1.  Auto Detects Brushed or Brushless motor (See Select 

Motor Type)

2.  One-Touch Endpoints calibration

3.  Battery Selection:

  a.   LiPo (ESC auto detects number of cell:  

1S to 3S)

  b.  NiMH

4.  2 ESC profile:

  a.  Forward / Reverse with Smart Brake II

  b.  Forward Only

5.  Battery Over Voltage Protection (Max Input voltage = 

13V)

6.  Thermal Protection

7.  Motor Stall Detection

Speed Control Programming

Select Motor type

  When ESC is turned on, it will check the connection 

between Red and White wire. If the wires are shorted, 

then it will go into brushed motor mode.

Brushed Motor

  a.  Motor (+) connected to Red and White Wire of ESC

  b.  Motor (-) connected to Black Wire of ESC

Brushless Motor

Connect the 3 motor wires to Red, White and Black wire of 

ESC.

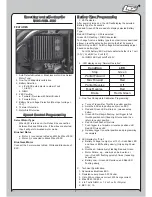
Battery Type Programming

C.  LED indicator

After power is turned on, the LED will display the selected 

Battery Type for 2 seconds.

Red and Green LEDs are used to display selected Battery 

Type:
Red LED Flashing = LiPo is selected
Green LED Flashing = NiMH is selected
To change from one battery type to another (colors described 

above), press the setup button during the first 2 seconds 

after turning on ESC. Cutoff voltage will automatically adjust 

based on battery type:
 

For LiPo battery: ESC will auto detect whether it is 1 cell 

(3.3V), 2 cell (6V) or 3 cell (9V)
 

For NiMH: ESC will cutoff at 4.3V

2.   LED display during “Normal Operation”

Condition

Stop

Partial Forward

Max Forward

Partial Reverse

Max Reverse 

Brake

LED

Green

Off

Red

Off

Red

Red & Green

3.  One-Touch Endpoints Calibration Programming:

  a.  Turn on Transmitter, Throttle in neutral position

  b.  Hold the ESC setup button and turn on ESC

  c.   Red and Green LED will turn on, release setup 

button

  d.   Green LED will begin flashing, pull trigger to full 

throttle position until Green light turns solid, then 

return to neutral position

  e.  Red LED will flash at this time

  f.   Push trigger to at maximum reverse position until 

Red LED turns solid

  g.   Release trigger to neutral position and programming 

is complete

4.  LED display for “Error”

  a.   Battery Voltage too high (over 13V)---Solid Red LED 

and Green LED flashing slowly (Only during Power 

ON)

  b.   Overheat---Alternatively Flashing Red and Green

  c.   Motor Failure, e.g., wire broken, bad motor, or 

jam---Red LED flashing quickly 3 times (repeating 

sequence)

  d.   Battery Low---Green LED solid on and Red LED 

flashing slowly

C.  Technical Specification:

1.  Sensorless Brushless ESC

2.  Resistance per phrase: 0.0036 ohm

3.  Up to 25A continuous current, 250A surge current

4.  Max RPM: 120,000

5.  4 to 7 cells NiMH, or 1, 2 or 3 cell Li Polymer

6.  BEC: 6V, 1A

Summary of Contents for mini SCT

Page 1: ...Not responsible for errors Losi a Division of Horizon Hobby Inc Before operating this vehicle please read all printed materials thoroughly Operation Manual...

Page 2: ...for this product Meaning of Special Language The following terms are used throughout the product literature to indicate various levels of potential harm when operating this product NOTICE Procedures...

Page 3: ...en charges Always inspect the battery before charging Always terminate all processes and contact Horizon Hobby if the product malfunctions Always keep batteries and charger away from any material that...

Page 4: ...urn during power on adjust the TH Trim knob located to the lower right of the steering wheel until they stop To make the vehicle move forward pull the trigger back To reverse the vehicle wait for the...

Page 5: ...H battery pack LOSB1212 a 2 cell 7 4 volt LiPo battery pack LOSB9826 or 3 cell 11 1 volt LiPo battery pack LOSB9827 Please consult the Motor Battery Chart below for suggested motor battery combos The...

Page 6: ...e bind your transmitter to the receiver should the need arise During the bind process there is a unique ID from the transmitter communicated to the receiver to ensure trouble free radio operation Step...

Page 7: ...will automatically adjust based on battery type For LiPo battery ESC will auto detect whether it is 1 cell 3 3V 2 cell 6V or 3 cell 9V For NiMH ESC will cutoff at 4 3V 2 LED display during Normal Oper...

Page 8: ...ion The slipper is primarily used to help absorb sudden impacts on the drivetrain due to landing big jumps or when using more powerful aftermarket motors and or battery packs Additionally it can be us...

Page 9: ...As you make them longer you will increase the toe in and vice versa Ride Height This is the height the chassis sits and runs at Spring spacers included with the Mini SCT when installed between the sh...

Page 10: ...crews If you are replacing the spur gear with one of a different size number of teeth you must first loosen do not remove the two screws that secure the motor and slide it back slightly Remove the 3mm...

Page 11: ...Remedy Horizon s sole obligation hereunder shall be that Horizon will at its option i repair or ii replace any Product determined by Horizon to be defective In the event of a defect these are the Pur...

Page 12: ...uggested dump out the old uid from the shock body Carefully ll the shock body with uid to the bottom of the threads inside the shock body Step 6 Pull the shaft out so the piston is next to the cartrid...

Page 13: ...ing full charge Slipper slipping too much Motor worn out Driveline bound up Recharge battery Try another charger Check adjust slipper Replace motor Check wheels and transmission for binding Poor range...

Reviews: