


Installation
2-6
■
AC Adaptor
Note:
There are two types of AC adaptors: one for 100 V and one for
200 V. Confirm that the AC adaptor you use matches the
power supply voltage of the power outlet.
To install the AC adaptor:
1.
Confirm that the power is turned off at the GX-1 main unit:
that is, the switch is toggled down to
.
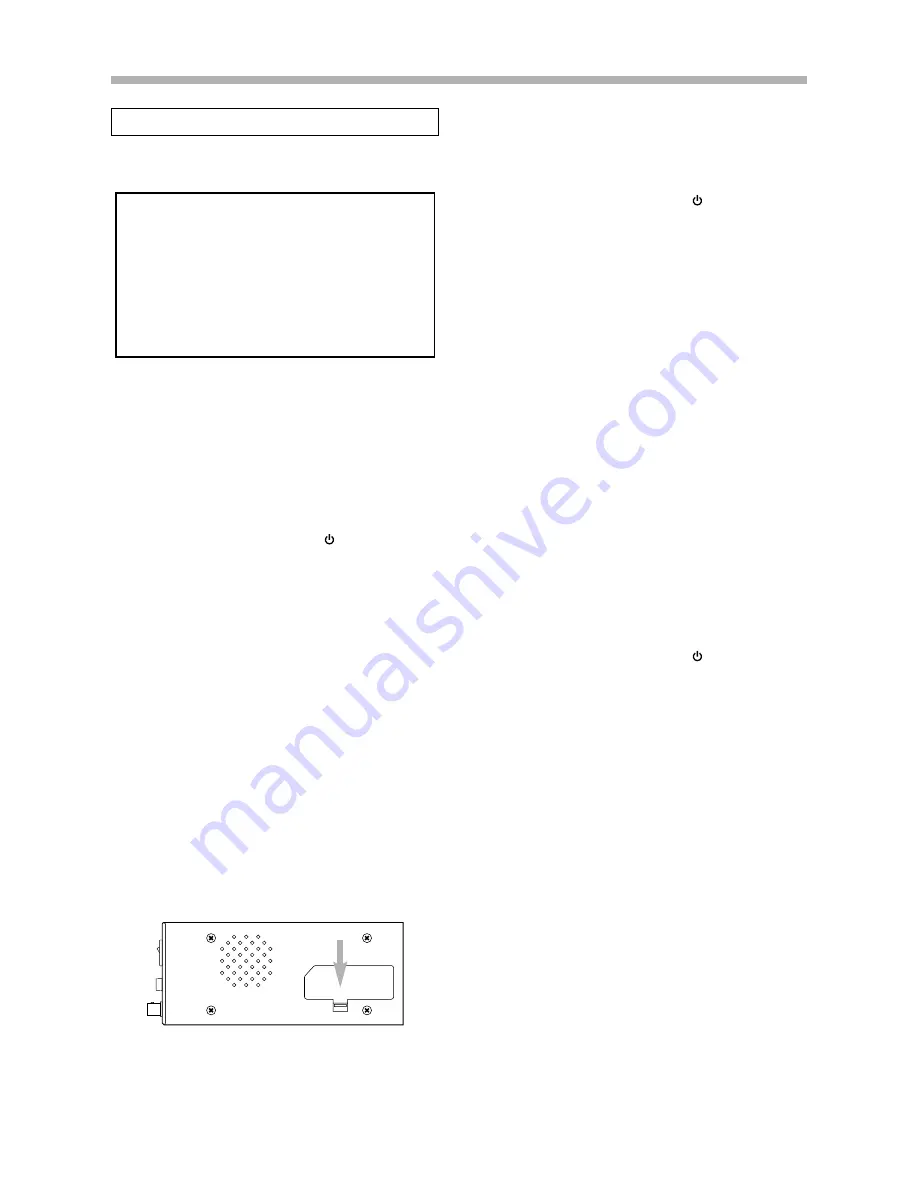
2.
Insert the AC adaptor into the power supply slot on the
right side of the GX-1.
3.
Plug the power cable into the AC adaptor.
4.
Plug the power cable into the power outlet.
Note: Backup by DC power
If +11 to 16 V DC power is supplied to the DC IN connector
while using the GX-1 with an AC power supply, the DC power
supply backs up in case of a failure of the AC power.
However, if the supplied voltage is +16 V DC or greater, the
DC power supply takes priority.
Note: Removing the AC adaptor
To remove the AC adaptor, push the eject lever beneath the
power supply slot. The AC adaptor pops out with the force of a
built-in spring—be careful.
WARNING
Before installing or removing the AC adaptor, discon-
nect the power cable from the adaptor. If the cable is
left connected to the adaptor and a power outlet, the
power supply voltage is applied to the output termi-
nals of the adaptor and might cause an electric
shock.
Preparing the Power Supply
■
DC Power Supply
The GX-1 can be operated on +11 to 30 V DC.
To connect the DC power supply:
1.
Confirm that the power is turned off at the GX-1 main unit:
that is, the switch is toggled down to
.
2.
Plug the DC power cable into the DC IN connector at the
rear of the GX-1.
Note: What happens when the DC supply voltage drops
to +11 V or less?
The message LOW BATTERY appears on the status bar of the
provided software's window. When you see this message,
promptly quit recording. If data is being recorded to the GX-
1's memory at this time, transfer the data from memory to a
removable medium or PC. When the power supply voltage fur-
ther drops to +10 V or less, the GX-1 automatically shuts
down.
Note: Backup by battery pack
If the battery pack is installed in the power supply slot while
using the GX-1 with a DC power supply, the DC power supply
and battery pack are used in parallel. This way of use is recom-
mended when the DC power supply is unstable. Also in this
case, if the supply voltage drops to +10 V or less, the GX-1
automatically shuts down. However, since an idling current
flows even during shutdown, turn off the power switch to pre-
vent excessive discharge of the battery pack.
■
Battery Pack
To install the battery pack:
1.
Confirm that the power is turned off at the GX-1 main unit:
that is, the switch is toggled down to
.
2.
Insert the battery pack into the power supply slot on the
right side of the GX-1.
Notes:
• What happens when the battery voltage drops to +11 V
or less?
The message LOW BATTERY appears on the status bar of
the provided software's window. When you see this mes-
sage, promptly quit recording. If data is being recorded to
the GX-1's memory at this time, transfer the data from mem-
ory to a removable medium or PC. When the voltage further
drops to 10 V or less, the GX-1 automatically shuts down.
However, since an idling current flows even during shut-
down, turn off the power switch to prevent excessive dis-
charge of the battery pack.
• Removing the battery pack
In the same way used to remove the AC adaptor, push the
eject lever.
• With a fully charged battery pack, the GX-1 can record con-
tinuously for approximately 40 minutes (when using an AIT
or an MO).
• To recharge a battery pack, follow the documentation for the
battery charger.
• Nickel metal hydride batteries are susceptible to a "memory
effect". Discharge the battery fully before recharging.
Summary of Contents for GX-1
Page 5: ...iv...
Page 7: ...1 2...
Page 15: ...1 10...
Page 17: ...2 2...
Page 27: ...2 12...
Page 28: ...GX Navi 3 1...
Page 29: ...3 2...
Page 47: ...3 20...
Page 67: ...3 40...
Page 68: ...Technical Information 4 1...
Page 69: ...4 2...
Page 79: ...Specifications 4 12 External Dimensions Unit mm 300 85 200...
Page 80: ...4 13...
Page 81: ...4 14...
Page 117: ...5 2...
Page 121: ...5 6...


