


What routing should I choose?
The are two main situations that calls for different
routings. Recording and Mixing. In this section we will
look at both and use Cubase LE and Cubase SX as host
applications.
Recording - use internal mode
In the typical recording situation you wish to:
-
Monitor the source with no latency.
-
Record the source signal. Either dry or processed via
the Fabrik C channel strip or both of them
simultaneously.
Normally when working with a microphone and a
standard pre-amp you will add slight compression
and EQ from the pre-amp and record this signal only.
However, with Konnekt it is very easy to set up and
record two individual tracks simultaneously; one
unprocessed and one processed.
-
Listen to the Fabrik R reverb on the source signal as
“cue reverb” without recording the reverb.
This is set up the following way:
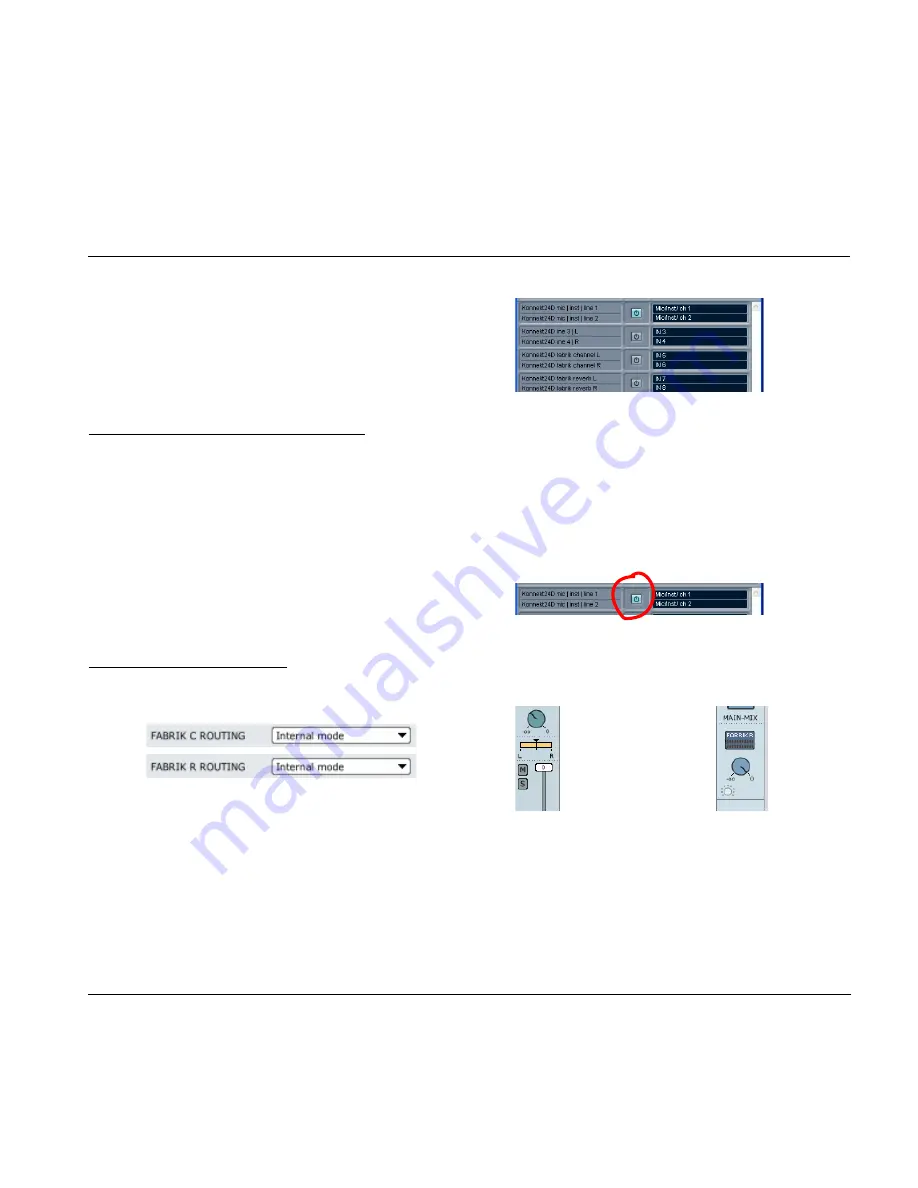
•
Select “Internal” mode for both Fabrik C and Fabrik R
via the Fabrik pages.
Fabrik C Routing
•
In the DAW VST Input section you may select which
input or inputs to record. This is where you select
whether you record the dry source signal or the
source signal processed through Fabrik C, - or both!
The following example is from Cubase LE
Fabrik R Routing
As opposed to Fabrik C, Fabrik R will be typically be
used as a send effect from the host application. This
means that you will listen to the effect while recording but
not actually record the reverb.
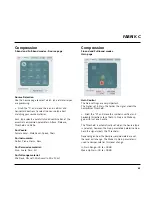
•
Go to the VST inputs and select e.g. Konnekt 24D
mic/inst/line 1 to select the frontpanel input 1. Activate
the input pressing the “power-button”.
•
Go to the Mixer page in the TC Near control page.
Send to Fabrik R from ch. 1 using the send knob and
adjust the Fabrik R main mix level.
Fabrik R send level
Fabrik R return level
for channel 1.
That’s it.
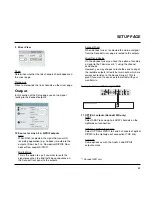
ROUTING MODES
31
Summary of Contents for Konnekt 24D
Page 1: ...User s Manual English Version Konnekt 24D Konnekt 8...
Page 2: ......
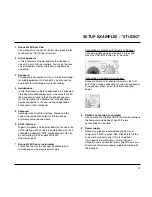
Page 18: ...SETUP EXAMPLES STUDIO 16...
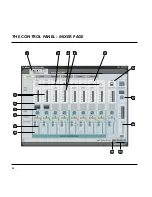
Page 24: ...THE CONTROL PANEL MIXER PAGE 22...
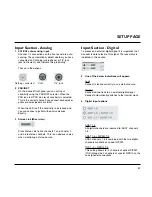
Page 28: ...SETUP PAGE 26...
Page 34: ...32...
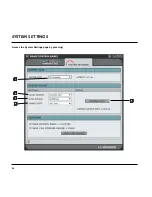
Page 36: ...SYSTEM SETTINGS 34 Access the System Settings page by pressing...


