


27
26
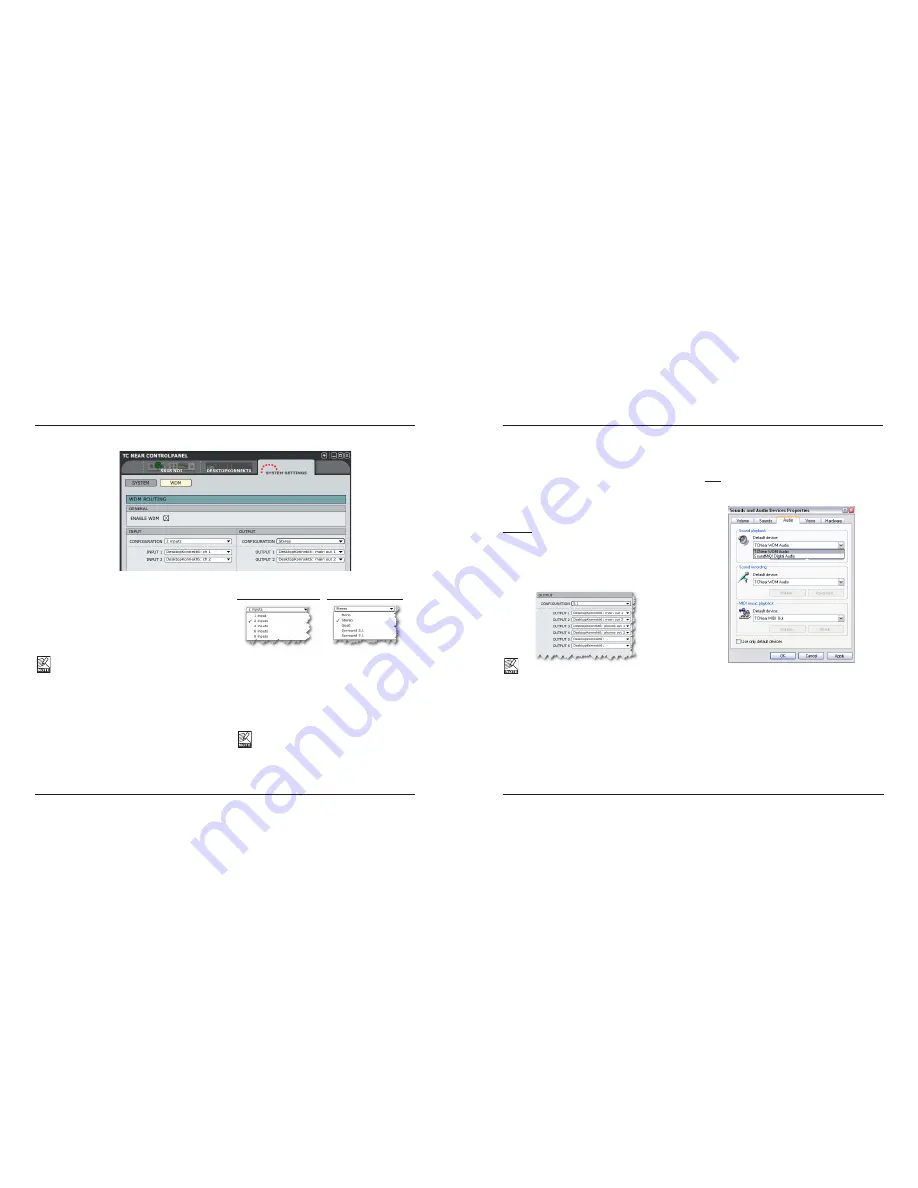
SYSTEM SETTINGS - WDM PAGE
(WINDOWS ONLY)
GENERAL
Enable WDM
WDM is Windows’ audio driver system, and is used for
Windows sounds, media player and other applications
that don’t support ASIO. Also, applications such as
PowerDVD use WDM as their audio driver system.
If your audio application supports ASIO, we
recommend using the ASIO driver.
INPUT/OUTPUT
Configuration
Desktop Konnekt 6 has two input channels and handles
up to four output channels.
Typically the Desktop Konnekt 6 would be used in
a regular stereo setup and therefore the default
configuration is “2 inputs” and “Stereo output”.
However, the following configurations are available:
Input Config. options
Output Config. options
Note - Always use “2 inputs” for the Desktop Konnekt 6.
Input
Assuming that Desktop Konnekt 6 is the only Konnekt
device connected to your computer, you can select
between “DesktopKonnekt6: ch1” and “DesktopKonnekt6:
ch2”.
If you have more than one Konnekt unit in your
system, the input channels from all units will
appear in this drop-down menu.
Output
Assuming that Desktop Konnekt 6 is the only Konnekt
device connected to your computer, you can select
between the following output channels for each output:
Desktop Konnekt6: main out 1
Desktop Konnekt6: main out 2
Desktop Konnekt6: phones out 1
Desktop Konnekt6: phones out 2
Example:
In the screenshot above, we have selected “stereo” as
the output configuration and “Main Out 1” and “Main Out
2” as Outputs 1 and 2 respectively.
If we had selected “5.1” as the output configuration, the
following options would have been available:
If you have more than one Konnekt unit in your
system, the output channels from all units will appear in
this drop-down menu.
Setting up WDM in Windows
To use Konnekt with WDM, you’ll need to tell Windows
that this is your intention.
Go to:
Control Panel/ Sounds and Audio Devices Properties/
Audio
Select “TCNear WDM Audio” for both Sound playback and
Sound recording.
Your Konnekt can handle both WDM and ASIO at the
same time. If you wish, you can listen to background
music from your media player or watch a DVD movie
while working with your audio application at the same
time.
SYSTEM SETTINGS - WDM PAGE
(WINDOWS ONLY)


