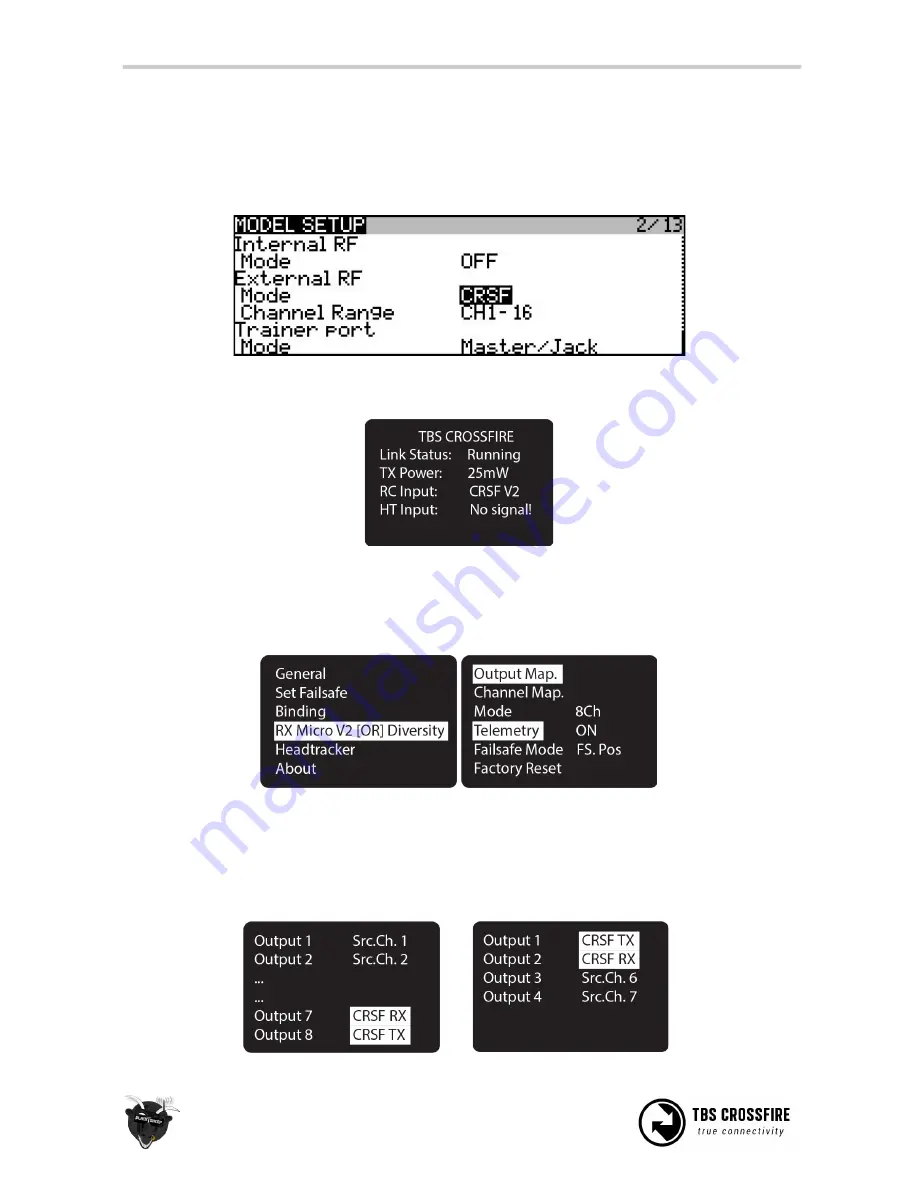
Setting
up
radio
for
CRSF
With
the
CROSSFIRE
transmitter
in
place
on
the
radio,
you
have
to
change
the
to
change,
or
make
sure,
that
the
internal
radio
is
OFF
and
the
external
radio
protocol
(between
the
radio
and
transmitter
module)
is
set
to
CRSF,
and
change
the
channel
range
to
only
the
number
you
need
(8/12.).
On
the
CROSSFIRE
transmitter
OLED
display,
you
should
now
see
“RC
Input:
CRSF”,
meaning
you
have
CRSF
enabled
and
running.
Setting
up
receiver
for
CRSF
With
the
CROSSFIRE
receiver
powered
and
connected,
go
into
the
settings
menu,
turn
“Telemetry”
to
“On”,
then
open
the
“Output
mapping”
screen.
On
the
CROSSFIRE
MICRO
V1,
only
CRSF
TX
will
be
available.
For
the
CROSSFIRE
DIVERSITY
RX,
change
“Output
8”
to
“CRSF
TX”
and
“Output
7”
to
“CRSF
RX”.
While
on
the
CROSSFIRE
MICRO
V2
RX,
change
“Output
1”
to
“CRSF
TX”
and
“Output
2”
to
“CRSF
RX”.
This
will
output
CRSF
on
the
respective
ports
on
the
receiver
pin
header.
5V
compatible.
Diversity:
Micro
V2:
37


