


TBK-DVR1100 Digital Video Recorder User Manual
42
Before you start
Ensure the network connection is valid and correct. For detailed checking and configuring of the
network, please see
Chapter 12 Network Settings.
OPTION 1:
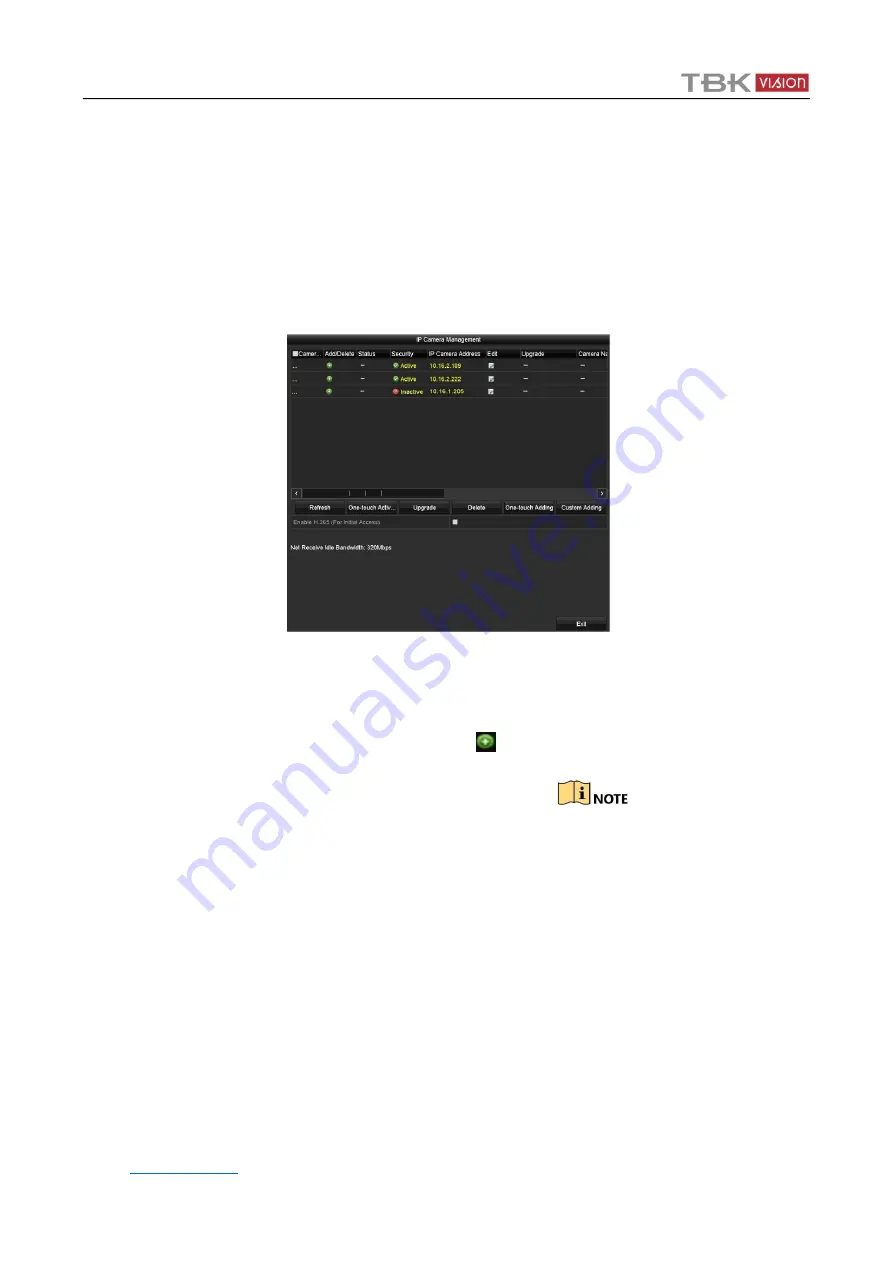
Step 1
Select the
Add IP Camera
option from the right-click menu in live view mode or click Menu>
Camera> IP Camera to enter the
IP Camera Management
interface.
Figure 2-4
IP Camera Management Interface
Step 2
The online cameras with same network segment will be detected and displayed in the
camera list.
Step 3
Select the IP camera from the list and click the
button to add the camera (with the
same admin password of the DVR’s). Or you can click the
One-touch Adding
button to add
all cameras (with the same admin password) from the list.
Make sure the camera to add has already been actiavted by setting the admin password, and the
admin password of the camera is the same with the DVR’s.
Step 4
(For the encoders with multiple channels only) check the
checkbox
of Channel Port in the pop-
up window, as shown in the following figure, and click
OK
to add multiple channels.


