background image

D01152220A

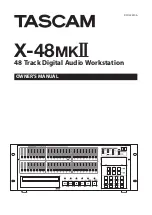
X-48

MK

"

48 Track Digital Audio Workstation

OWNER'S MANUAL

Summary of Contents for X-48MKII

Page 1: ...D01152220A X 48MK 48 Track Digital Audio Workstation OWNER S MANUAL...

Page 2: ...TEAC CORPORATION for compliance could void the user s authority to operate this equipment For U S A For European Customers 8 8 WARNING This is a Class A product In a domestic environment this product...

Page 3: ...to qualified service personnel Servicing is required when the apparatus has been damaged in any way such as power supply cord or plug is damaged liquid has been spilled or objects have fallen into th...

Page 4: ...ens DVD Less than 1 08mW Play and 102mW Record on the objective lens Wavelength 777 787 nm CD 656 663 nm DVD CAUTION DO NOT REMOVE THE PROTECTIVE HOUSING USING A SCREWDRIVER USE OF CONTROLS OR ADJUSTM...

Page 5: ...ate and time 18 Navigating the LCD Interface 18 Sample Rates 18 Digital Audio Clock 19 I O Settings 20 Analog I O Operating Level 20 Control Mode 20 MIDI Device ID 21 Sony 9 Pin 21 Video Reference 21...

Page 6: ...Tool 42 Selecting Editing 43 Selecting Clips 43 Selecting Time 43 In and Out Points 43 Clip Properties 43 Snap to Grid 43 Cut Copy Delete Paste 43 Repeat Paste 43 Crop 43 Insert Time 44 Delete Time 44...

Page 7: ...by connecting a display keyboard and mouse 6 TDIF digital input and output connectors support a total of 48 inputs and outputs at 96 kHz sampling frequency 2 option card slots for 24 channels of audio...

Page 8: ...m resolution a two button PC mouse PS 2 or USB and a PC keyboard PS 2 or USB Intellectual property rights TASCAM is a trademark of TEAC Corporation registered in the U S and other countries Microsoft...

Page 9: ...be damaged Cleaning the unit To clean the unit wipe it gently with a soft dry cloth Do not wipe with chemical cleaning cloths benzene paint thinner ethyl alcohol or other chemical agents to clean the...

Page 10: ...age the mechanism and cause it to malfunction Do not use cracked discs Only use circular compact discs Avoid using non circular promotional etc discs If you are in any doubt as to the care and handlin...

Page 11: ...standby A system prompt will confirm shutdown Holding the button down for several seconds will shut the unit off without a confirmation 7 System Lights These indicators light when sample locked to an...

Page 12: ...tswitch jack Compatible with a momentary footswitch like the TASCAM RC 30P for punch in punch out and so on NOTE To operate correctly a footswitch must be connected before the X 48MKII is powered on s...

Page 13: ...TASCAM X 48MKII 13 v Cooling fan Make sure that this fan is not blocked off in a rack to prevent overheating the system b AC IN jack Connect the included power cord here 2 Names and Functions of Parts...

Page 14: ...s S PDIF cables AES EBU When installed into an X 48MKII Slot an AES EBU digital I O card TASCAM IF AE24X will provide 24 channels of I O at normal sample rates 44 1k 48k or double speed sample rates 8...

Page 15: ...nd closed loop are supported Time Code There are two 1 4 TRS connectors on the rear of the X 48MKII used for sending and receiving time code LTC These connectors are balanced to allow for long cable r...

Page 16: ...tracks For example while eSATA itself is fast enough for high track counts the actual drive inside an external drive enclosure may be a low RPM drive not capable of high track counts Powering On Stand...

Page 17: ...Restore CD to reinstall the system 3 With the X 48MKII powered on insert the System Restore CD then restart the X 48MKII The VGA UI doesn t have to be displayed all that is required is power to open t...

Page 18: ...y to the list of hard drive management functions such as a Free Space display and disk formatting utility INP 1 24 Goes directly to input routing menus for inputs 1 through 24 In most cases these will...

Page 19: ...are connected together in a system and clock is correctly distributed from a central clock generator or one of the connected devices Invert Word Out Polarity Some manufacturers of digital audio equipm...

Page 20: ...IF Use the Sample rate conversion on S PDIF inputs checkbox to set whether or not the S PDIF input sampling rate is converted or not Front Panel Operation To configure the I O cards from the front pan...

Page 21: ...ick the Windows menu and select Settings 2 Click the Prefs tab 3 There are three settings under the Sony 9 pin heading Track Arm Punch Delay and Chase Control Front Panel Operation 1 Press the PREF bu...

Page 22: ...e following DNS server addresses should be already selected 11 Preferred DNS server and Alternate DNS server should be blank Press OK 12 Close the Local Area Connection Properties window 13 Select Sta...

Page 23: ...3 Press the 5 b buttons to see the free space on each of your drives 4 Press HOME when you re finished Drive Benchmarking Utility The X 48MKII includes a utility that you can use to test any connected...

Page 24: ...n 2 Use the 5 b buttons to select Qui ck Format and press CHNG 3 Select a drive using the 5 b buttons and press ENTER 4 The display will ask you if you want to format the drive Press ENTER YES Factory...

Page 25: ...ection To access this setting Mouse Keyboard Operation only 1 Open the Windows menu and select Settings 2 Select the System tab 3 Check or uncheck the Mixer Bypass checkbox Make a Default Project You...

Page 26: ...return to an old take of a recording using Undo or by editing the previous take The disadvantage to this method is that your hard drive is filled with Wave files If you imported all of these files int...

Page 27: ...the PREF button 2 Press the 5 b arrows until you select Auto Save and press CHNG 3 Press the 5 b buttons to select Onand press ENTER 4 Press the PREF button again press the Up button once to select Au...

Page 28: ...right side navigate to where you want to copy the project to i e a removable eSATA hard drive 4 When you re ready to begin copying press the button under the word Copy between the two panes Front Pane...

Page 29: ...nd button STOP Stops playback recording or loop playback PLAY Starts playback loop playback or loop recording RHSL Starts Rehearsal recording This simulates recording changing input monitor modes as s...

Page 30: ...PREF button Use the 5 b buttons to select Use Pre Post Ro l land press CHNG 2 Use the 5 b buttons to select Onand press Enter 3 Pre roll and Post roll times can also be changed in the Preferences menu...

Page 31: ...o indicate it is ready for record Front Panel Operation Press the Record Enable buttons on the front panel The Record indicator will flash on tracks that are ready to record Punch Crossfade Time To av...

Page 32: ...ES button to change the setting Pre Fader Post Fader selection Use the 5 b buttons to select Meter Mode and press the CHNG button Use the 5 b buttons to select Pre F ader or Post F ader and press the...

Page 33: ...Operation 1 First set the punch in and punch out points At the default setting the starting and ending points of the last recording are automatically set as the in and out points respectively You can...

Page 34: ...ple Remove Unused This removes audio regions that are not used in the project from the audio pool If you put a check next to the Delete unreferenced audio files item before clicking OK those audio fil...

Page 35: ...SE and destructive recording DEST REC status indicators appear blue when enabled Hard disk usage and remaining recording time CPU load Project name Changing part colors on the track screen Click Color...

Page 36: ...e chosen when first creating a project with consideration to what will be done with the final product Your choices are 44100 CD standard 48000 DVD standard 88200 2x CD standard 96000 2x DVD standard 4...

Page 37: ...l ock Inor BNC C l ock Out and press CHNG 2 Use the 5 b buttons to select a setting and press Enter BNC Word Clock Output Polarity This setting allows the Word Clock signal outphase to be reversed Th...

Page 38: ...at marker 2 and stops at marker 3 Cue number 3 uses markers 4 and 5 and so on Before enabling Theater Play mode a cue must be set within the project The total number of markers in a project must be ev...

Page 39: ...window see next section this setting tells the X 48MKII what to do Always Always tells the transport to shift to the correct timecode value even if it s in record If the threshold value is exceeded an...

Page 40: ...vi at i on and press CHNG 2 Watch the lock deviation When you re finished press the Exit or Home button Timecode Output Muting This setting is useful when the device receiving timecode cannot accept o...

Page 41: ...ck 24 track 48 track 24 track 44 1 kHz 16 bit 60 hr 33 min 121 hr 7 min 6 hr 33 min 13 hr 07 min 24 bit 40 hr 22 min 80 hr 44 min 4 hr 22 min 8 hr 44 min 32 bit floating 30 hr 16 min 60 hr 33 min 3 hr...

Page 42: ...e top left or top right corner and the tool changes to a horizontal line under a white arc This is the fade tool which allows you to add a fade in or fade out to a clip If clips on multiple tracks are...

Page 43: ...can also be muted or locked by clicking these checkboxes Locking a clip makes it impossible to edit until unlocked Another set of buttons in the Clip Properties window allow you to move the clip eithe...

Page 44: ...ry audio files from the undo history After doing this previous operations cannot be undone Moving clip borders and adjusting crossfades As shown below the following example of editing involves three c...

Page 45: ...to the left first Clip 1 Clip 2 Clip 3 17 Next drag to the right to adjust the position of the clip border Clip 1 Clip 2 Clip 3 Fade in fade out and crossfade curves Select the Object tool Double clic...

Page 46: ...mount of gain reduction that occurs after the audio crosses the threshold Attack and Release control the amount of time until gain reduction is fully functional and Soft applies a soft knee for extrem...

Page 47: ...of the typical uses for the subgroups is to combine tracks when you do not have enough mixer inputs for your session For example 17 tracks of percussion can be combined into a stereo group then sent...

Page 48: ...1000HD To mix on the X 48MKII 1 Click the Output field on the Master channel on the right side of this window This opens a menu of options Mouse over the Stereo Outputs submenu and choose SPDIF 2 Make...

Page 49: ...D SYNC IN connector Connector BNC Unbalance TTL level 75 termination auto on off selection WORD SYNC TRU WORD SYNC OUT connector Connector BNC Unbalance TTL level 75 MIDI IN MIDI OUT connector Connect...

Page 50: ...roduct In order to improve the product specifications and appearance could be changed without prior notice IF AN24X 24 channel analog input and output card with 96 kHz compatible connectors D sub 25 p...

Page 51: ...e Set the name of the X 48MKII File q Set X48 name Open the Launch External Application screen File q Launch External Application Launch MX View for MX 2424 units File q Launch MX View Launch TASCAM m...

Page 52: ...usive Options q Solo q Solo Exclusive Unsolo the selected track Options q Solo q Clear Solos Select disk usage display Options q Disk Usage Display q Disk Usage Select remaining recording time display...

Page 53: ...en Audio Pool screen Windows q Audio Pool Ctrl P Open Markers screen Windows q Markers Ctrl 3 Open I O Marker Properties screen Windows q I O Marker Properties Ctrl 4 Open Time Display screen Windows...

Page 54: ...Change setting items CLEAR HOME button Use to clear a setting or return to the LCD home position 5 b button Moves the cursor When SHIFT is active sets punch in and punch out points TC CHASE button Tur...

Page 55: ...Set track 41 48 input routings SYNC Sample Rate Set the sampling frequency Sample Clock Source Set the audio clock source BNC Clock In Set the word clock input frequency BNC Clock Out Set the word cl...

Page 56: ...ut Select the auto input mode Punch Crossfade Set the crossfade time when punch recording EDL Crossfade Shape Set the EDL crossfade shape type Overload LED Time Set how long the overload indicator lig...

Page 57: ...ck in Edit window Ctrl A Repeat Paste Ctrl Alt V Redo Ctrl Y Crop Ctrl U Insert Time Ctrl T Split Ctrl E Cycle through Edit Tools ESC or simultaneously press both mouse keys Select entire region in Ed...

Page 58: ...cord 3 on numeric keypad Stop recording spacebar Start stop playback spacebar Solo safe track Ctrl click on track solo enable button Punch In Out of Record Ctrl spacebar or F12 Stop recording do undo...

Page 59: ...TURE UPDATE RATE MOTION CONTROL TALLY VELOCITY TALLY RECORD MODE RECORD STATUS TRACK RECORD STATUS TRACK RECORD READY GLOBAL MONITOR RECORD MONITOR NOTE See the MIDI Machine Control 1 0 specifications...

Page 60: ...5939 Wallace Street Mississauga Ontario L4Z 1Z8 Canada TEAC MEXICO S A de C V http www teacmexico net Phone 52 55 5010 6000 R o Churubusco 364 Colonia Del Carmen Delegaci n Coyoac n CP 04100 M xico DF...

Reviews: