background image

IMPORTANT SAFETY INSTRUCTIONS

TASCAM  US-1641


1

3 – Installation

TASCAM  US-1641


1

Updating the firmware for the US-1641

TASCAM may release updates for the software that runs 
on the microchip inside the US-1641. This is commonly 
called “firmware”. When your US-1641 is plugged into the 
computer, the 

US-1641 Control Panel

 shows what firmware 

version the unit is currently running. Visit TASCAM’s 
website (http://www.tascam.com) to see if a newer version 
of the firmware is available. If so, you can download a 
firmware updater program for you computer that will 
update your US-1641’s firmware.

Preparation Step 1:


Install the latest driver on your PC or Mac computer.

Preparation Step 2:


Connect the US-1641 (for which firmware will be updated) 
to the computer via a USB cable.

The firmware updater varies with the firmware version 
of the unit.

For PC (Windows XP) users

Connect the US-1641 to the computer via a USB 
cable.

Run the firmware updater file (for PC) for the 
version to which you wish to update. 
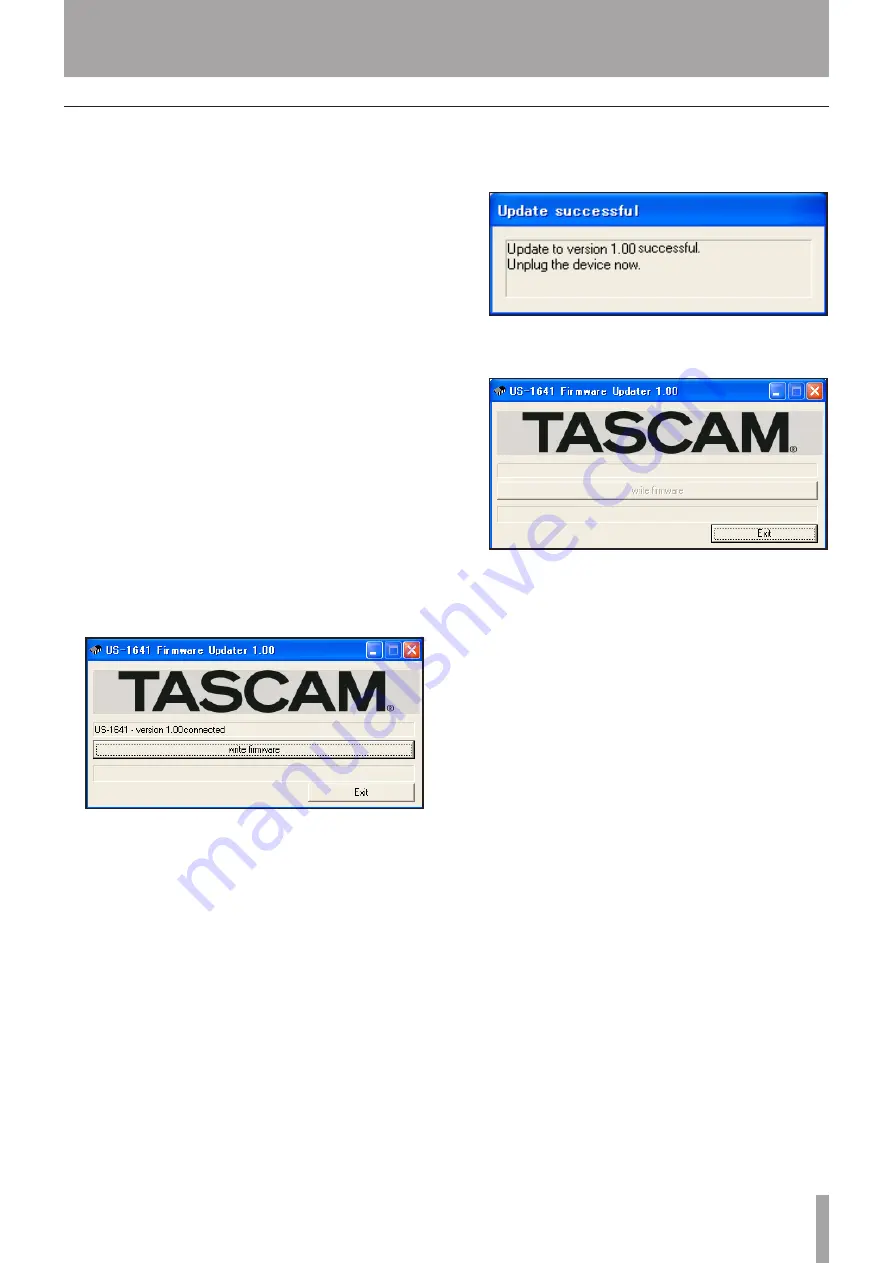
The system displays the following screen:

Click the 

write firmware

 button.

*

1�

2�

3�

When the update process is complete, the system 
displays the following screen:

Disconnect the USB cable from the US-1641. 
The system displays the following screen:

Click the 

Exit

 button to complete the update opera-

tion.

For Mac (OS X) users

Connect the US-1641 to the computer via a USB 
cable.

Run the firmware updater file (for Mac) for the 
version to which you wish to update.

Follow the steps for Windows PCs as described 
above. The screens displayed may appear slightly 
different from those shown above, but their content 
is essentially the same.

4�

5�

6�

1�

2�

3�

Summary of Contents for US-1641

Page 1: ...D01002220A US 1641 16x4 96k 24 bit USB Audio MIDI Interface OWNER S MANUAL...

Page 2: ...domestique cet appareil peut provoquer des interf rences radio dans ce cas l utilisateur peut tre amen prendre des mesures appropri es F r Kunden in Europa Warnung Dies ist eine Einrichtung welche di...

Page 3: ...ufacturer or sold with the apparatus When a cart is used use caution when moving the cart apparatus combination to avoid injury from tip over 13 Unplug this apparatus during lightning storms or when u...

Page 4: ...ck mounting kit to mount the unit in a standard 19 inch rack as shown below Remove the feet of the unit before mounting NOTE Leave 1U of space above the unit for ventilation Allow at least 10 cm 4 in...

Page 5: ...ing the firmware for the US 1641 13 Installing Cubase LE 4 14 Settings on your computer 16 4 Control Panel settings 17 Overview 17 Driver settings 17 Audio Performance Windows PC case 17 Sample Clock...

Page 6: ...conventions Controls and keys on the US 1641 are written like this MENU We use the term key to describe the push button controls on the US 1641 This typeface is used to designate on screen controllers...

Page 7: ...ed from a cold to a warm place or used after a sudden temperature change there is a danger of condensation vapor in the air could condense on the internal mechanism making correct operation impossible...

Page 8: ...phone jacks function as unbalanced guitar input jacks when the select switches are set to the GUITAR position and function as balanced line input jacks when the switches are set to the LINE IN positi...

Page 9: ...The received MIDI messages will be transmitted to the computer E INPUTS 11 14 jacks and LEVEL switches These are TRS 1 4 phone balanced line input jacks Use the LEVEL switches to set the nominal leve...

Page 10: ...use a system with at least 512 MB of memory However additional memory will enhance the operation of digital audio application software This product has been tested for use with typical computers that...

Page 11: ...a USB cable Insert the included driver installation CD ROM into the CD ROM drive on your computer Click the Install US 1641 Driver button when the menu screen below appears If this screen does not app...

Page 12: ...ith the USB cable When the screen below appears the installation is complete Click the Reboot now button to restart the computer After the computer has restarted select Start Settings Control Panel th...

Page 13: ...ware will be updated to the computer via a USB cable The firmware updater varies with the firmware version of the unit For PC Windows XP users Connect the US 1641 to the computer via a USB cable Run t...

Page 14: ...utton The system displays the License Agreement for end users Read the contents then select I accept the tems in the License Agreement if you agree to the terms Click the Next button 1 2 3 The system...

Page 15: ...on 8 The system displays a screen indicating that the Syncro Soft installation is complete Click the Finish button to finish the installation procedure NOTE When you start Cubase LE 4 for the first ti...

Page 16: ...rams Processing digital audio places a consider able load on your computer This means that if you are running other applications especially graphics or Internet tools at the same time as your audio ap...

Page 17: ...er buffer size will reduce the audio signal delay when you monitor the input signal but will require your computer to perform the processing faster If the process ing does not occur in time e g if the...

Page 18: ...t of the US 1641 to your speakers via an amp or headphones so you will be able to monitor the audio signals coming into the US 1641 or signals being output from your computer Mic Connect your micropho...

Page 19: ...als selectable in the US 1641 Control Panel On the other hand you can input S PDIF signals to the DIGITAL IN jack Headphones Connect a set of stereo headphones to the PHONES jack 1 4 stereo phone jack...

Page 20: ...rt is auto matically selected If necessary you can change the device port The device port pull down list indicates all available input ports for the US 1641 1 2 3 4 Select the Outputs tab then set the...

Page 21: ...desired input bus in the Input field located in the upper right corner Click the REC FUNCTION button to turn it on the button indicator will light 1 2 Press the REC button in the transport section to...

Page 22: ...ubase LE 4 22 TASCAM US 1641 Mixdown Move the left and right locators to specify the region that you want to mix down From the File menu choose Export Audio Mixdown 1 2 In the Export Audio Mixdown dia...

Page 23: ...pling rate of your project be set to 48 kHz If your ultimate objective is to create a CD TASCAM recommends that the sampling rate be set to 44 1 kHz from the beginning To specify the sampling rate cho...

Page 24: ...put impedance 10k Nominal input level with the Gain knobs set at maximum 42dBu Nominal input level with the Gain knobs set at minimum 4dBu Headroom 16dB With the LINE IN GUITAR switch set to GUITAR Ty...

Page 25: ...Balanced Tip hot Ring cold Sleeve ground Output impedance 100 Nominal output level 4dBu Maximum output level 24dBu PHONES jack analog Connector 1 4 stereo phone jack Tip L Ring R Sleeve ground Maximu...

Page 26: ...minimum gain maximum input level excluding GUITAR IN Crosstalk 1kHz 90dB Host computer compatibility Operating system Windows 32 bit Windows XP SP2 or 32 bit Vista Macintosh Mac OS X version 10 4 or l...

Page 27: ...IMPORTANT SAFETY INSTRUCTIONS TASCAM US 1641 27 8 Specifications TASCAM US 1641 27 Dimensions...

Page 28: ...5939 Wallace Street Mississauga Ontario L4Z 1Z8 Canada TEAC MEXICO S A De C V Phone 52 555 581 5500 www tascam com Campesinos No 184 Colonia Granjes Esmeralda Delegacion Iztapalapa CP 09810 Mexico DF...

Reviews: