


42
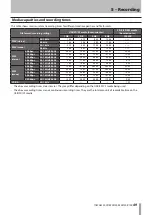
TASCAM SS-CDR200/SS-R200/SS-R100
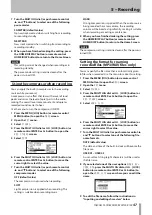
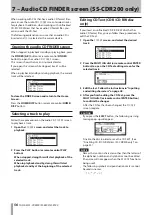
3 Select
OTHERS
.
4 Press the MULTI JOG dial or
,
[LOCK] button (or
remote control ENTER or
t
button) to open the
REC OTHERS
screen.
5 Select
SRC
.
6 Press the MULTI JOG dial or
,
[LOCK] button (or
remote control ENTER or
t
button) to move the
cursor right to select the value.
7 Turn the MULTI JOG dial (or press the remote
control
5
and
b
buttons) to set it to
ON
(default
value:
OFF
).
8 When you have finished making the setting, press
the HOME/DISPLAY button (or remote control
HOME/DISP button) to return to the Home Screen.
NOTE
If a digital signal with a sampling frequency that
•
differs from the sampling frequency specified in the
REC FORMAT
item is being received at the
DIGITAL
IN
jack, and you attempt to record with
SRC
off, an
FS
UNMATCH
error message will appear.
The sampling rate converter (SRC) setting is retained
•
even after the power is turned OFF.
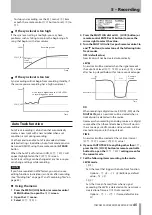
Monitoring the input signal
When you press the front panel or remote control
RECORD
button to enter recording standby, the
RECORD
and
READY
buttons light, and the input signal will be
output from the various output jacks (headphones, analog
balanced, analog unbalanced and digital). In addition, the
meters on the home screen will show the input level.
To end recording standby, press the front panel or remote
control
STOP
button.
TIP
If you simply want to monitor the input signal without
•
intending to record anything, press the
RECORD
key
without any media in the current device.
MONITOR
will
appear on the display, and the
RECORD
button will
blink red.
To stop monitoring the input signal, press the
•
STOP
button on the front panel or remote control.
Adjusting the input signal level and
balance
You can use the menu to adjust the level and balance of
the input signal.
Follow the instructions in the “Monitoring the input
signal” section above to enable monitoring of the input
signal, and then follow these procedures.
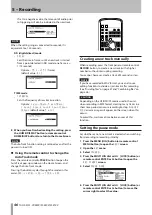
1 Press the MENU [JOG] button (or remote control
MENU button) to open the
MENU
screen.
2 Open the
REC
menu.
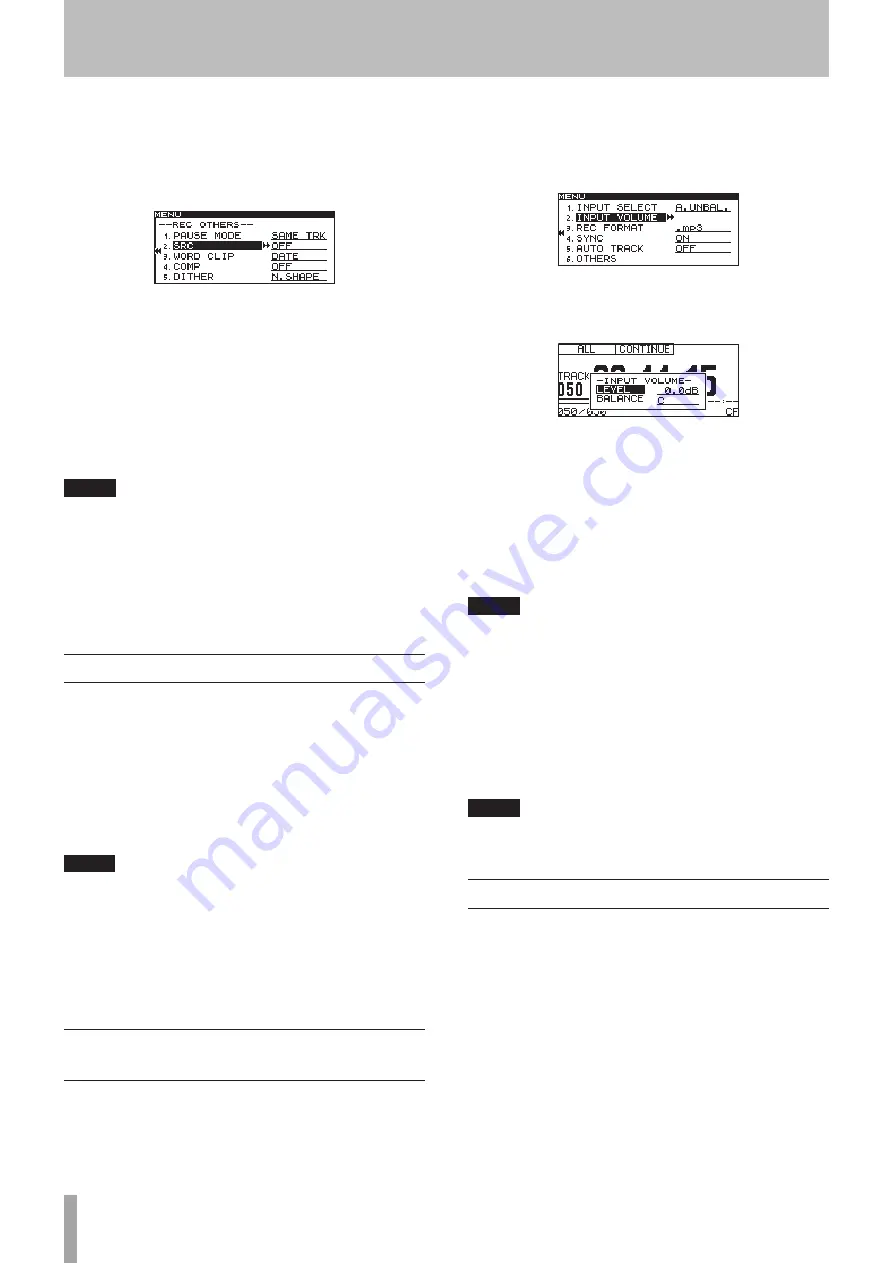
3 Select
INPUT VOLUME
.
4 Press the MULTI JOG dial or
,
[LOCK] button (or
remote control ENTER or
t
button) to open a pop-
up with the
INPUT VOLUME
settings.
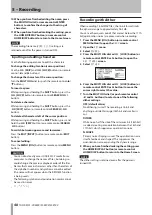
5 Set the following
INPUT VOLUME
items.
LEVEL
Adjust the input level.
Options:
–inf
,
–54dB
–
0.0dB
(default value) –
+18dB
BALANCE
Adjust the input balance.
Options:
L50
–
C
(center, default value) –
R50
NOTE
The level meter will show
•
OVER
at
–0.2 dBfs
.
Since the level meter appears on the Home Screen at
•
the top of the display, you can check the input level as
you adjust it. Set the level as high as possible without
making the
OVER
indicator to the right of the meter
appear.
6 When you have finished making the setting, press
the HOME/DISPLAY button (or remote control
HOME/DISP button) to return to the Home Screen.
NOTE
The input
LEVEL
and
BALANCE
settings are retained even
after the power is turned OFF.
Basic recording operations
You can begin recording after you have finished making
the above settings (input source selection, recording file
format setting, sampling rate converter ON/OFF, input
level adjustment).
To start recording standby from a stopped state:
Press the front panel or remote control
RECORD
button
to put the unit in recording standby (The
RECORD
and
READY
buttons light).
To start recording from recording standby:
Press the front panel or remote control
PLAY
button.
To switch from recording to recording standby:
Press the front panel or remote control
READY
button.
5 – Recording


