background image

TASCAM SS-CDR200/SS-R200/SS-R100  

43

To stop recording: 

Press the front panel or remote control 

STOP

 button. 

When you stop recording, the recorded data will be 

written and an audio file will be created.

NOTE

You can use the 

• 

WORD CLIP

 item in the 

REC OTHERS


menu to set the audio file name that is automatically 

added to files when they are created. (See “Setting the 

format for naming recorded files” on page 47.)
The maximum size of each track is 2 GB.

• 

The recorded track will be created in the current folder. 

• 

(See “Folder operations” on page 51.)

CAUTION

While the recorded content is being written to the 

recording media, 

INFORMATION WRITING

 will appear 

the display. While this message is shown, do not move 

the unit, turn off the power or remove the media from the 

current device. The recorded content will not be able to 

be saved correctly if you do so.

Finalizing CD-R/CD-RW discs 

(SS-CDR200 only)

After you have recorded to a CD-R or CD-RW disc, you will 

need to finalize the disc before the disc can be played 

back by a CD player or CD drive other than this unit. The 

finalization procedures using this unit depend on whether 

the file format is MP3 or audio CD.

With MP3 format recordings: 

The unit will automatically finalize the CD-R/CD-RW disc 

when you eject it. This means that once you remove a 

disc that was recorded in MP3 format, you will not be able 

to add recordings to that disc. In addition, if you turn off 

the power without ejecting the CD-R/CD-RW disc, the 

unit will automatically finalize the disc the next time it is 

powered-on.
You can also use the menu to finalize the disc without 

ejecting it. (See “Finalizing discs” below.)

With audio CD format recordings: 

If you have recorded in audio CD format, the unit will not 

automatically finalize the disc. You will be able to make 

additional recordings on that disc (as long as there is free 

space remaining on the disc) until you finalize the disc 

using the menu. However, the disc will not be playable 

on other devices until you finalize it. For details on how to 

finalize, refer to the following section.

Finalizing discs

As explained above, in order for a CD-R/CD-RW disc 

recorded by the unit in audio CD format to be playable 

on another device, that CD must be finalized manually. 

Moreover, although discs recorded in MP3 format will be 

finalized automatically when ejected, as described above, 

you can also finalize a disc manually without ejecting it.

In either case, follow these procedures to finalize a disc. 

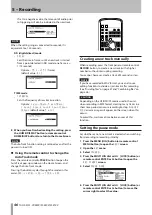
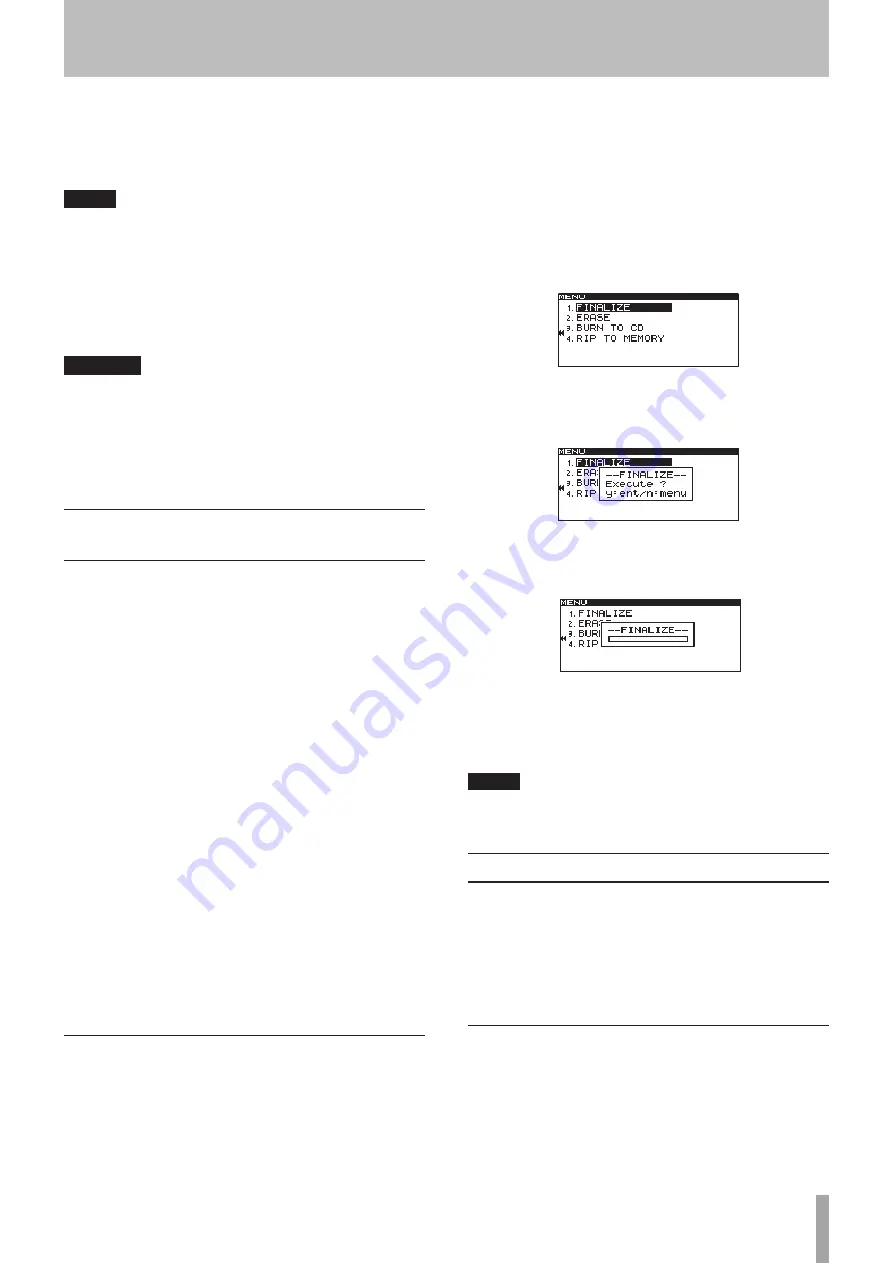
1  Press the DEVICE button (or remote control DEVICE 

SELECT button) to open the 

DEVICE SELECT


screen, and select 

CD

. (See “Selecting the device 

used” on page 26.)

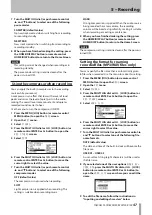
2  Press the MENU [JOG] button (or remote control 

MENU button) to open the 

MENU

 screen. 

3  Open the 

CD

 menu. 

4  Select 

FINALIZE

5  Press the MULTI JOG dial or 

,

 [LOCK] button (or 

remote control ENTER button or 

t

 button). 

A confirmation pop-up message appears. 

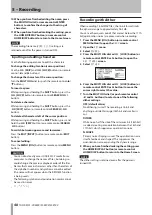
6  Press the MULTI JOG dial or 

,

 [LOCK] button (or 

remote control ENTER button or 

t

 button) again 

to start finalization.


-- FINALIZE --

 and a progress bar are displayed in 

a pop-up during finalization. 
When finalization is completed, the 

CD

 menu will 

reopen.

NOTE

You can unfinalize a finalized CD-RW disc. (See 

“Unfinalizing CD-RW discs” on page 69.)

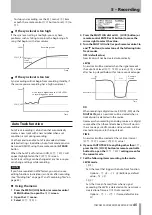
Sync recording

If the sync recording function is ON, recording will begin 

automatically when the input signal exceeds the level set 

in advance (SYNC LEVEL). After recording has begun, if the 

input signal stays below the sync level for the specified 

length of time (STOP TIME), the unit will end recording 

and switch to recording standby automatically.

Sync settings

Use the menu to turn the sync recording function ON/

OFF and to make detailed settings. You can also use the 

remote’s SYNC key to turn this function ON/OFF.
When the sync recording function is on, 

SYNC REC

 will 

appear highlighted on the 

FUNCTION

 screen.

5 – Recording

Summary of Contents for SS-CDR200

Page 1: ...SS CDR200 Solid State CD Stereo Audio Recorder SS R200 SS R100 Solid State Stereo Audio Recorder D01155420A OWNER S MANUAL...

Page 2: ...xpressly approved by TEAC CORPORATION for compliance could void the user s authority to operate this equipment For U S A In North America use only on 120V supply For European Customers WARNING This is...

Page 3: ...ll instructions 5 Do not use this apparatus near water 6 Clean only with dry cloth 7 Do not block any ventilation openings Install in accordance with the manufacturer s instructions 8 Do not install n...

Page 4: ...USTMENTS OR PERFORMANCE OF PROCEDURES OTHER THAN THOSE SPECIFIED HEREIN MAY RESULT IN HAZARDOUS RADIATION EXPOSURE IF THIS PRODUCT DEVELOPS TROUBLE CONTACT YOUR NEAREST QUALIFIED SERVICE PERSONNEL AND...

Page 5: ...TASCAM SS CDR200 SS R200 SS R100 5 For China SS CDR200 SS R200 SS R11 Safety Information...

Page 6: ...se 27 Panel lock function 27 4 Playback 28 Files that can be played 28 Tracks and files 28 Play area 28 Setting the play area 28 Selecting the current folder or current playlist 29 Playback modes 29 S...

Page 7: ...media only 60 Overview 60 Open the USER PLAYLIST screen 60 Navigating the playlist screen 60 Using the playlist FINDER MENU 61 Adding files to playlists 61 Removing files from playlists 62 Moving a f...

Page 8: ...ed using playlists and folders Track editing WAV files only Built in clock for time stamping Balanced SS CDR200 SS R200 only and unbalanced analog audio inputs and outputs Coaxial digital audio inputs...

Page 9: ...fications for such data and or information TEAC Corporation disclaims any warranty that any use of such data and or information shall be free from infringement of any third party s intellectual proper...

Page 10: ...uses USB memory SD cards and CF cards for playback and recording Microdrives cannot be used with this unit The capacities and performance of your unit will vary based on the speed and abilities of th...

Page 11: ...ed with the disc or contact the disc manufacturer directly About CD R and CD RW discs CD R discs can be recorded once only Once they have been used for recording they cannot be erased or re recorded H...

Page 12: ...pressing and holding the SHIFT button to set the jog playback mode See Jog playback on page 31 When in menu mode press to go back one menu level 7 EDIT INPUT button Press this button to put the unit...

Page 13: ...he key level Press this while pressing and holding the SHIFT button to turn key control ON OFF See Key control playback on page 33 e PHONES jack knob Use this standard stereo jack to connect stereo he...

Page 14: ...ecording standby The button blinks when jogging during playback When in playback standby press this button to search for the call point point from where playback last started from playback standby and...

Page 15: ...ctor See Link playback connections on page 38 DIGITAL OUT COAXIAL This digital output jack can output IEC60958 3 S PDIF and AES3 2003 IEC60958 4 AES EBU formats according to the unit s setting To link...

Page 16: ...See Opening the FINDER screen on page 50 and Editing the playlist USB SD CF media only on page 60 w MENU button This has the same function as the front panel MENU JOG button e SEARCH m and buttons The...

Page 17: ...MULTI JOG dial f RECORD button This has the same function as the front panel RECORD button g CALL button Searches for the call point point from where playback last started from playback standby and s...

Page 18: ...being played back NOTE When stopped the total playback time of the play area is always shown regardless of the current Home Screen display mode When using a CD R CD RW disc with MP3 or WAV files that...

Page 19: ...8 File type Shows the current recording file format 9 Current device Shows the currently selected device 0 Total recording position Shows the current recording position as a bar As recording elapses...

Page 20: ...o change the input level After changing the setting press the MULTI JOG dial or remote control ENTER button to confirm the setting Menu structure Press the MENU JOG button or the MENU button on the in...

Page 21: ...THER Dither setting Page 48 Menu operation basics You can perform the following operations in the menus To select an item vertically on the screen Turn the MULTI JOG dial Use the cursor 5 and b button...

Page 22: ...operation Press the ENTER or t button 6 Select the item on the SYNC screen to set Front panel operation Turn the MULTI JOG dial to select the item Remote control operation Use the 5 and b buttons to s...

Page 23: ...or example use a thick cable with a high current capacity to minimize variation in the power voltage Computer RS 232C port COM port etc SS CDR200 SS R200 only DIGITAL OUT COAXIAL DIGITAL IN COAXIAL Di...

Page 24: ...t in clock 1 Press the MENU JOG button or remote control MENU button to open the MENU screen 2 Open the UTILITY menu NOTE The screen above is an example from an SS CDR200 or SS R200 unit The SS R100 d...

Page 25: ...he appropriate card slot on the front panel to use it for playback and recording NOTE You can insert SD and CF cards regardless of whether the power is ON or OFF 1 Pull the card slot door forward to o...

Page 26: ...umber of tracks and total playback time of an audio CD will be shown The total number of tracks in the current folder of a data CD will be shown CAUTION Discs cannot be inserted when the power is OFF...

Page 27: ...and select the device with the media that you want to format See Selecting the device used on page 26 2 Press the MENU JOG button or remote control MENU button to open the MENU screen 3 Open the UTIL...

Page 28: ...etting the A B repeat A point a discrepancy could occur between the point set and the point used when playback is started Tracks and files Audio data is saved on the media as audio files These files a...

Page 29: ...playback mode appears in the playback mode indication area at the top of the Home Screen All tracks in the play area will play back in random order without regard to their track numbers When all track...

Page 30: ...o start playback of the selected track You cannot use the number buttons on the remote to specify the track while in program or random mode Searching backward and forward You can search forward or bac...

Page 31: ...e time from the beginning of the track is less than the skip time when you press the m SKIP button or remote control SEARCH m button the unit will locate to the beginning of the current track If the t...

Page 32: ...you attempt to program a 100th track a PROGRAM FULL warning message pop up will appear If the total time of the programmed tracks exceeds 99 hours 59 minutes 59 seconds will appear on the display In P...

Page 33: ...ing the KEY LEVEL it is shown in a pop up on the Home Screen You can set the KEY LEVEL in a range from 6 1 0 no pitch change 1 6 NOTE When using the key control function the playback may sound irregul...

Page 34: ...ack starting point A will be cancelled 2 Once again press the FINDER A B button while pressing and holding the SHIFT button or remote control A B button to set the ending point B of the repeat playbac...

Page 35: ...e beginning of the next track NOTE If the Auto Cue function is ON playback standby will occur when sound starts in the next track rather than at the beginning of track When starting playback with the...

Page 36: ...control ENTER or t button to open the PLAY OTHERS menu 5 Select MONO MIX 6 Press the MULTI JOG dial or LOCK button or remote control ENTER or t button to move the cursor to the right and select the se...

Page 37: ...mote control 5 and b buttons to set it to ON default value OFF 8 When you have finished making the setting press the HOME DISPLAY button or remote control HOME DISP button to return to the Home Screen...

Page 38: ...it to MASTER or SLAVE as appropriate Options OFF default value MASTER SLAVE 8 When you have finished making the setting press the HOME DISPLAY button or remote control HOME DISP button to return to t...

Page 39: ...parallel connector SS CDR200 SS R200 only If you are using a PS 2 or USB keyboard you can press CTRL and a function key F1 F12 to flash start tracks 1 12 see Keyboard operation list on page 73 If you...

Page 40: ...s on a data CD See Creating data CDs on page 65 Automatic protection against unintentional power interruptions If an unintentional power interruption occurs when recording to USB SD CF media the prote...

Page 41: ...ntrol MENU button to open the MENU screen 2 Open the REC menu 3 Select REC FORMAT 4 Press the MULTI JOG dial or LOCK button or remote control ENTER or t button to move the cursor right to select the v...

Page 42: ...ote control Adjusting the input signal level and balance You can use the menu to adjust the level and balance of the input signal Follow the instructions in the Monitoring the input signal section abo...

Page 43: ...at disc as long as there is free space remaining on the disc until you finalize the disc using the menu However the disc will not be playable on other devices until you finalize it For details on how...

Page 44: ...conds 8 When you have finished making the setting press the HOME DISPLAY button or remote control HOME DISP button to return to the Home Screen NOTE The sync recording setting is retained even after t...

Page 45: ...NU button to open the MENU screen 2 Open the REC menu 3 Select AUTO TRACK 4 Press the MULTI JOG dial or LOCK button or remote control ENTER or t button to move the cursor right to select the value 5 T...

Page 46: ...rder OFF q LEVEL q DD q TIME q OFF Creating a new track manually When recording press the front panel or remote control RECORD button to create a new track with a higher number without interrupting re...

Page 47: ...r is not used when recording SOFT Light compression is applied when recording This setting is suitable when recording music HARD Strong compression is applied When the audio source being recorded has...

Page 48: ...ous playback order of the files Names that contain characters other than the letters of the alphabet numbers and symbols cannot be edited the name will not appear when the RENAME function is being use...

Page 49: ...0 40 141 20 12 25 192 kbps 44 1 kHz 48 kHz 11 40 23 20 46 40 93 20 8 15 256 kbps 44 1 kHz 48 kHz 8 50 17 40 35 20 70 40 6 10 320 kbps 44 1 kHz 48 kHz 7 00 14 00 28 00 56 00 4 55 MP3 mono 64 kbps 44 1...

Page 50: ...opens When in playback standby regardless of the play area setting the FINDER screen for the folder that contains the currently selected file opens and the current file is highlighted NOTE The curren...

Page 51: ...I JOG dial or remote control ENTER button to open the folder FINDER MENU pop up Turn the MULTI JOG dial or push remote control 5 b buttons to select the desired item and press the MULTI JOG dial or re...

Page 52: ...ited the name will not appear when the RENAME function is being used The following symbols and punctuation marks cannot be used in names Editing file names USB SD CF media only 1 Select the file that...

Page 53: ...open the FINDER screen and turn the MULTI JOG dial or push remote control 5 b buttons to select ADD PLAYLIST 2 Press the MULTI JOG dial or remote control ENTER button to open the ADD PLAYLIST screen...

Page 54: ...e control ENTER button to open the NEW FOLDER screen 3 Input the folder name Follow the instructions in Inputting and editing characters on page 48 4 When you have completed inputting the folder name...

Page 55: ...dial and m SKIP and LOCK buttons or remote control 5 b g and t buttons to navigate the FINDER screen and open the destination folder If you move the cursor to where a file name is shown the file moved...

Page 56: ...control PLAY button When stopped doing this will start playback of the selected track When in playback standby doing this will start playback standby at the beginning of the selected track Editing CD...

Page 57: ...nu pop up 3 Turn the MULTI JOG dial or press the remote control 5 and b buttons to select DELETE 4 Press the MULTI JOG dial or remote control ENTER button A confirmation pop up message appears To dele...

Page 58: ...two WAV files that have different sampling rates or different numbers of channels You can undo the COMBINE operation after executing it See Undoing EDIT menu operations on page 59 1 Use the PLAY m SK...

Page 59: ...tton to open the EDIT menu pop up 2 Turn the MULTI JOG dial or press the remote control 5 and b buttons to select UNDO 3 Press the MULTI JOG dial or remote control ENTER button A confirmation pop up m...

Page 60: ...ee playlists PLAYLIST 01 PLAYLIST 03 are shown The numbers of files tracks in each playlist are shown to their right When the PLAYLIST EDIT or USER PLAYLIST screen is open turn the MULTI JOG dial or p...

Page 61: ...n to remove the file from the playlist or press the FINDER A B button or remote control FINDER button to cancel removal INFORMATION Shows the number of tracks in the playlist and its total playback ti...

Page 62: ...ge appears 5 Press the MULTI JOG dial or remote control ENTER button to remove the file s To cancel removal press the FINDER A B button or remote control FINDER button Moving a file in a playlist You...

Page 63: ...e unit 1 Press the MENU JOG button or remote control MENU button to open the MENU screen 2 Open the CD menu 3 Select BURN TO CD 4 Press the MULTI JOG dial or remote control ENTER button to open a pop...

Page 64: ...ore tracks choose ADD TRACK and press the MULTI JOG dial or remote control ENTER button to return to step 9 If you have completed selecting tracks select BURN EXECUTE and press the MULTI JOG dial or r...

Page 65: ...ll not appear CD Data format will be selected automatically 8 Press the MULTI JOG dial or remote control ENTER button to open the FINDER screen for the selected media 9 Select the folder or file from...

Page 66: ...hem to USB SD CF media You can copy files from a CD to USB SD CF media with or without conversion When copying from an audio CD to the media each track file will be converted into the format you speci...

Page 67: ...ger shown If you are selecting only one file or folder there is no need to press the FUNCTION button or remote control FUNC button After selecting the desired file proceed to step 10 10 When you have...

Page 68: ...e or folder there is no need to press the FUNCTION button or remote control FUNC button After selecting the desired file proceed to step 5 8 When you have selected all of the files you want to copy pr...

Page 69: ...e remote control 5 and b buttons to select Unfinalize 6 Press the MULTI JOG dial or remote control ENTER button A confirmation pop up message appears 7 Press the MULTI JOG dial or remote control ENTER...

Page 70: ...button again to start erasing tracks ERASE and a progress bar appear in a pop up while tracks are being erased After the tracks have been erased the CD menu will reopen NOTE When erasing tracks on a...

Page 71: ...with the RC 3F MODE item Footswitch mode functions The functions of the footswitches in each mode are as follows MODE Footswitch L press C press R press L press and hold C release R press and hold 1...

Page 72: ...s backup memory to the settings they had when shipped from the factory Follow these steps using the menu to restore the settings NOTE The factory settings cannot be restored if media is loaded in the...

Page 73: ...g text into a computer To edit the name of a file or folder from the FINDER screen open its FINDER MENU and select RENAME to open the RENAME screen To select the case As when using a computer use the...

Page 74: ...rack 11 Ctrl F12 After completing flash loading start flash start playback of track 12 Ctrl E Same as the EJECT button Ctrl I Select the input source Ctrl J Turn jog playback mode ON Ctrl K Set the sk...

Page 75: ...the parallel connector Using the CONTROL I O PARALLEL connector you can control this unit through serial connection with a TASCAM RC SS20 or other external controller The pin assignments are as follow...

Page 76: ...ng fader start stop START STOP Pin 1 FADER START Pin 8 GND PARALLEL 4 Pin 22 24 Device Select Tally 1 2 Depending on the high low settings of pins 22 and 24 the device assignment will be as follows 22...

Page 77: ...will appear on the display After appearing for about two seconds warning messages automatically disappear 1st line 2nd line Meaning 1 caution CAN T UNDO Undo is not possible because no undoable edit e...

Page 78: ...messages will appear in the time display area 1st line Meaning 1 POWER ON The system is starting up and initializing 2 DEVICE ERROR The device cannot be detected Please contact TASCAM customer support...

Page 79: ...em and check the volume of the amplifier Unable to record Confirm the connections Adjust the recording level If the media does not have enough open space erase unneeded data to make more space or chan...

Page 80: ...ector RCA pin jack Output impedance 200 Nominal output level 10 dBV 0 316 Vrms Maximum output level 6 dBV 2 0 Vrms If you want to change the maximum balanced input and output levels please contact TAS...

Page 81: ...input source input volume recording file format sync recording auto track increment pause mode sampling rate converter recording file name compressor dither display and indicator brightness keyboard t...

Page 82: ...2mm 482 6mm 44mm 0 5mm 31 8mm 280mm 14 8mm 6 2mm 465mm 432 6mm 41 6mm Illustrations in this manual might differ in part from actual products In order to improve the products specifications and appear...

Page 83: ...TASCAM SS CDR200 SS R200 SS R100 83 Notes...

Page 84: ...890 9888 5939 Wallace Street Mississauga Ontario L4Z 1Z8 Canada TEAC MEXICO S A de C V http www teacmexico net Phone 52 55 5010 6000 R o Churubusco 364 Colonia Del Carmen Delegaci n Coyoac n CP 04100...

Reviews: