24
TASCAM SS-CDR200/SS-R200/SS-R100
Turning the power ON/OFF
Press the front panel
POWER
switch to turn the power
ON.
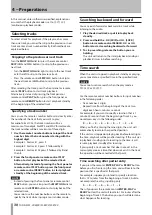
Startup screen
Home Screen
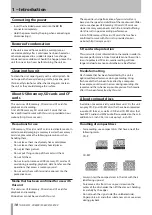
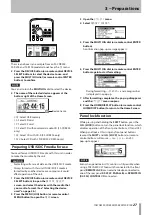
The unit starts up and the startup screen appears. (The
example above is from an SS-CDR200.)
If no media is loaded in the current device, a
NO MEDIA
message appears.
If media is loaded in the current device, a
MEDIA
READING
message appears while the unit reads the
media. When completed, the Home Screen opens.
Turning the power OFF:
Press the
POWER
switch to turn the power OFF. No special
shutdown procedures are necessary.
CAUTION
Do not turn the power OFF when the unit is in use
(recording, playing back, writing data to USB/SD/CF
media, etc.). Doing so could cause recording to fail,
recorded data to be damaged, sudden loud noise to
be emitted from monitoring equipment, damage to
equipment and harm to hearing.
Setting the date and time
The date and time is added to the recorded file based on
the built-in clock.
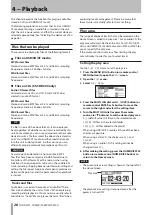
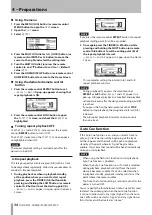
1 Press the MENU [JOG] button (or remote control
MENU button) to open the
MENU
screen.
2 Open the
UTILITY
menu.
NOTE
The screen above is an example from an SS-CDR200 or
SS-R200 unit.
The SS-R100 does not have the
5.RS-232C
menu item.
3 Select
CLOCK ADJUST
.
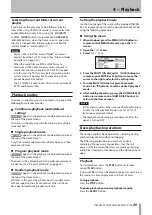
4 Press the MULTI JOG dial or
,
[LOCK] button (or
remote control ENTER or
t
button) to open the
CLOCK ADJUST
screen.
5 Set the date and time with the following
operations.
Use the
•
m
[SKIP]
and
,
[LOCK]
buttons (or
remote control
g
and
t
buttons) to select the item
you want to set.
Turn the
•
MULTI JOG
dial (or press the remote
control
5
and
b
buttons) to change the selected
item.
6 After making the setting, press the MULTI JOG dial
(or remote control ENTER button) to confirm the
date and time and return to the
UTILITY
menu.
7 Press the HOME/DISPLAY button (or remote control
HOME/DISP button) to return to the Home Screen.
Adjusting the display
You can adjust the display contrast and brightness as
necessary.
Adjusting the display contrast
While pressing and holding the
SHIFT
button, turn the
MULTI JOG
dial (or press the remote control
LCD –/+
buttons) to adjust the display contrast.
3 − Preparations

