TASCAM 2488MKII
5 − Mixer
If the fader matching setting is changed from the factory
setting REAL, to JUMP or CATCH as described below,
then fader data will be recalled together with scenes.
Immediately after recall, though, the physical fader posi-
tions may not match the internal fader values and the
initial effect of a moving a physical fader then depends on
the fader matching mode.
Change the fader matching setting with the FADER
MATCHING item on the MIXER screen of the
PREFERENCE menu. Choose one of the following three
options (see
REAL mode (factory setting):
The internal faders are always controlled by the physical faders.
In other words, the internal faders and physical faders are
always matched. Scene recall does not recall fader values,
and MIDI cannot be used to control faders.
JUMP mode:
The moment a physical fader is moved, it takes control of
the level, sending its value to the internal fader.
CATCH mode:
The moment a physical fader reaches the value equal to the
current internal fader value, it takes control of the level.
Matching the physical faders with
internal fader values
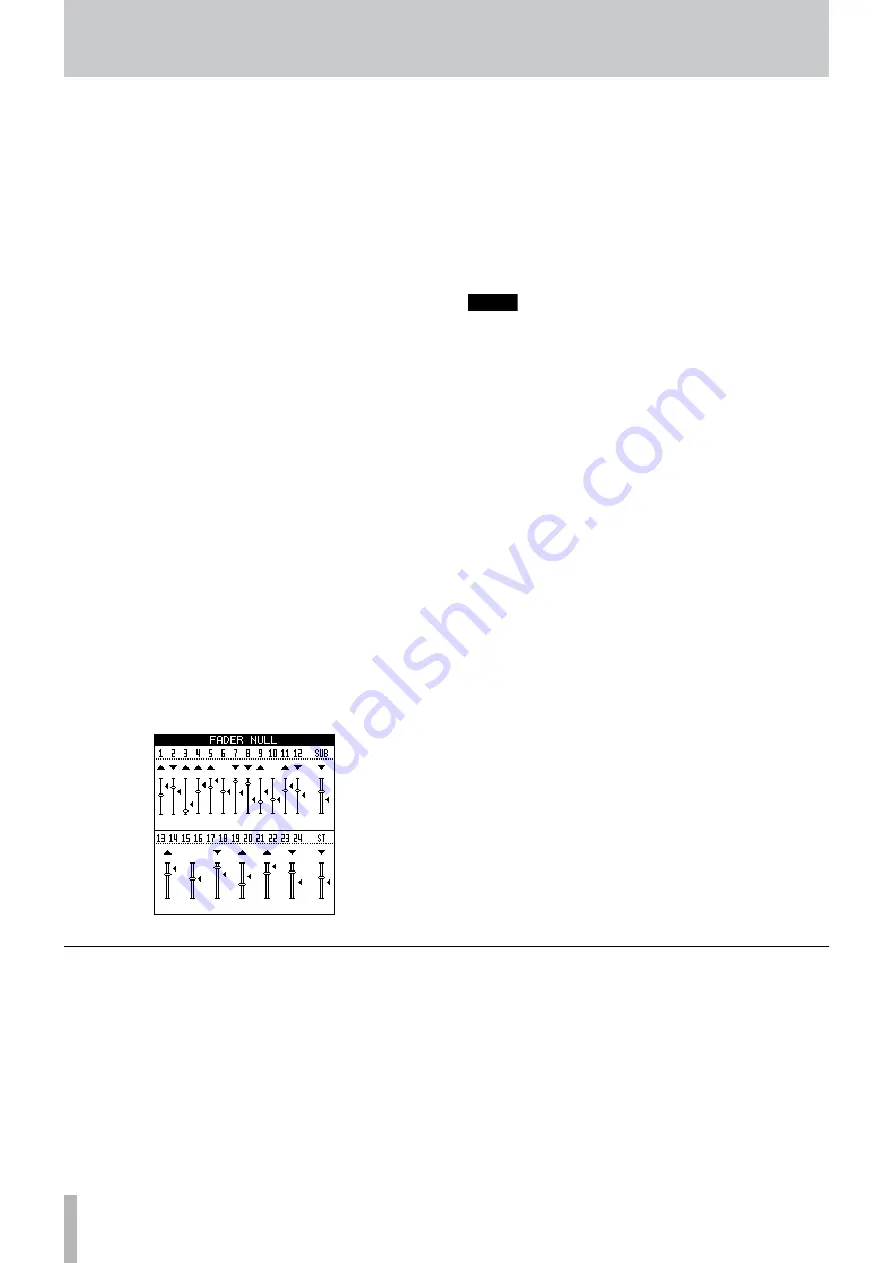
Use the FADER NULL screen to match physical fader
positions with recalled internal fader values.
With the
SHIFT
indicator lit, press the
SCENE
(
NULL
) key
to open the FADER NULL screen.
ª
This screen shows the current physical fader positions. The
Ó
symbols next to the fader icons show internal fader positions.
When a physical fader position and internal fader position
are not matched, a
¶
or
§
will appear above the fader
icon. These triangles indicate whether a physical fader
needs to be (raised
§
or lowered
¶
to) match its internal
fader position.
When a physical fader position and its internal fader posi-
tion are matched, no symbol appears above the fader icon.
NOTE
The FADER NULL screen is only for matching physical
faders with internal fader positions. While this screen
is open, moving the physical faders will not change
the actual fader levels (internal fader values and the
fader matching mode has no effect).
Save your current settings (scene) to the library using the
following procedures.
1 Press the
SCENE
key to open the scene library screen.
2 Use the
¥
cursor key to select SAVE.
3 Use the
JOG/DATA
dial to select the destination
for saving. If you choose a destination that already
contains scene data, you will overwrite it. To create
new scene data, select “New Scene.”
4 If you selected “New Scene,” press the
SHIFT
key
and press the
MENU
(
TITLE
) key to open the title
input pop-up screen where you can input the scene
name (see “Titling” on page 15).
5 Press the
YES/ENTER
key to save the current scene.
Saving scenes


