background image

0. GENERAL


IOM manual 

 SG series 

5  

0.


General 

0.1.


Introduction 


The purpose of this manual is to provide necessary information for:  


Installation  


Operation 


Maintenance 


WARNING:

 Read this manual carefully before installing and using the product. Improper use 

of the product can cause  death, personal injury and damage to property and  may void the 
warranty. 


NOTICE:


Save this manual for future reference and keep it readily available at the location of the unit. 

0.2.


Safety symbols and terminology 


It  is  extremely  important  that  you  read,  understand,  and  follow  the  safety  messages  and 
regulations carefully before handling the product. They are published to help prevent these 
hazards: 


Personal accidents and health problems  


Damage to the product  


Product malfunction 


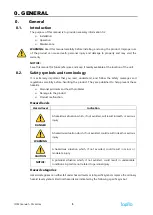
Hazard levels 

Hazard level 

Indication 


DANGER 

A hazardous situation which, if not avoided, will result in death or serious 
injury 


WARNING 

A hazardous situation which, if not avoided, could result in death or serious 
injury 


CAUTION 

A  hazardous  situation  which,  if  not  avoided,  could  result  in  minor  or 
moderate injury 

NOTICE:


A  potential  situation  which,  if  not  avoided,  could  result  in  undesirable 
conditions. A practice not related to personal injury. 


Hazard categories 

Hazard categories can either fall under hazard levels or let specific symbols replace the ordinary 
hazard level symbols. Electrical hazards are indicated by the following specific symbol: 


Summary of Contents for SG Series

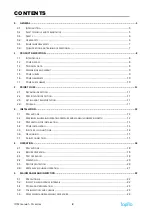
Page 1: ...Pump models SG2 04P IOM manual SG series Submersible Drainage Pumps Original Instruction 2022 1 Read this instruction manual carefully before you install and operate the pump...

Page 2: ...N 11 2 3 LIFTING AND TRANSPORTATION 11 2 4 STORAGE 11 3 INSTALLATION 12 3 1 PRECAUTIONS 12 3 2 MAXIMUM ALLOWABLE OPERATING PRESSURE AND MAXIMUM IMMERSION DEPTH 12 3 3 PREPARATION FOR INSTALLATION 13 3...

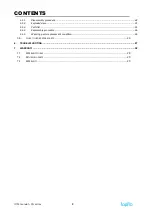
Page 3: ...edure 24 5 5 2 Exploded view 25 5 5 3 Parts list 25 5 5 4 Reassembly procedure 26 5 5 5 Wearing parts replacement condition 26 5 6 HOW TO ORDER SPARE PARTS 26 6 TROUBLE SHOOTING 27 7 WARRANTY 28 7 1 W...

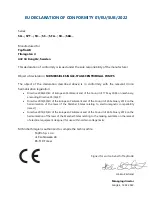
Page 4: ...on machinery amending Directive 95 16 EC Directive 2014 30 EU of the European Parliament and of the Council of 26 February 2014 on the harmonisation of the laws of the Member States relating to electr...

Page 5: ...e handling the product They are published to help prevent these hazards Personal accidents and health problems Damage to the product Product malfunction Hazard levels Hazard level Indication DANGER A...

Page 6: ...e is a question regarding the intended use of the equipment please contact the manufacturer representative before proceeding This manual clearly identifies accepted methods for disassembling units The...

Page 7: ...quid in compliance with applicable environmental regulations Clean all leakages in accordance with safety and environmental procedures Report all environmental pollution to the appropriate authorities...

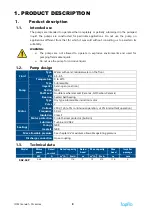
Page 8: ...ter on the floor PH 6 5 8 5 Temperature 0 to 40o C Pump Type Submersible Impeller Semi open cast iron Casing NBR Shaft seal Double mechanical seal Ceramic SiC Carbon Ceramic Bearing Sealed ball bearin...

Page 9: ...1 PRODUCT DESCRIPTION IOM manual SG series 9 1 4 Dimensions and weight Model Height H Width W Weight net Outlet d mm mm kg mm SG2 04P 358 205 12 6 25 1 5 Pump curves...

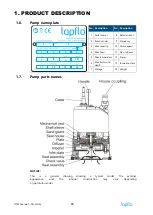
Page 10: ...rent 2 Pump model 9 Frequency 3 Max capacity 10 Motor speed 4 Max head 11 No of phases 5 Max temperature 12 Power 6 Max immersion depth 13 Insulation class 7 Voltage 14 Weight 1 7 Pump parts names NOT...

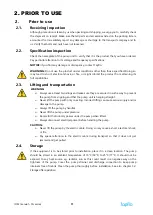
Page 11: ...lings and make sure they are secured in such a way to prevent the pump from slipping and that the pump unit is hanging straight Never lift the pump with only one sling Incorrect lifting can cause seri...

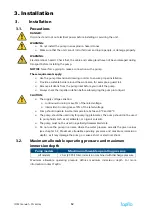
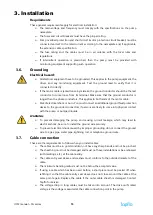
Page 12: ...otation before submerging the pump into liquid CAUTION The supply voltage variation continuous running max 5 of the rated voltage intermittent running max 10 of the rated voltage Pump should operate i...

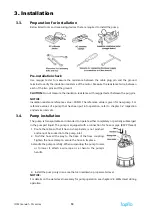
Page 13: ...een put into operation refer to chapter 5 2 Inspection and service intervals 3 4 Pump installation The pump is transportable and intended to operate either completely or partially submerged in the pum...

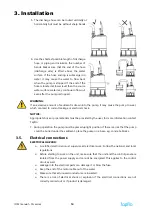
Page 14: ...OTICE Appropriate hose or pipe materials must be provided by the user for more information contact Tapflo 7 During operation the pump must be placed upright position If there is a risk that the pump c...

Page 15: ...rical shock or burn You must connect an additional ground fault protection device to the grounded connectors if persons are likely to come into physical contact with the pump or pumped liquids WARNING...

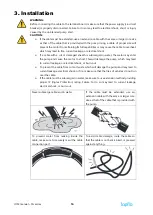
Page 16: ...he pump and cause the motor to short This will damage the pump which may lead to current leakage or electrical shock or burn out To prevent the cable from cuts or twists which will damage the pump and...

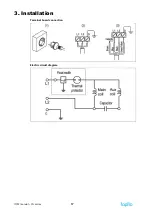
Page 17: ...3 Installation IOM manual SG series 17 Terminal board connection Electric circuit diagram...

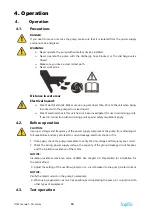
Page 18: ...h swimming pools special safety regulations apply 4 2 Before operation CAUTION Improper voltage and frequency of the power supply will prevent the pump from attaining its full capabilities and may als...

Page 19: ...t the impeller can be rotated freely Check that the monitoring equipment if any works properly 1 Pour 2 5L of water into the pump through the discharge before operation NOTICE The pump will not start...

Page 20: ...its full capabilities and may also generate abnormal noise and vibration and cause damage to the pump which may lead to current leakage electrical shock and fire NOTICE It is the best for pump lifeti...

Page 21: ...uring the pump operation The pump will be damaged if operating dry CAUTION Do not operate the pump for longer periods below Continuous operation Water Level C W L as doing so will damage the pump caus...

Page 22: ...surized Make sure that the pump is isolated from the system and that pressure is relieved before you disassemble the pump remove plugs or disconnect piping Washing the pump Remove any debris attached...

Page 23: ...period of time pull the pump up allow it to dry and store it indoors For storage recommendations see chapter 2 4 Storage NOTICE Be sure to perform a test operation before reinstalling the pump If the...

Page 24: ...make sure to drain the oil from the pump Mechanical seal should be replaced only when broken or worn see chapter 5 4 Oil inspection and change 1 Suction cover 8 and pump casing 13 disassembly Remove t...

Page 25: ...r AISI 304 1 11 Washer AISI 304 1 12 Impeller Cast iron 1 13 Oil casing NBR 1 14 Rear wear plate NBR steel 1 15 Washer AISI 304 1 No Part name Material Q ty 16 Sand guard NBR 1 17 Shaft sleeve AISI 20...

Page 26: ...he mechanical seal that is sold separately as a spare part For cleaning use dust free material e g blue towel TORK 1230081 3 After complete reassemble check that the impeller rotatessmoothly and that...

Page 27: ...use an extension cable that meets the standard Circle thermal protector or protective device failure Replacement or adjustment A 50 Hz model is operated at 60 Hz Check the nameplate and replace the p...

Page 28: ...Serial No see name plate or stamped on pump housing Description of the fault The installation Liquid Temperature C Viscosity cPs Spec grav kg m3 pH value Content of particles of max size mm Flow l min...

Page 29: ...o the highest standards Except as expressly stated above Tapflo makes no warranties express or implied concerning the products including all warranties of fitness for a particular purpose 3 This warra...

Page 30: ...considered defective in materials design or workmanship if they need to be adapted changed or adjusted to conform to national or local technical or safety standards in force in any country other than...

Page 31: ......

Reviews: