


27
27
28
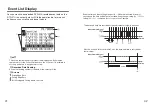
〔
Recording Mode
〕
One Time
…
Recording will stop when the data capacity becomes full.
Endless
…
Recording will continue with oldest data continuously
overwritten.
〔
Recording Interval
〕
Choose from
15
intervals :
S
…
1
,
2
,
5
,
10
,
15
,
20
,
30
seconds
M
…
1
,
2
,
5
,
10
,
15
,
20
,
30
and
60
minutes.
〔
Read Settings
〕
If you wish to make no changes and want
to restart recording under the same
conditions, please read the current
settings first and then restart recording.
(See p.
29
for details)
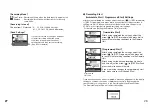
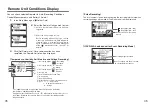
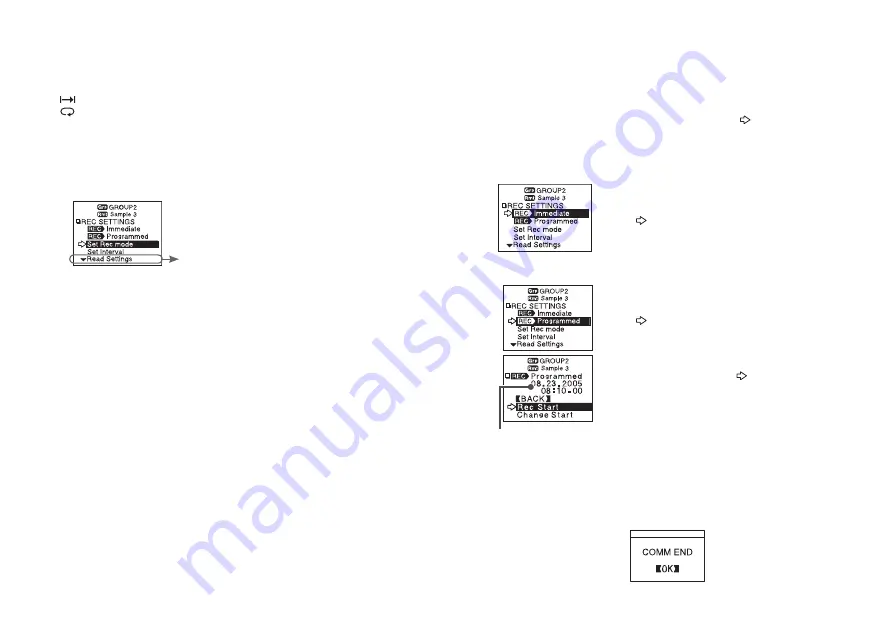
◆
Recording Start
(Immediate Start / Programmed Start) Settings
After having completed the settings, adjust the arrow (
) to [REC Immediate]
or [REC Programmed] and press dial to transmit the recording conditions to
the Remote Unit. Please make sure that the date and time settings in the
RTR-
57
U are correct before making recording start settings.
(
For details, see [Setting the Date and Time] from p.
10
).
programmed
start time
【
Immediate Start
】
After having completed the settings, adjust the
arrow (
) to [REC Immediate] and press dial to
transmit the recording conditions to the Remote
Unit.
【
Programmed Start
】
After having completed the settings, adjust the
arrow (
) to [REC Programmed] and press dial
to transmit the recording conditions to the Remote
Unit.
After having set the desired recording start date
and time, adjust the arrow (
) to [REC Start] and
press the dial to transmit the info.
If you are making changes to a programmed start
time, make sure to click [Change Start].
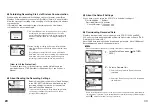
Once transmission has been completed, a message will appear on the display
telling you communication was completed successfully. By pressing the
operation dial you can go back to the Recording Settings Menu Display.
The Remote Unit(s) will be put on Record Standby.
①
②


