Handling the Multi Snare Frame
Replacing Snare Heads
[STARPHONIC Bravura Model]
STARPHONIC Concert Snare Drums feature “Freedom Lugs,” which allow
head replacement without taking the tension bolts out of the hoop.
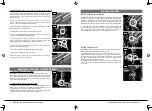
When replacing drum heads, after loosening the tension bolts, tilt the
tension bolts with the hooks together away from the hoop and remove the
hoop as shown in Image 18. There is no need to take the tension bolts out
of the lugs.
After placing the new drum head, put the hoop back down and fit the hooks
with the tension rods into the groove on the hoop. After placing all the
hooks with the tension bolts into the groove, tune the drum as usual.
[STARPHONIC Model]
1.REPLACING BATTER HEADS
STARPHONIC Bravura Snare Drums feature “Freedom Lugs,” which allow
easy head replacement and doesn’t require tension bolts to be taken out of
the hoop.
When replacing drum heads, first loosen the tension bolts, then tilt the
tension bolts with the hooks together away from the hoop and take off the
hoop as shown in Image 15. No need to take the tension bolts out of the
lugs!
After placing the new drum head, place the hoop back down and fit the
hooks with the tension rods into the groove on the hoop. After placing all
the hooks with the tension bolts into the groove, simply tune the drum and
you are done.
2.REPLACING THE BOTTOM HEAD
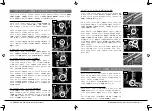
When replacing the bottom heads, first detach the Multi Snare Frame from
the snare drum. Do so by lifting up the four black hooks on the sides of the
frame (Image 16), and remove the black cords connecting to the strainer
and butt from the frame. (Image 17).
After removing the Multi Snare Frame from the drum, follow the same steps
as the batter head replacement mentioned above.
After replacing heads, reinstall the Multi Snare Frame onto the snare drum
by reversing the removal steps.
IMPORTANT - Be sure to refasten the black snare cords by using the black
hooks seen in Image 17. Otherwise, the frame may come off the snare
drum during performance.
STARPHONIC Bravura Model features the “Multi Snare Frame,” with dual
adjustable mechanisms: one that tailors the head-to-wire contact and the
other that allows individual tension adjustment of three kinds of wires .
Each unit comes from Tama manufacturer with three tension adjustment
knobs on the strainer side and one knob on the butt side. You can choose
the positions of the strainer and the butt by removing the frame from the
snare drum and turn it around (180 degrees) and reinstall.
In order to detach the frame from the snare drum, unhook the four black
hooks on the sides of the frame to release the black cords that connect the
strainer and butt from the frame. After taking the frame off the snare drum
(Image 19), turn the Multi Snare Frame 180 degrees and put the black cords
back onto the frame in the reverse order. Be sure to refasten the black snare
cords by using the black hooks seen in Image 16. Failure to do so could
loosen the frame from the snare drum while performing.
[MULTI SNARE FRAME - HANDLE WITH CARE]
*To make these two amazing mechanisms possible: snare wires head
contact adjustment and snare wires individual tension adjustment, the Multi
Snare Frame system had to adopt the method of attaching the frame to the
snare drum only with the snare cords. Take great caution when handling
because impact on the frame or drum head could significantly damage the
system and impact performance.
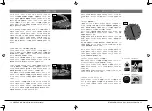
*You will notice the four tension bolts by the multi snare frame on the snare
side have longer metal sleeves because these four bolts are designed to
protect the Multi Snare Frame from direct contact to the desk or floor when
placed down for tuning.
Make sure you set these four bolts in their designated positions to protect
the Multi Snare Frame. Be sure not to put these long tension bolts on other
spots!
*The Multi Snare Frame is equipped with four metal hooks where the snare
cords are hooked together with their black lock levers. When turning off the
lock levers and taking off the snare cords, you can detach the snare frame
itself from the drum. However, avoid doing so unnecessarily, as this requires
adjustment of the lengths of them every time they are removed.
Image15
Image16
Image17
Image18
Image19
Image20
6 STARPHONIC Snare Drum Instrucion Manual
7
STARPHONIC Snare Drum Instrucion Manual


