Read instructions carefully before use.
Thank you for purchasing TAMA’s Concert Snare Drum. Please read this instruction manual PRIOR TO ASSEMBLY
to enable safe usage and to help you utilize all features of this product. After assembly, keep this manual in a safe
place for future reference.
TAMA Concert Snare Drum Series offers two models in its lineup: STARPHONIC Bravura and STARPHONIC. Be sure
you are reading the correct manual for your new product.
目次
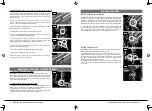
Part description
・・・・・・・・・・・・・・・・・・・・・・・・・2
How to adjust snare wires
・・・・・・・・・・・・・・・・・・・・ 3-4
How to replace snare wires
・・・・・・・・・・・・・・・・・・ ・・5
How to replace heads
・・・・・・・・・・・・・・・・・・・・・・ 6
How to handle the Multi Snare Frame
・・・・・・・・・・・・・ ・・ 7
How to tune the snare drum
・・・・・・・・・・・・・・・・・・・ 8
各部名称
[STARPHONIC Bravura Model]
[STARPHONIC Model]
スネアワイヤーの調整
STARPHONIC Bravura Model features its innovative new “Multi Snare Frame,” equipped with a mechanism that
adjusts the contact of the snare side head and wires allowing up and down movement as well as TAMA’s unique
snare wire individual tension adjustment of 3 different kinds of wires. Follow the instructions below and get your
desired sound.
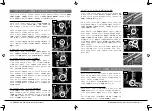
1.HOW TO ADJUST HEAD-TO-SNARE WIRE CONTACT
In order to adjust the space between the head and wires to your desired
sound, turn the knobs on top of the strainer and the butt (Image 1-A and
Image 2-B) which allows up-and-down movement of the whole snare frame
to adjust the height of the snare wires.
To obtain snare wires’ even contact across the head, it is important to set
the Multi Snare Frame completely level to the snare head.
After switching off the strainer, turn the tension knobs on the strainer and
butt till the circle marks on the hexagonal shafts on both sides are on the
same level. (Image 3) This allows the Multi Snare Frame to be completely
level to the snare head.
When the pressure of the snare wires against the snare head is too weak or
too strong, turn both knobs on the strainer side and the butt side evenly to
adjust the height of the wires for your desired position.
2.ADJUSTING SNARE WIRE TENSION
The Multi Snare Frame can hold full surface contact snare wires with three
kinds of materials that create different kinds of sound. It allows you to adjust
the tension of the three different snare wires individually as well as adjusting
them all together.
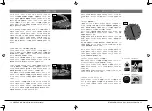
2-1. SETTING THE SNARE WIRES INDIVIDUALLY
In order to adjust tension of the three types of snare wires individually, first
switch off the strainer. Then turn the three adjustment knobs (Image 4 C)
until the wires are even to a level surface.
*Turning the knobs clockwise will increase tension and counterclockwise
will reduce tension.
Once all the tension wires become level to an even surface, turn the strainer
back on so the snare wires are once again touching the snare side head.
Keeping the strainer on, turn the three adjustment knobs separately to
adjust the tension of each for your desired sound.
Hi-Carbon coils balance the response of the entire snare drum, while guitar
strings enhance the snappy onset sound and crisp attack. Black coated
nylon wires bring out full resonance of the shell while controlling the sustain.
2-2. ADJUSTING ALL THREE KINDS OF SNARE WIRES EVENLY
The knob D on the butt side allows an even tension adjustment of the
three types snare wires at once. After adjusting the three types of wires
individually as described in 2-1, turn knob D to adjust the tension of all the
three types of wires at the same time.
Contents
Claw Hook
Strainer
Multi Snare Frame
How to Adjust Snare Wires – STARPHONIC Bravura Model
A
B
C
D
Image1
Butt
Hoop
Fine Adjuster
Hybrid Snare Wire
Lug
Image2
Image3
Image4
Image5
Part Description
2 STARPHONIC Snare Drum Instrucion Manual
3
STARPHONIC Snare Drum Instrucion Manual


