53
54
Customer Service Toll Free: 833.3TACTILE (833.382.2845)
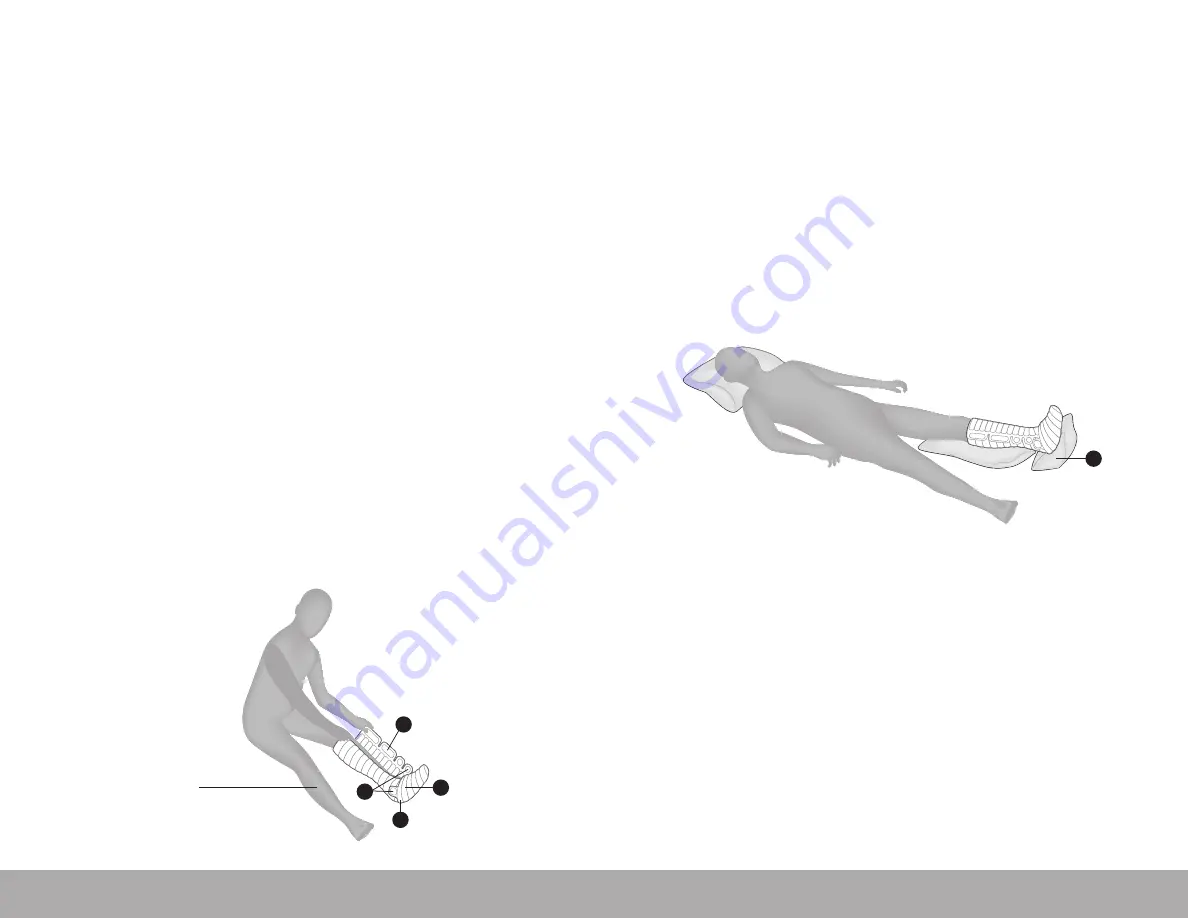
Figure 6.3.a. Applying
the Half Leg Garment
If you are treating both
legs simultaneously,
apply the second garment
the same way you
applied the first garment,
following steps 2–5
on previous page
5
3
2
4
6.3
Applying Your Flexitouch Plus Half Leg Garment
Preparing Your Half-Leg Garment for the First Time
1. Unfold and place your half leg garment on the bed or sofa.
Position it so the foot section is at the bottom, and the tubing
cover runs along the back of your leg.
2. Sit down and place your leg on the garment. Center your heel
in the heel cup area where the foot section bends (#2 in
Figure 6.3.a.).
3. Contour the ankle section and secure the fabric in place with the
hook fasteners (#3 in Figure 6.3.a.).
4. Unfasten the small tabs at the ankle section and secure the hook
fasteners as you contour the foot section snugly around the arch
of your foot and your toes. Continuing up your leg, readjust the
ankle section, if necessary, and continue wrapping your lower
calf, following its contours. Secure the fabric with the hook
fastener tabs (#4 in Figure 6.3.a.).
5. Continue to contour the garment using the hook fasteners
for a secure fit up the calf (#5 in Figure 6.3.a.). You may need to
readjust the ankle area before continuing to contour up the calf.
When wrapping, try to minimize any bunches or folds in the
fabric and adjust the hook fastener tabs as necessary to get a
well-contoured fit.
Figure 6.3.b. Fully Applied Half Leg Garment
6
6. Finally, place a couple of pillows under your calf and foot to
elevate them just above your hips for optimal treatment (#6 in
Figure 6.3.b.). Place the hoses alongside your body so they will
be easy to reach when attaching them to the controller unit.
NOTE:
After your half leg garment has been configured for the first time,
you should be able to slide it on as you would a boot. You should only
need to open the top hook fastener when removing and reapplying the
garment each time.
You are now ready to begin your treatment session. See Chapter 9
for further instructions.


