


Synclavier Regen User Manual
40
can load them using the same procedure for preset
samples.
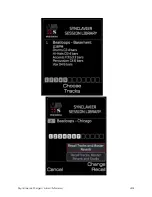
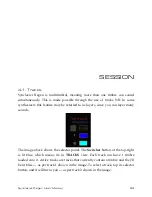
3.4. Reverbs
If you tap the
Reverb
button on the LIBRARY panel, you’ll be presented with a
list of preset reverbs. Unlike timbres and samples, there’s only one library of
reverb presets, so it doesn’t matter which preset library you have selected, you’ll
always get the same list.
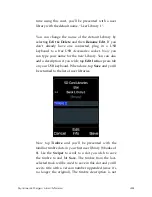
There are 3 levels of zoom, as usual, and you can load one of these reverb
presets to the MASTER reverb via the
Enter
button. Since many Synclavier
timbres benefit from a small amount of reverb, the default MASTER reverb is
Studio A [1-1]. If you want a clean master output with no reverb select Zero
Reverb [1-3].
If a preset reverb is the current reverb on the MASTER output, it will be
denoted in the list by a red blob. Reverbs can also be applied to individual tracks
— covered later in the manual.
A reverb algorithm draws from many parameters, and these will be covered
later in the manual — see the Timbre Effects section of the Playing With Timbres
chapter. Now, it’s sufficient to say that the reverb parameters are accessible from
the
Reverb
button of the MASTER panel. When you modify one of these settings,
you will have deviated from a preset reverb and be inputting a custom reverb. If
you come up with something you like, you can save that to an SD card (covered
later). Since the MASTER reverb is part of the session, this is also saved when
you save a session on an SD card (sessions covered in the next section).
It’s sometimes difficult to evaluate reverbs against each other, as there’s a lot
going on, so one tip is to start with a percussive sound, such as Raindrops [RW
7-7], and flick through presets or change settings before going to something
more harmonious like Hour Glass Transmission [RW 3-8].