11-5
Maintenance and Troubleshooting
5.
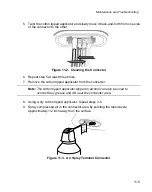
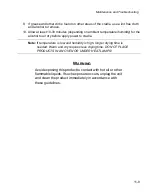
Twist the cotton tipped applicator and slowly move it back-and-forth from one side
of the connector to the other.
Figure 11-2. Cleaning the Connector
6.
Repeat step 5 at least three times.
7.
Remove the cotton tipped applicator from the connector.
Note: The cotton tipped applicator dipped in alcohol can also be used to
scrub off any grease and dirt near the connector area.
8.
Using a dry cotton tipped applicator, repeat steps 3-5.
9.
Spray compressed air in the connector area by pointing the tube/nozzle
approximately 1/2 inch away from the surface.
Figure 11-3. Air Spray Terminal Connector
1/2"
Summary of Contents for PPT 8800
Page 1: ...PPT 8800 Series Product Reference Guide for Embedded Windows CE NET ...
Page 2: ......
Page 6: ...iv ...
Page 50: ...1 30 PPT 8800 Series Product Reference Guide for Embedded Windows CE NET ...
Page 52: ...2 2 PPT 8800 Series Product Reference Guide for Embedded Windows CE NET ...
Page 79: ...3 13 Settings Figure 3 6 Device Management Information Tab ...
Page 113: ...3 47 Settings 3 Select the Config tab Figure 3 40 Symbol Settings Config Tab ...
Page 117: ...3 51 Settings 3 Tap the Copyrights tab Figure 3 44 System Properties Copyrights Tab ...
Page 122: ...4 2 PPT 8800 Series Product Reference Guide for Embedded Windows CE NET ...
Page 160: ...5 2 PPT 8800 Series Product Reference Guide for Embedded Windows CE NET ...
Page 178: ...6 2 PPT 8800 Series Product Reference Guide for Embedded Windows CE NET ...
Page 246: ...7 50 PPT 8800 Series Product Reference Guide for Embedded Windows CE NET ...
Page 248: ...8 2 PPT 8800 Series Product Reference Guide for Embedded Windows CE NET ...
Page 280: ...10 2 PPT 8800 Series Product Reference Guide for Embedded Windows CE NET ...
Page 292: ...11 2 PPT 8800 Series Product Reference Guide for Embedded Windows CE NET ...
Page 318: ...B 10 PPT 8800 Series Product Reference Guide for Embedded Windows CE NET ...
Page 326: ......
Page 327: ......


