- 12 -Model 5030 Access Port Quick Reference Guide DRAFT V3
Note:
Use only CAT 5 Ethernet cable without molded or integrated
strain relief on the connector that interfaces with an Access
Port. If a similar Access Port is daisy chained connect the
Ethernet cable from the ACC port to the LAN port on the daisy
chained device.
Plaster Wall Board Ceiling Mount
1.
Use the metal mounting bracket as a template to install the metal bracket in a horizontal
orientation with the open (raised) part of the mounting “snap” facing away from the installer.
Mark the locations of the two mounting holes when the mounting bracket is positioned
correctly.
2. Drill two 3/16 inch (if using wall anchors) sized holes at the locations marked.
3.
Install the anchors into the ceiling (if applicable)
4. Secure the mounting bracket to the surface using the screws.
Note:
Use the rubber feet provided only for desk mount installations.
Screws and anchors provided are for plaster wallboard
installation only. If mounting Access Port to something other
than plaster wallboard ensure the appropriate size, length and
type screws are used (must be customer supplied).
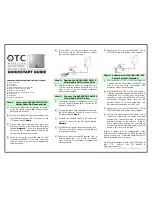
Attaching the Access Port to the Mounting Bracket
1. Hold the Access Port up to the bracket with the LEDs facing the floor, the
Symbol
logo and
port connections away from the installer.
2. Align the slots along the sides (on the left and right) of the ribbed bottom of the Access Port
to the notch hooks of the mounting bracket. Insert the Access Port into the bracket until it
locks in place and both hooks are fully seated.
3. Connect the network Ethernet cable (use CAT 5 without any strain relief) to the LAN port.
Note:
Use the rubber feet provided for desk mount installations only.
Use only CAT 5 Ethernet cable without molded or integrated
strain relief on the connector that interfaces with an Access
Port. If a similar Access Port is daisy chained connect the
Ethernet cable from the ACC port to the LAN port on the daisy
chained device.