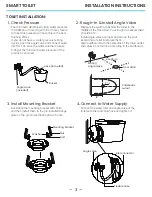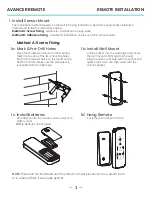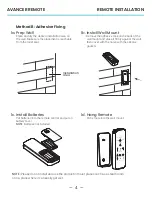
TOILET INSTALLATION:
— 3 —
SMART TOILET
INSTALLATION INSTRUCTIONS
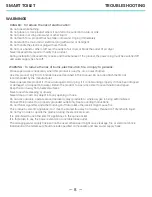
2. Rough-In & Install Angle Valve
·
Measure the wall from behind the toilet to the
middle of the floor drain. Your rough-in measurement
should be 12”.
·
Install angle valve at proper position on the wall
according to toilet inlet placement.
·
Align cardboard with the centerline of the drain outlet,
then draw a contour line according to the cardboard.
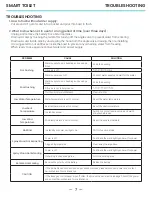
1. Check Pressure
·
The minimum dynamic working water pressure
is 0.09MPa or more (4 gal/min or more), failure
to meet this pressure will not achieve the best
flushing effect.
If you do not have a water pressure testing
device, open the angle valve and connect water
inlet for 10s, once the water volume is above
0.66 gal, the minimum water pressure of the
product is ensured.
Angle valve
(included)
Hose (included)
Bucket
Nut
Bolt
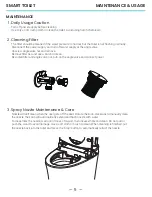
3. Install Mounting Bracket
·
Assemble the mounting bracket with bolts
and then install them to the pre-installed flange
plate on the ground and lock tight with nuts.
Mounting bracket
Washer
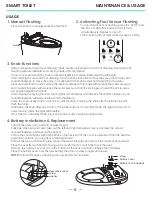
4. Connect to Water Supply
·
Connect the water inlet and angle valve of the
toilet with the matching hose and tighten it.
Floor drain
Mating
angle valve
Rough-in
Cardboard
cutout
12”
2
³⁄4
”
Angle valve
Inlet connector
Flexible hose


