background image

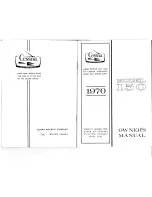
2.1. Transferring the A quick links  

Start with the lines on the A1 riser. Open the quick link (Fig. 4), remove it from the riser (Fig. 
5
) and hang it on the A1 riser of the paramotor riser, facing in the same direction (Fig. 6).  


Fig. 4:   Open the quick link  

Fig. 5:   Remove the quick 

link 

Fig. 6:   Paramotor riser with 

A1 quick link 

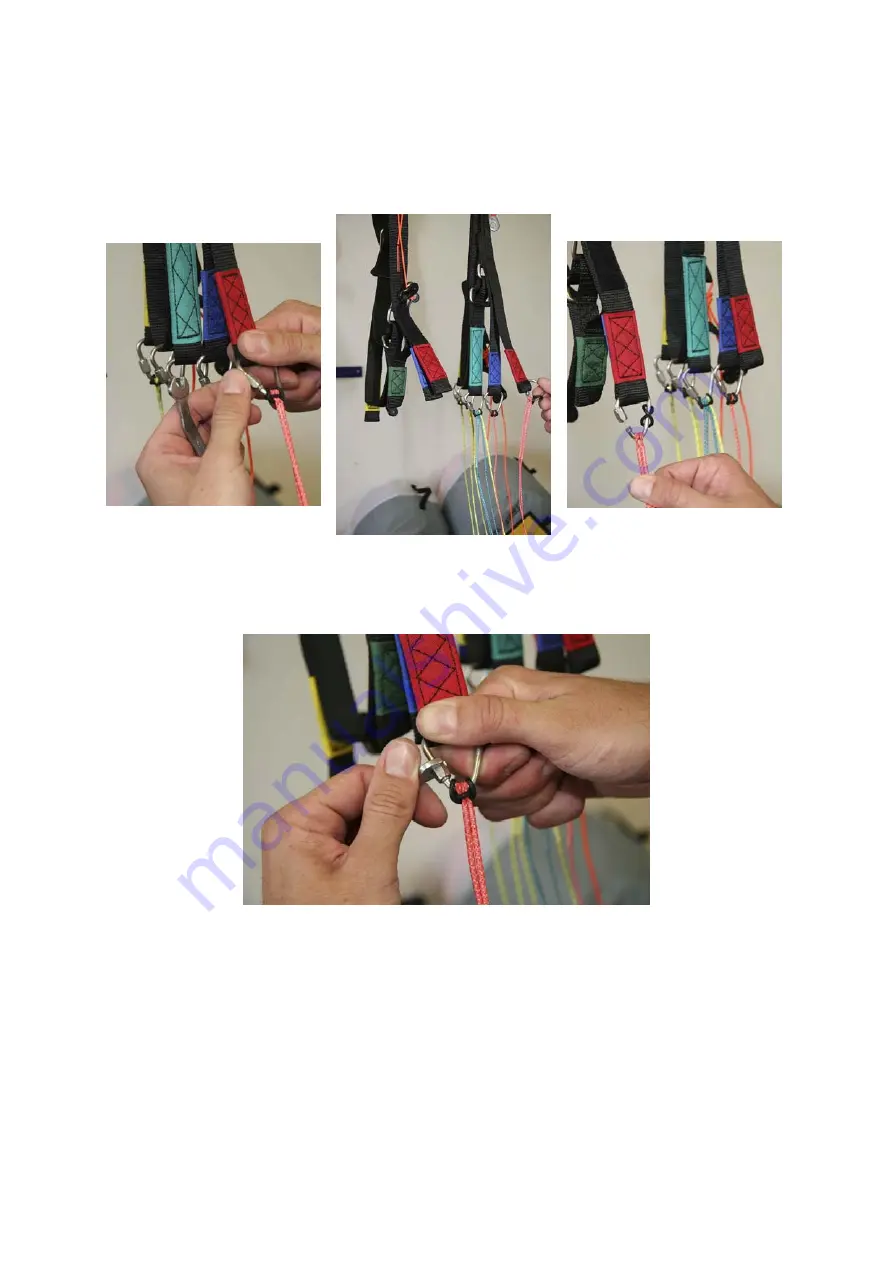
Now close the quick link again and use the spanner to tighten it (Fig. 7). It has been 
tightened up enough when you can no longer open it up with your fingers. 


Fig. 7: 

Closing and tightening the quick link  

Repeat the process with the lines on the A2 riser. 

2.2. Transferring the stabiliser lines and the B- and C1 lines 

You must transfer the stabiliser lines from the B-level to the C-level for use with the 
paramotor riser. This means that you cannot simply transfer the B and C1 quick links from 
one riser to the other. 

Open the quick link for the B-lines and undo the O-ring (Fig. 8). 

Take the inside three B-lines (blue) and hang them in the quick link on the paramotor riser 
(Fig. 9 and Fig. 10). 

Summary of Contents for Mistral 5

Page 1: ...s Fig 1 1 Paramotor risers for Mistral 5 We have developed paramotor risers specifically for the Mistral 5 These are very different from paramotor risers for other models of paraglider A quick link wi...

Page 2: ...with quick link on B Pulleys on the right hand side Fig 3 The two right hand risers Begin with the right hand risers First you need to attach all of the lines from the right hand standard riser to th...

Page 3: ...ightened up enough when you can no longer open it up with your fingers Fig 7 Closing and tightening the quick link Repeat the process with the lines on the A2 riser 2 2 Transferring the stabiliser lin...

Page 4: ...s on C1 Next open the C1 quick link and undo that O ring too Fig 12 Now take the lines out of the quick link and hang them with the stabiliser lines on the paramotor riser Fasten the O ring and close...

Page 5: ...e standard riser Fig 14 Fig 14 Paramotor riser with all lines except the brake line 2 4 Transferring the brake line You must first undo the knot on the brake handle before you are able to transfer the...

Page 6: ...ake the free end of the brake line loop it back and make it into a knot with the brake line Fig 17 Brake line with knot at the mark Fig 18 Brake handle with brake line To make the knot feed the end of...

Page 7: ...is it is essential that you lengthen the brake lines by the distance between the pulleys 18 5cm This requires a longer main brake line which you are able to obtain from us for your paramotor riser The...

Page 8: ...do this is to check them again lightly with the spanner 3 3 Inflate the glider After you have changed over the risers it is imperative that you inflate the glider on a flat area before you next fly i...

Reviews: