


Netviewer
The DxClient Netviewer allows you to view, control recording, view playback and control cameras (depending on the
cameras - must have PTZ capabilities).
1
3
8
4
5
2
6
7
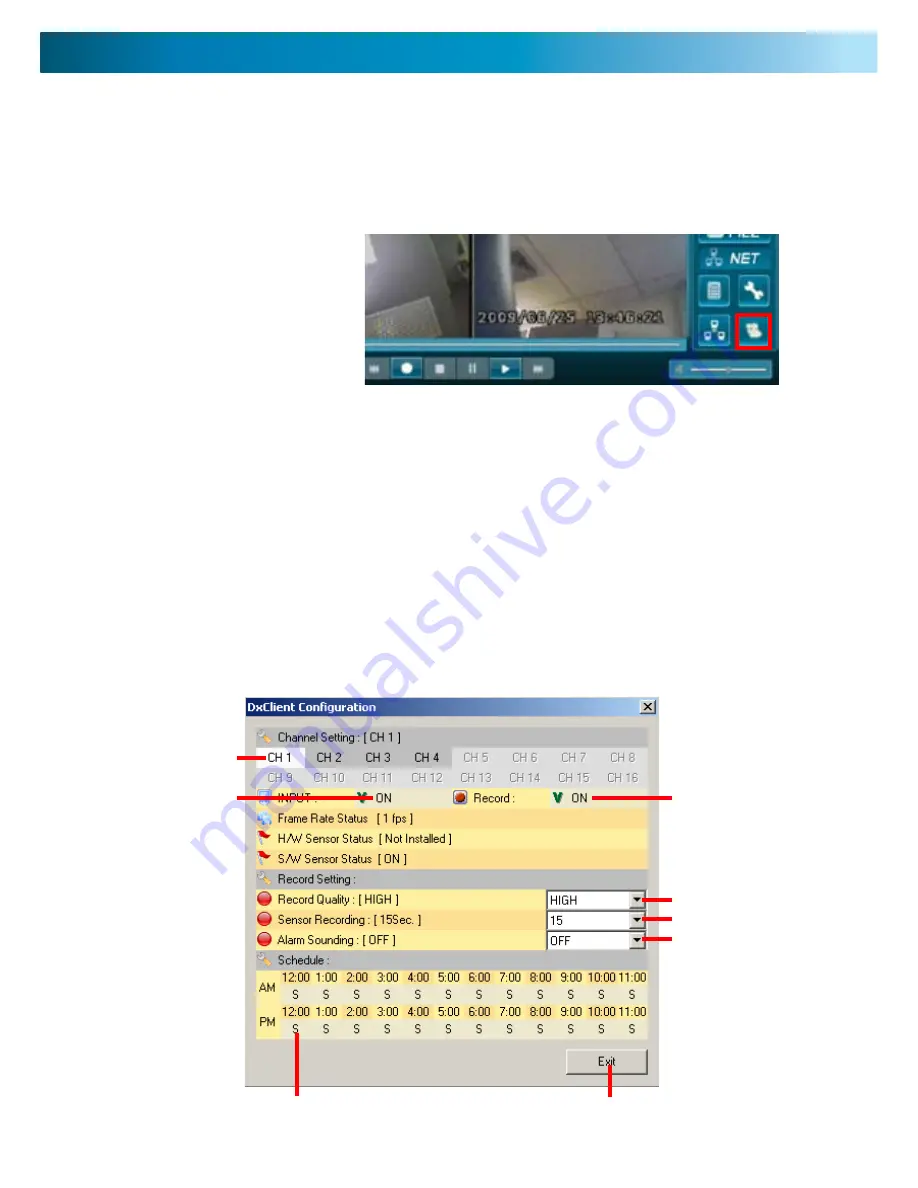
1. CH1, CH2, CH3 or CH4
- Click on the channel you
would like to change the settings on.
2. Camera Setup
- Click to turn camera setup ON and
OFF.
3. Record setup
- Click to turn record setup ON and
OFF.
4. Record Quality
- Click to open dropdown options
HIGHEST, HIGH, NORMAL and LOW. Highlight and click
to make selection.
5. Sensor Recording
- Click to open dropdown options
5, 10, 15, 20, 25 and 30 seconds. HIghlight and click to
make selection.
6. Alarm Sounding
- Click to open dropdown options
5, 10, 15, 20, 25, 30 seconds. CONT (continuos) and OFF
HIghlight and click to make selection.
7. EXIT
- Click to close DxClient Configuration window.
8. Schedule Record Timeline
- (--) NO RECORD (S)
Sensor Record (A) Normal Record. Click on the “S”, “A”,
or “--” to change the record setting.
DxClient Configuration - Netviewer
1. Click on the DXCLIENT SYSTEM
SETTINGS button.
This will bring up the Netviewer DX-
CLIENT CONFIGURATION window.
Note: to view the DVR using the DxClient Netviewer the DVR must be connected to a network (using
the network cable).


