


Orion-VX1000 User Manual
18
5.
Getting Started
Step 1: Follow the precautionary and safety instructions
Follow the precautionary and system safety instructions that appear in
Appendix A
of this User
Manual. To install the system, choose a clean, dust-free area that is well ventilated. Avoid areas
where heat, electrical noise and electromagnetic fields are generated. If you intend to install the
system in a rack, choose a location near a grounded power outlet, and follow the instructions in
Appendix B
of this User Manual.
Step 2: Unpack your Orion-VX1000 system
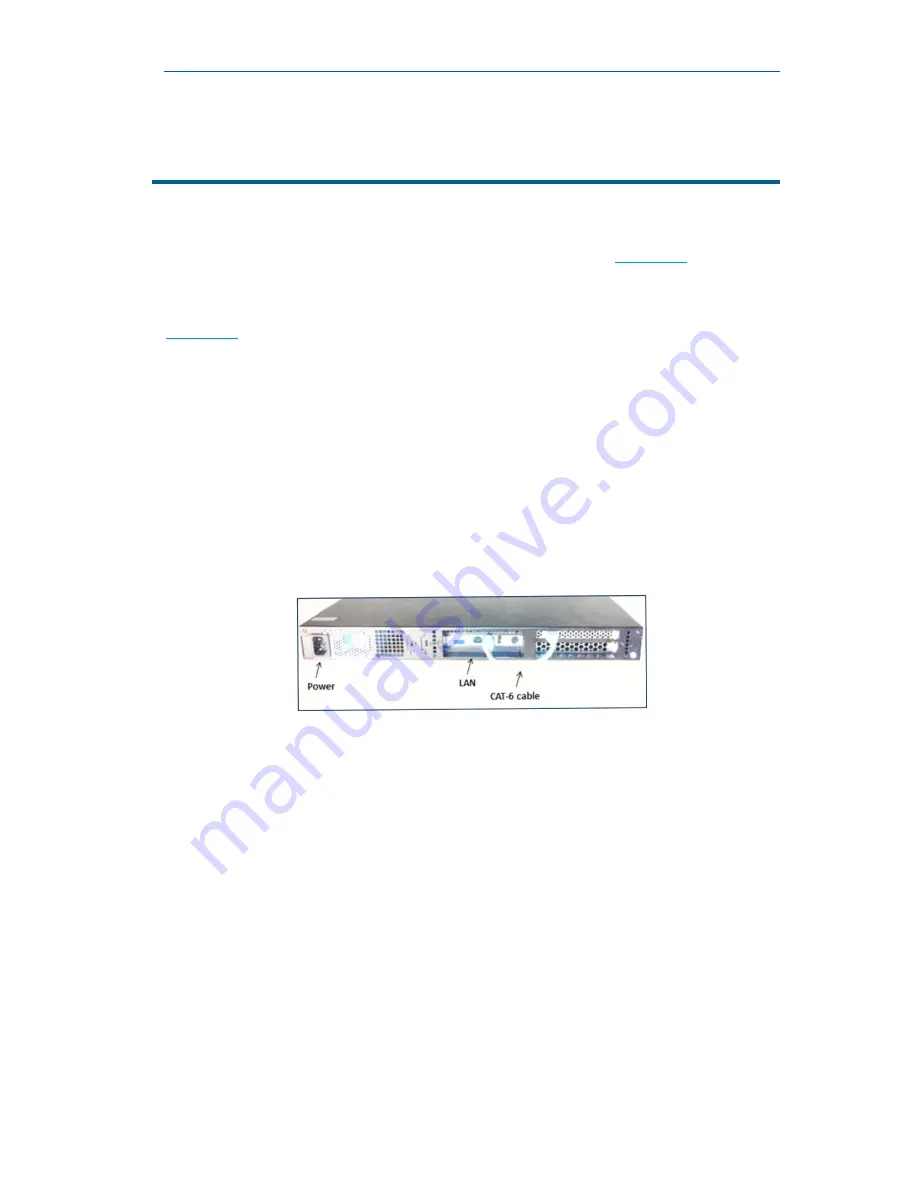
Step 3: Connect the cables
Connect the cables to your Orion-VX1000 system:
1.
Connect the short CAT-6 cable that is provided with the system in a loop as shown in
Figure
5-1 below.
2.
Connect the Orion-VX1000 “LAN” port to the Ethernet port of your computer using a CAT-6
cable.
3.
Connect the power cable first to the Orion-VX1000 and then to the power outlet. Press the
power-on button located on the front panel of the Orion-VX1000 to start the system. (Server
and application load time is approximately 5 minutes).
Figure
5-1: Cable Connectivity
Step 5: Change Orion-VX1000’s IP address
Orion-VX1000 is provided with a default IP address “
192.168.0.1
” that should be modified
before using the system.
To change the IP address:
Step 4: Apply the static IP address “192.168.0.2” to your Computer
Change your computer’s network settings and apply the following static IP address:
“
192.168.0.2
”.
1.
In a web browser, navigate to the default IP address - 192.168.0.1. Upon the appearance of
the login screen, enter the default user name and password (admin, admin).
Note
:
Orion-VX1000 web based GUI supports Internet Explorer 8 or newer, Google Chrome
20 or newer, Mozilla Firefox 14 or newer and Safari 5 or newer.
2.
Select
System Settings > Network Settings,
as shown in Figure
5-2 below: