11
User
User
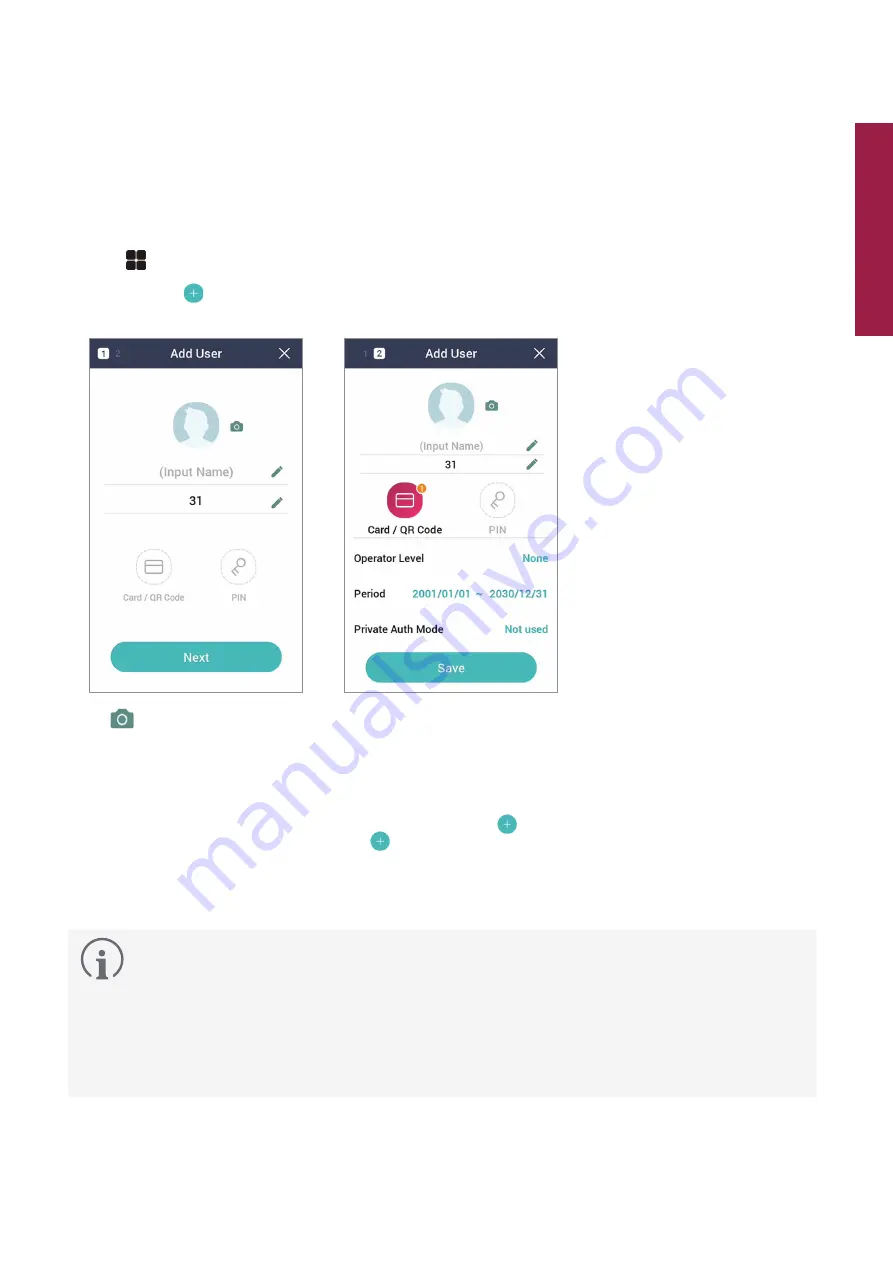
Registering user information
The user information including credentials can be registered.
1
Press
and authenticate with the Admin level credential.
2
Select
USER
→
, and choose a credential you want to register.
There are two steps for the user registration. Some options are available after the credential has been registered.
•
: Take a picture of a user with the built-in camera.
•
Name
: Enter the username.
•
ID
: Enter a number between 1 and 429467295 to register as the user ID. If User ID Type set to Alphanumeric, a
combination of alphanumeric characters and symbols (_, -) can be used for the ID. Up to 32 characters can be
input.
•
Card / QR Code
: Register a card for user authentication. Press
and scan the card which will be assigned to the
user. To register an additional card, press
again. You can issue QR codes only on BioStar 2.
•
PIN
: Enter the PIN you wish to use. Enter the PIN you wish to use, and then enter the same PIN again for
confirmation. Enter a number between 4 and 16 digits to prevent leaking.
•
Operator Level
: Select the level you wish to assign to a user.
Available menus vary according to the set user level.
•
None
: This is the general user level and menus cannot be accessed.
•
Administrator
: All menus can be accessed.
•
Configuration
:
AUTHENTICATION
,
DISPLAY & SOUND
,
NETWORK
,
DEVICE
, and
EVENT LOG
menus can be
accessed.
•
User Management
:
USER
and
EVENT LOG
menu can be accessed.
•
Period
: Set an expiry date to use the user account.
•
Access Group
: Select an access group for the user. Access groups can be registered only in BioStar 2.
•
Private Auth Mode
: Change the authentication method according to the user.