2-8
X10SAE User’s Manual
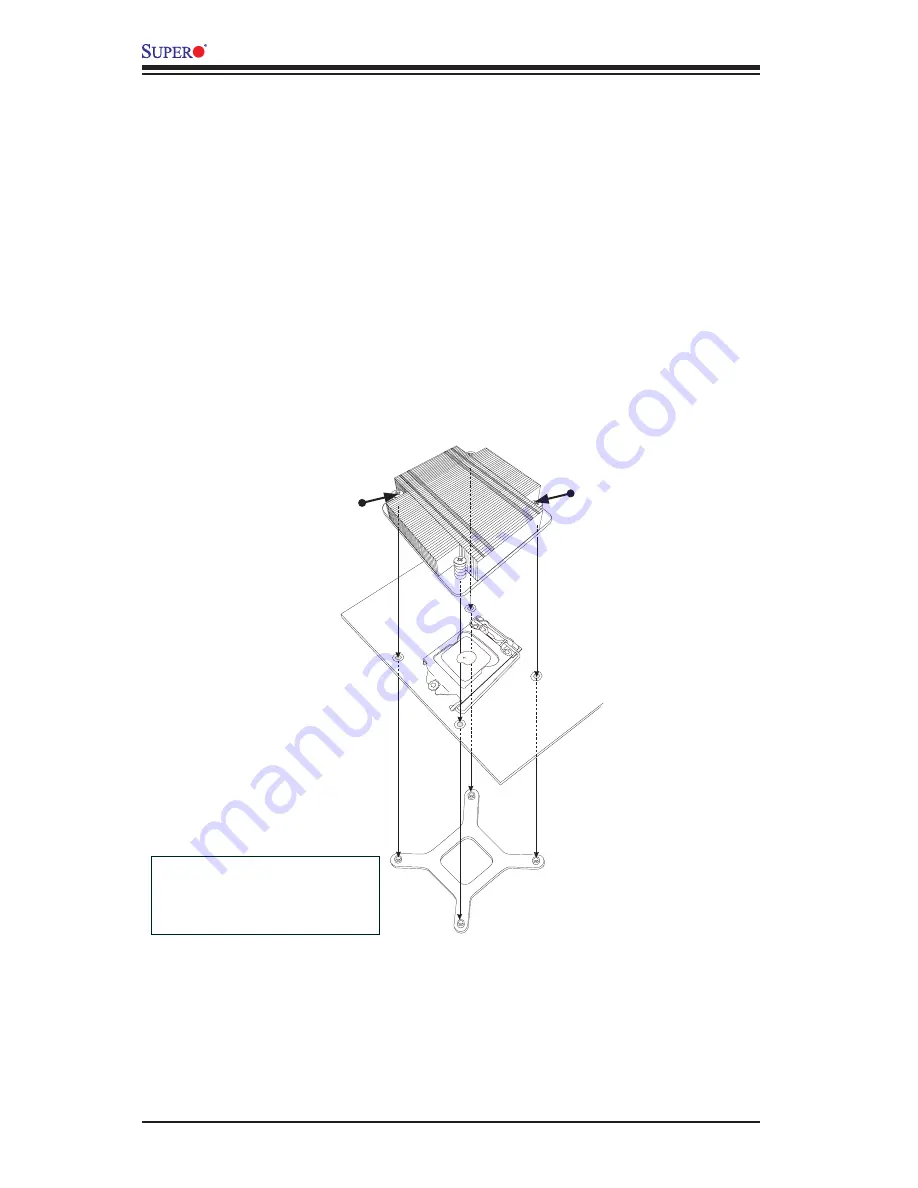
Mounting Holes
Screw#1
Heatsink Bracket
Installing a Passive CPU Heatsink
1.
Do not apply thermal grease to the heatsink or the CPU die; the required
amount has already been applied.
2.
Place the heatsink on top of the CPU so that the four mounting holes are
aligned with those on the motherboard and the underlying heatsink bracket.
3.
Screw in two diagonal screws (the #1 and #2 screws in the figure below)
until just snug. To avoid possible damage to the CPU, do not over tighten the
screws.
4.
Finish the installation by fully tightening all four screws.
Recommended Supermicro
heatsink:
SNK-P0046P heatsink with BKT-
0028L bottom bracket
Motherboard
Screw#2
For the 1U passive heat sink, ask for SNK-P0046P (back plate is included),
for the 2U active heat sink, SNK-P0046A4.
Summary of Contents for X10SAE
Page 1: ...X10SAE USER S MANUAL Revision 1 1a...
Page 60: ...2 40 X10SAE User s Manual Notes...
Page 100: ...4 34 X10SAE User s Manual Notes...
Page 102: ...A 2 X10SAE User s Manual Notes...
Page 106: ...B 4 X10SAE User s Manual Notes...


