Chapter 6: Advanced Chassis Setup
6-9
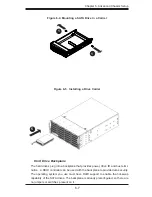
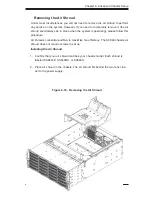
4. Lower the drive and tray into the chassis, carefully inserting the lower rubber-
lined holes onto the pins at the base of the chassis and aligning the upper
rubber holes with the holes in the chassis.
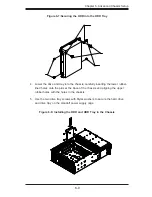
5. Use the two drive tray screws with Mylar washers to secure the hard drive
and drive tray on the standoff power supply cage.
Figure 6-7:Securing the HDD into the HDD Tray
Figure 6-8: Installing the HDD and HDD Tray in the Chassis
Summary of Contents for 6047R-E1R24L
Page 1: ...SUPER STORAGE SYSTEM 6047R E1R24L SUPER USER S MANUAL 1 0...
Page 5: ...Notes Preface v...
Page 26: ...3 4 SUPERSTORAGESYSTEM 6047R E1R24L User s Manual Notes...
Page 62: ...5 32 SUPERSTORAGESYSTEM 6047R E1R24L User s Manual Notes...
Page 77: ...Chapter 6 Advanced Chassis Setup 6 15 Notes...
Page 111: ...A 2 SUPERSTORAGESYSTEM 6047R E1R24L User s Manual Notes...

