


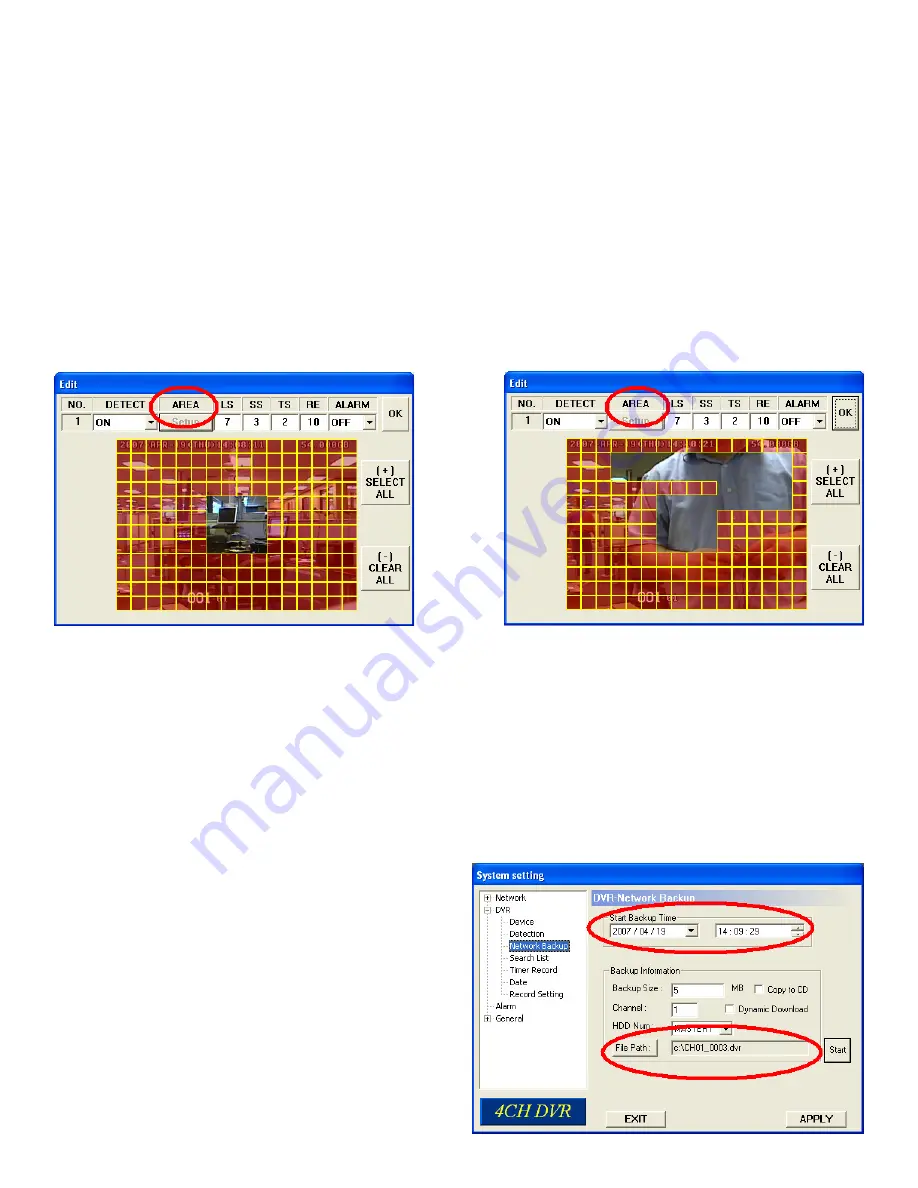
Select AREA to setup motion area.
a. DETECT (motion detection):
Select motion detection function ON / OFF.
b. AREA (motion detection area):
Set the motion detection area by selecting the area grids with your mouse. Pink blocks represent the area that is
not being detected while the transparent blocks are the area under detection.
Press “+” to set the whole area under detection.
Press “-” to set the whole area undetected.
c. Motion Detection Sensitivity:
Set the detection sensitivity (LS / SS / TS / RD).
d. Alarm:
LOW / HIGH for the alarm polarity.
e. Press “OK” and then press “APPLY” button to confi rm.
7.11 Network Backup
You can backup recorded data from the DVR directly to your PC and CD through the network. The backup fi le can be
played in the PC with the remote Video Server, or other media players (Ex: Windows Media Player or RealPlayer) after
the fi le is converted to “AVI” format.
•
Enter the backup information:
If you want to make a backup CD, check “Copy to CD”.
If you want to view the backup image while the backup is processing, check “Dynamic Download”.
After entering the backup information, press “Start” button to start the backup process.
Note:
For CD backup, install “NERO” CD burning program.
Note:
Maximum fi le size for Network Backup is 500MB.
57
Summary of Contents for DMR 16 RT
Page 1: ...DVQ 2 DMR 4 8 16 RT USER MANUAL 1 ...
Page 13: ...13 2 2 DMR 4 8 16 RT Rear Panel ...
Page 17: ...DVR and Monitor Installation 3 2 DVQ 2 SYSTEM CONFIGURATION 17 ...
Page 18: ...3 2 DMR 4 8 16 RT SYSTEM CONFIGURATION 18 ...
Page 72: ...Appendix 4 DVQ 2 RECORDING TIME TABLE 72 ...
Page 74: ...Appendix 6 DMR 4 8 16 RT Compatible Hard Drives HDD 74 ...
Page 75: ...Appendix 7 DVQ 2 DMR 4 8 16 RT MENU TREE 75 ...
Page 76: ...Appendix 8 DMR 4 8 16 RT Specifications 76 ...


