background image


Customizing the Remote Layout 

You may customize the unit’s display to 

match your existing remote controls. 

Note:   

These instructions will help you learn how to 
use all the advanced features of this remote 

control.    It will not explain how to use your 
device’s functions.    So please refer to your 

device’s user manual for information related 
to your device if needed. 
 

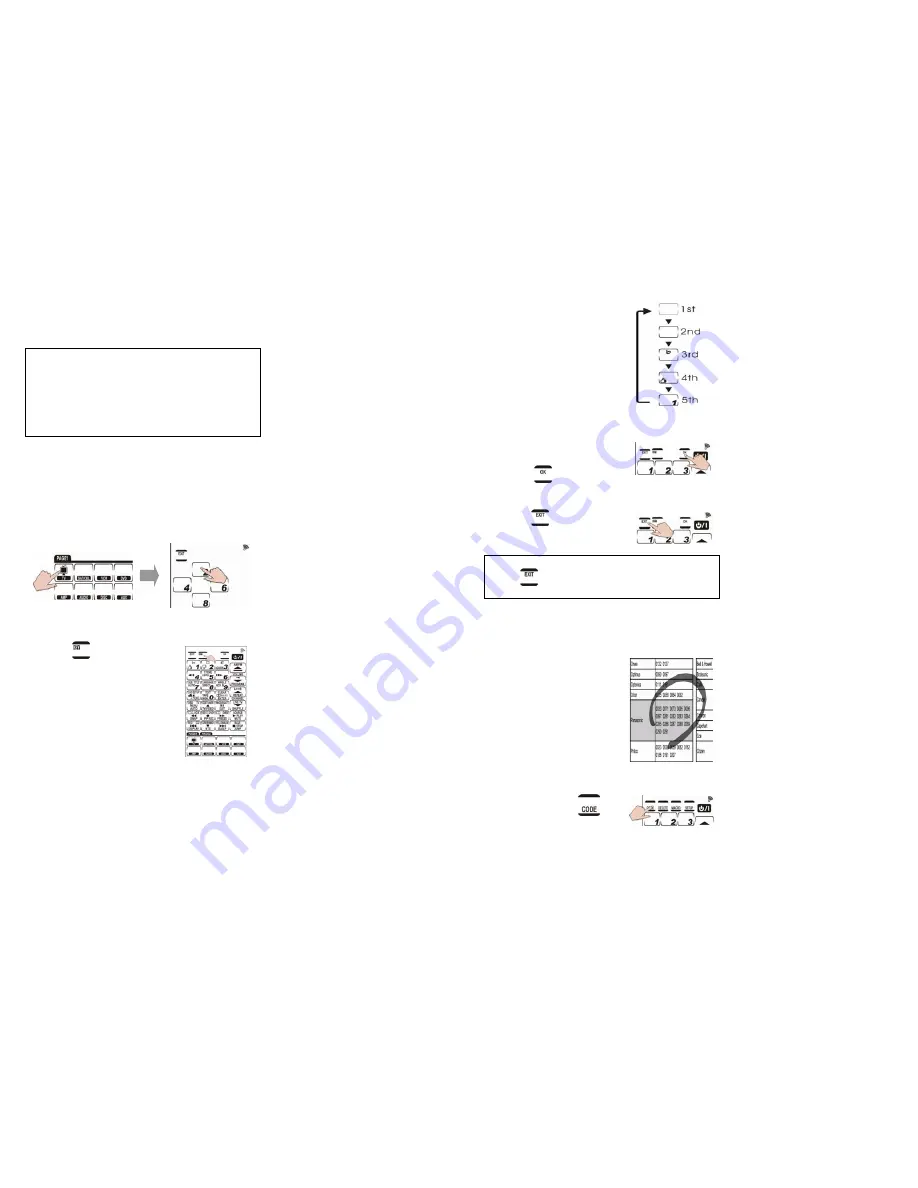
1. Press and hold the desired DEVICE KEY for 

four seconds. The password screen 
appears, preventing you from 

accidentally modifying your remote.   
Press each number button (2, 4, 6, 8) in 

any order until they disappear. 


2. Press 

  to figure out all 

key labels


7


3. Select a key you want to 

modify.  EX. Press that 
key repeatedly to scroll 

through the available 
choices for the key. 


4. Repeat Step 2 to modify all desired keys.


5. After you have finished 

customizing the layout, 
press 

 to confirm 

changes. 


6. Press 

 to exit. 


Note:  
Press 

 at any time while customizing to 

exit without making any changes.


Manually Setup by Pre-code 

You may configure all keys 
on this unit for use with a 

specific manufacturer’s 
model number.  This is the 
fastest way to program 
the unit, but requires that 

the device to be 
programmed has a code 
listed in Preprogrammed 
Code List. 


1. Press and hold 

 for 

four seconds. 


Summary of Contents for SRC-3060

Page 1: ...in this manual are used for identification purposes only All trademarks and registered trademarks are the property of their respective owners 1 Table of Contents ABOUT SRC 3060 2 BATTERY PRECAUTIONS...

Page 2: ...eries reduce the effective distance of the unit Replace batteries immediately when the icon appears To reduce danger of leakage and damage remove batteries when used longer than two years The remote w...

Page 3: ...s remote control at the unit s eye so that the unit can learn your devices remote functions 1 Infrared Eye 2 Light Sensor 3 LCD Touchscreen 4 Learning Eye 5 REMOTE CONTROL OPERATION Inserting the Batt...

Page 4: ...ch number button 2 4 6 8 in any order until they disappear 2 Press to figure out all key labels 7 3 Select a key you want to modify EX Press that key repeatedly to scroll through the available choices...

Page 5: ...grammed Code List and enter it ex 0124 7 Press to make sure if the code is correct TV will be turned off when the code is correct 9 8 If incorrect please enter another code number until you find the c...

Page 6: ...appears 4 Turn on the target device and point the unit at the target device ex TV 5 Press the DEVICE KEY you want to program 6 Press and wait for the target device to turn off 11 0012 0013 0014 7 Touc...

Page 7: ...ey s Settings Then reconfigure the TV device screen for the living room TV Code learning does not work with all devices All keys except the and can be learned 1 Set both remotes on a flat surface so t...

Page 8: ...ice s remote control which corresponds to the blinking buttons on the unit s screen After each press of the corresponding key appears and the next key will automatically begin blinking When all button...

Page 9: ...to delete Delete each code setting by pressing any key 1 6 Press to exit this mode 17 Note Press at any time while customizing the remote to exit delete mode Device keys can also save codes To delete...

Page 10: ...nce 3 1 Press and hold for four seconds 3 2 Press each number button 2 4 6 8 in any order until they disappear and begins flashing and appear on the screen 19 3 3 Press or until you reach and flashing...

Page 11: ...4 Create a five seconds delay 5 Play a DVD Set up the example macro using the following steps 1 1 Press and hold for four seconds to enter the password mode 1 2 Press each number button 2 4 6 8 in an...

Page 12: ...cro sequence is being sent The following macro will begin 1 TV turns on 2 TV switches to Video mode 3 DVD player turns on 4 Five seconds delay 5 DVD player starts playing DVD Note To restore TV s 1 to...

Page 13: ...a 25 Setting the Backlight The backlight function is always powered on but can be set to remain on for shorter or longer periods of time 1 Press and hold for four seconds 2 Press each number button 2...

Page 14: ...te Press at any time while setting sensitivity to exit backlight mode 27 Turning off the Beep Signal 1 Press and hold for four seconds 2 Press each number button 2 4 6 8 in any order until they disapp...

Page 15: ...Solution Your VCR will not record As a safety feature you must press on the unit for two seconds You cannot operate the target device even after teaching it using the learning function 1 Ensure that t...

Page 16: ...process has no errors but you still can t control your AV devices Repeat the learning procedure again Macro does not work 1 Target device s remote might not be compatible with learning procedure 2 Be...

Reviews: