


-18-
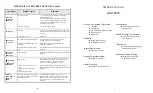
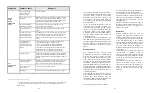
MECHANICAL TROUBLE SHOOTING (Cont'd)
Symptoms
Possible Causes
Remedies
LIQUID IN
FINISHING
DRAWER
Compost is too wet
1. See "Ongoing Toilet Maintenance" instructions,
and add bulking material
2. Bulking material compacting. Modify bulking
agent to include material with better porosity such
as chopped straw, shredded mulch, wood shavings
or wood chips. (Not cedar).
Drum Screen Clogged
See “Screen Clogged” below.
NOISY FAN
Dirt in fan
Unplug the fan, remove the fan assembly 12V or 110V,
and clean carefully with a small brush and/or compressed
air nozzle.
Fan bearings are worn
Replace fan.
DRUM WILL
NOT TURN
Pin securing handle to shaft has broken
Drill out broken pin and replace, or get handle
replacement kit (instructions included).
Steel pin securing gear wheel to shaft
has broken
Obtain and install a small gear replacement kit
(instructions included).
Drum fallen from bearings or bearing
fallen
Obtain fallen drum or fallen bearing plate kit (Instructions
included).
DRUM WILL
NOT STAY
VERTICAL
Drum lock broken
Obtain and install drum lock replacement kit (instructions
included).
DRUM DOOR
NOT
OPERATING
PROPERLY
Drum too full
Rake compost to rear of drum to allow door to shut. If
still insufficient space, empty some compost from top,
until door swings freely. Extract compost as per
instructions in "Monthly Check-up" section.
1. Slot in door for nylon hinges too
tight.
2. Drum door corners catching on
drum
3.
Drum door hinges broken
File slot/corners to permit easier door movement, or
obtain and install replacement drum door kit (instructions
included).
SCREEN
CLOGGED AT
REAR OF
DRUM
Clay like compost or woody peat moss
preventing excess liquid from exiting to
evaporating chamber
Rotate the drum anticlockwise until the screen is
uppermost. Remove the bowl liner and clear the screen
with a stick or wire brush. If the compost is clay like,
refer to instructions for "Trouble Shooting Your
Compost"
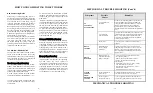
-3-
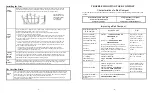
OWNER’S MANUAL
CONTENTS
How Your Composting Toilet System
Works
!
Composting
!
The SUN-MAR EXCEL
AC/DC
!
Start up and Use
!
Winter Use
Installation
!
Rough-in Dimensions
!
Installation procedure
Initial System Start Up
!
Start up procedure
Ongoing Toilet Maintenance
!
Routine maintenance
Periodic Check Up
!
Routine monthly check list
Annual start up
!
Restarting procedure for
seasonal units
Trouble Shooting Your Compost
!
Procedure for improving a
‘bad’ compost
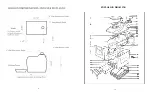
Toilet Design
!
Explosion drawing and part
numbers/descriptions
Mechanical Trouble Shooting
!
Diagnosing and fixing
a hardware problem
Summary of Contents for EXCEL AC/DC
Page 2: ...2 19...
Page 6: ...6 15 EXPLOSION DRAWING...


