2
English
Français
Deutsch
Italiano
Nederlands
Español
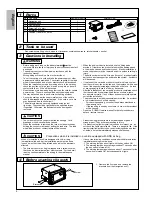
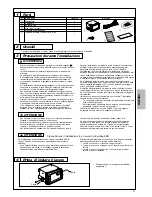
2 Tools to be used
Plus screwdrivers (long, short), nippers, clipremover, combination wrench, ratchet socket
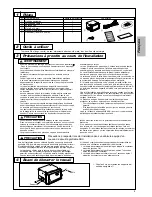
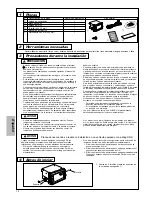
1 Parts
No. Part name
Number of Items
External View
q
Navigation
unit
1
w
Wiring
harness
1
e
GPS
Antenna
1
r
Screw (ø5 x 14 mm)
1
t
Installation
manual
1
y
Cushion (180 mm x 50 mm)
1
WARNING
• The cords must not be caught or pulled too strongly. Cord
breakage or short-circuit may be caused.
• When the connector is removed, the lock must be unlocked by
holding the connector instead of pulling the lead wire. The lead
wire will be broken or contact failure will be caused.
• Products using glass parts must not be dropped or given a
strong impact. They will break resulting in injury.
• If a product using liquid crystal is broken due to impact, etc., do
not touch the liquid crystal liquid. There is a danger to life. If the
liquid crystal liquid sticks to your body including hands and feet
or clothes, it must be immediately washed off with soap.
CAUTION
When it is installed in a vehicle equipped with SRS air bag
(hereinafter called air bag), the installation work must be done
in such a way that the air bag related parts will not be adversely
affected.
• The wire harness for air bag is wrapped with a yellow cover so
that it can be discriminated from other systems. For the detail,
reas the cautions related to the air bag in the maintenance
manual.
• If any of the following conditions occurs after vehicle restoration,
immediate checking must be done.
1 The warning lamp does not light with the key switch ON.
2 The warning lamp does not extinguish about 7 seconds after
the key switch is turned ON.
3 The warning lamp extinguishes one about 7 seconds after the
key switch is turned ON, but subsequently it lights.
CAUTION
Precautions when it is installed in a vehicle equipped with SRS air bag
• Before wiring work is done, the battery terminal - must be
removed. Electric shock or injury due to short-circuit accident will
be caused.
• The audio products must be wired in accordance with the
instruction manual.
Wrong wiring will result in a fire or other accident.
• To cut the coating of a cord and take the power supply of other
equipment is strictly prohibited. The current capacity of the lead
wire will be exceeded and a fire or electric shock will be caused.
• When the installation is made by making a hole in the car body,
check the positions of pipe, tank, electric wiring, etc. and avoid
contact with them. A fire will be caused.
• No extension must be made using other than the cord for vehicle
power wiring. The cord coating will be easily damaged and a
fire may be caused due to short-circuit or heating accident.
• Any cord passing near the sheet metal portion of the vehicle
should be wrapped with protective tape. If the cord is cut, a fire
may be caused due to short-circuit.
• The bolts/nuts must be securely tightened using tools of
right size. They should be tightened to the specified torque
if specified. Otherwise, the bolts/nuts may be damaged or
removed.
• When the audio product is installed, use the fitting parts
provided. Otherwise, the product interior will be damaged and
a fire may be caused due to short-circuit. If faulty installation is
made, the product may be removed and hit a person resulting in
injury.
• The earth cord must not be fit to a bolt or nut of important safety
parts such as steering portion and brake line system. Accidents
will be caused.
• If the fuse of the car audio product or vehicle is blown, confirm
that the cord is not short-circuited, and then replace it with a new
fuse of the capacity (amperage) indicated on the fuse. If a fuse
of wrong capacity is used, a fire may be caused.
• After the installation of the car audio product is completed, check
that the vehicle's brake lamps, head lamps, winkers, wipers,
etc. operate normally. If any of them does not normally operate,
correct the installation.
• The product must not be disassembled or modified. An accident,
a fire, or electric shock will be caused.
- For checking/repairing, consult at the address mentioned in
the warranty card.
- If the repairing is done by a customer, a fire or other accident
will be caused.
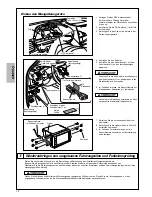
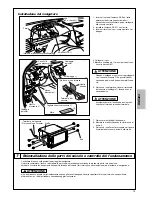
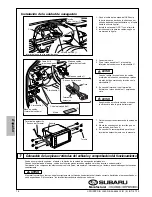
• Read the "SUBARU service manual" for detail proceadure to
detach / restore the trim.
3 Cautions in Installing
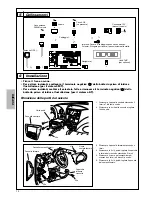
4 Before starting the work
q
w
e
r
t
y
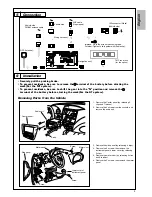
1. Remove the 2 screws, and remove the
brackets from the Navigation unit
q
.
Screw
Bracket

