20
&OHMJTI
6.5.9. RECEIVER UPGRADE
By pressing OK Receiver Upgrade menu is entered. Detail
information about Receiver Upgrade Menu is in section
6.9.2
6.6. TIMER MENU
By pressing
“ ’’
/
“ ’’
keys in Main Menu, Timers is
highlighted and by pressing OK
,
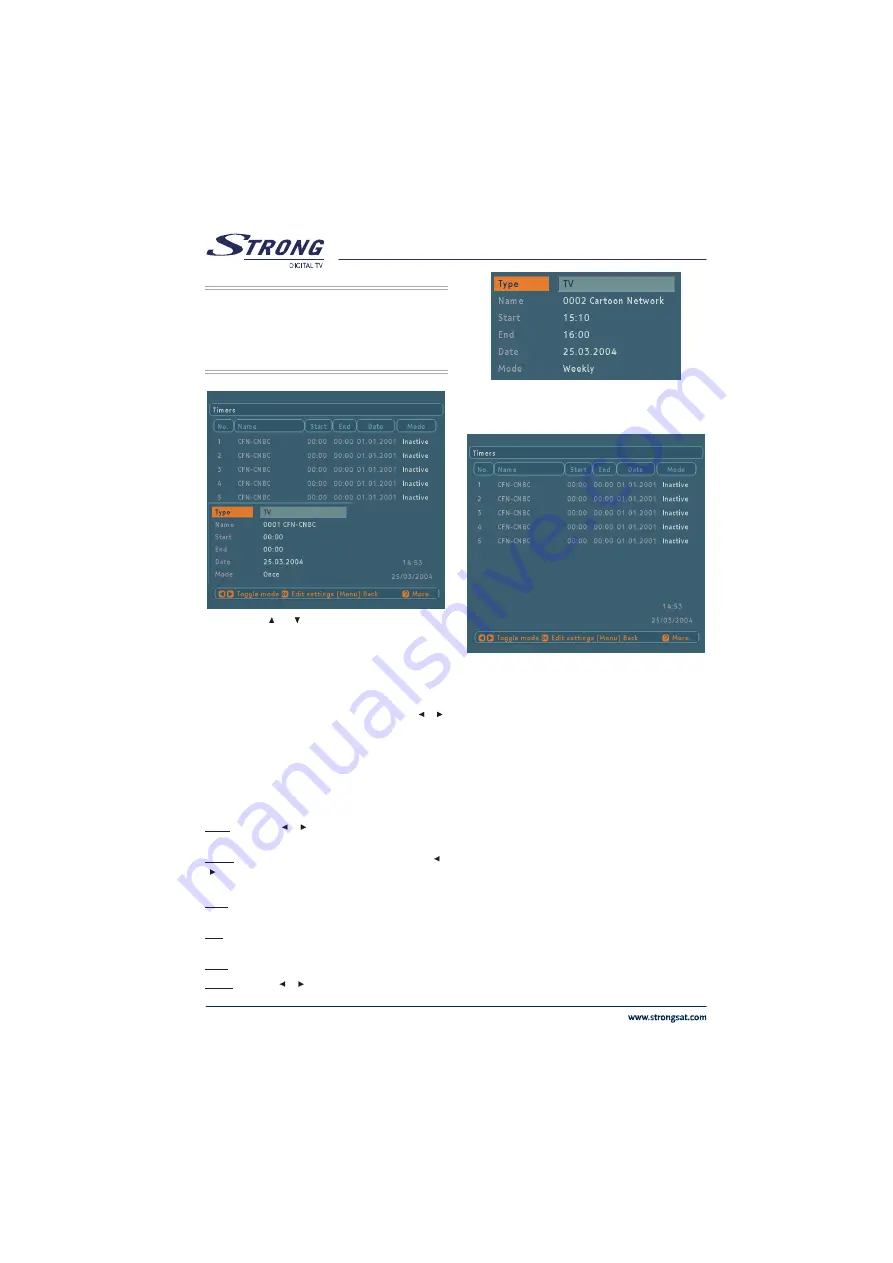
Timer Menu is entered.
There is a five column summary information, such as timer
no, channel name, start time, end time, start date and
mode, for each of the five timers.
There are two ways to set a timer. If the Start / End time and
Date are valid values, the timer can be set directly by
changing the mode to Active from Inactive using
“ ’’
/
“ ’’
keys.
If the Start / End times and Date are invalid or if the set
values will be changed totally, OK must be pressed while
the desired timer is highlighted in the summary list. A new
window where the timer details will be entered is displayed
on the lower part of the screen. The timer details are as
follows:
Type: By using
“ ’’
/
“ ’’
keys, channel type, i.e., TV or
Radio is selected.
Name: According to the type that is chosen above,
“ ’’
/
“ ’’
keys will navigate the user through the TV or Radio list
and name of the channel is selected.
Start: By using 0,1,2
,9 keys start time of the timer is
entered.
End: By using 0,1,2
,9 keys end time of the timer is
entered.
Date: By using 0,1,2
,9 keys date of the timer is entered.
Mode: By using
“ ’’
/
“ ’’
keys, timer mode is selected as
Once, Daily or Weekly .
The current time and date are shown on the lower-right part
of the screen to help the user.
After the desired detail fields are filled, by pressing OK the
settings are saved, by pressing MENU new settings are
cancelled and the user turns back to timer menu. A Timer
setting is cancelled (disabled) by changing the mode to
Inactive in Timer Menu.
When a timer Start time is reached, the receiver switches
to the desired channel, then when the End time is reached,
the box goes to stand-by mode. This utility helps the box
to be used as a sleep-timer.
All manuals and user guides at all-guides.com


