Installing the Motherboard
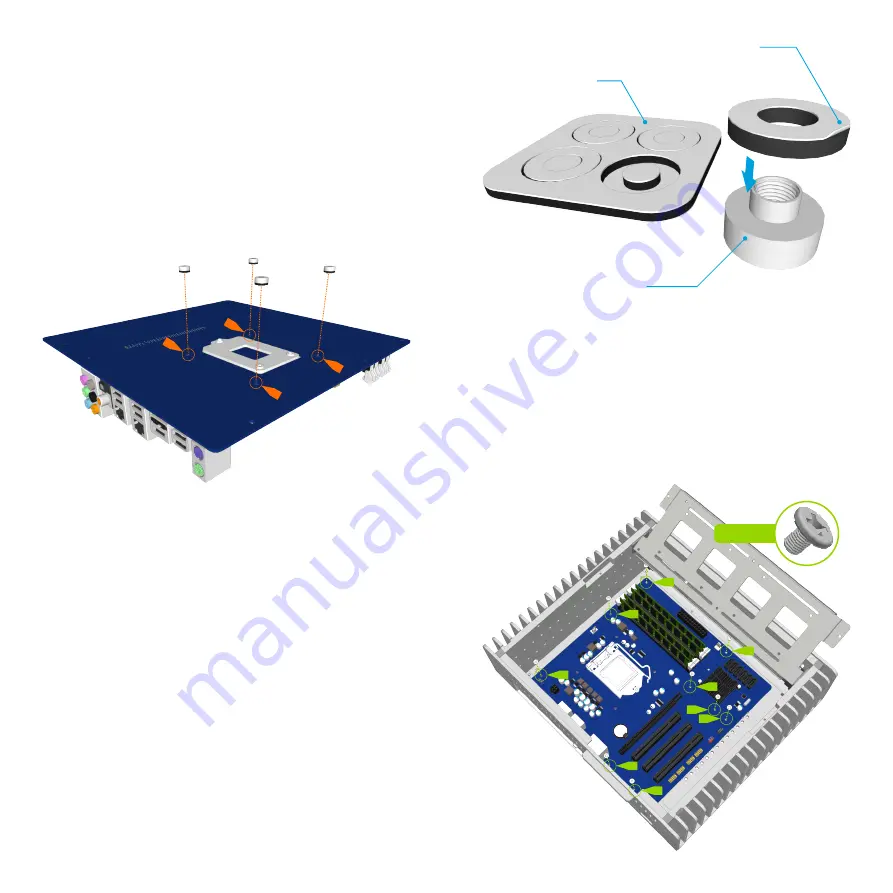
Carefully lower the motherboard into the case, with the I/O port side
leading so that the ports can fit into the I/O shield.
When the motherboard is correctly in position, secure it to the case
stand-offs using the screws provided. Ensure that all the holes correctly
align with the stand-offs before fully tightening the screws. Also ensure that
you have installed the correct stand-off locations.
The CPU and RAM can no w be installed on the motherboard.
6
Fit the CPU Cooler Mounting Nuts
The 4 CPU cooler mounting nuts supplied with your case must be fitted
to the motherboard prior to installing it inside the case as they will be
required later on in the assembly to secure the CPU cooler assembly. The
nuts are held in place by adhesive pads which are supplied in a pack of 4
(there is a spare pack should you wish to change your motherboard in
future). Affix the adhesive pads to the CPU nuts in preparation for fixing
them to the motherboard.
With the motherboard turned upside down, located the CPU cooler
mounting holes. The hole position will vary depending on the brand and
model of CPU. Peel the protective film from the adhesive pads and stick
the nuts to the underside of the motherboard ensuring they correctly align
with the holes. The slightly raised rim of the nut should fit through the
motherboard CPU mounting holes.
CPU Cooler Mounting Nut
Adhesive Pads
Peel Protective Film
TC-M3x4


