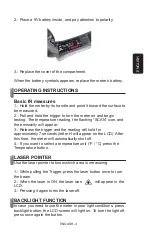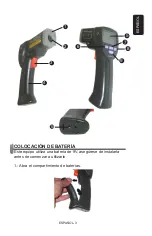
2.- Place a 9V battery inside, and pay attention to polarity.
3.- Replace the cover of the compartment.
When the battery symbols appears, replace the meter’s battery.
OPERATING INSTRUCTIONS
Basic IR measures
1.- Hold the meter by its handle and point it toward the surface to
be measured.
2.- Pull and hold the trigger to turn the meter on and begin
testing. The temperature reading, the
fl
ashing “SCAN” icon, and
the emissivity will appear.
3.- Release the trigger and the reading will hold for
approximately 7 seconds (letter H will appear on the LCD). After
this time, the meter will automatically shut off.
4.- If you want to select a temperature unit (°F / °C) press the
Temperature button.
LASER POINTER
Use the laser pointer to know which area is measuring.
1.- While pulling the Trigger, press the laser button once to turn
the beam.
2.- When the laser is ON, the laser icon will appear in the
LCD.
3.- Pressing it again turns the laser off.
BACKLIGHT FUNCTION
In case you need to use the meter in poor light conditions, press
backlight button, the LCD screen will light on. To turn the light off,
press once again the button.
ENGLISH
ENGLISH-4


