Document # 82070-637, Revision D
CONFIDENTIAL
© 2009 Copyright VTS Medical Systems, LLC
8 of 29
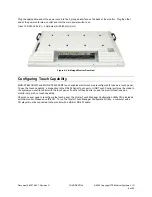
Plug the appropriate end of the power cord into the 3-pronged interface on the back of the monitor. Plug the other
end of the power cord into an outlet and turn the main power switch to on.
Input: 100-240 Volts (V) ~ 3 Amperes (A) 50/60 Hertz (Hz)
Figure 4: VividImage Monitor Rear View
Configuring Touch Capability
MON-STE42SDI-MT and MON-STE52SDI-MT touch enabled monitors come preconfigured for use as a touch panel.
To use the touch capability, a connection to the RS232 Serial Touch port or USB Touch Control port must be made to
the system you wish to control with the touch panel. If neither of these ports is used, the monitor functions as a
monitor only, with no touch capability.
Should you ever need to reconfigure the touch panel, the Crystal Touch Manager Configuration Utility CD is included
with the monitor. Please save this CD. To run the Crystal Touch Manager Configuration Utility, a computer with a
CD player must be connected to the monitor with a USB or RS-232 cable.


