


Page 4
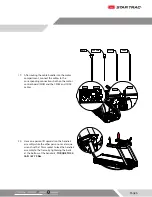
10.
Unpack all parts and inspect for damage.
11.
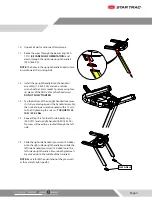
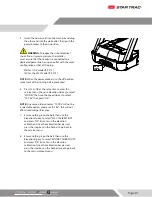
Route the wires through the beauty ring (020-
7911) (
BE CAREFUL OF ORIENTATION
) and
down through the right side upright handrail
(020-7854-XX).
NOTE:
The holes in the upright handrail need to face
inward toward the running belt.
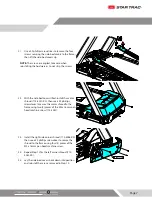
12.
Install the upright handrail into the handrail
assembly (715-4254-XX) and use a ratchet
wrench with a 15mm socket to secure using four
(4) pieces of the M10 x 20mm hex head screw -
DO NOT FULLY TIGHTEN
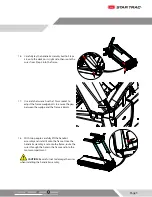
13.
Tap the bottom of the upright handrail to ensure
it is fully seated up against the handrail assembly,
then use a torque wrench coupled with a 15mm
to fi nish tightening the screws -
TORQUE TO 35
lb-ft / 47.45 Nm
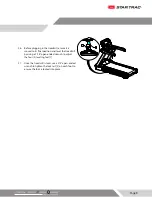
14.
Repeat Steps 2-4 for the left side beauty ring
(020-7911) and upright handrail (020-7853-XX).
No wires will need to be routed through the left
side.
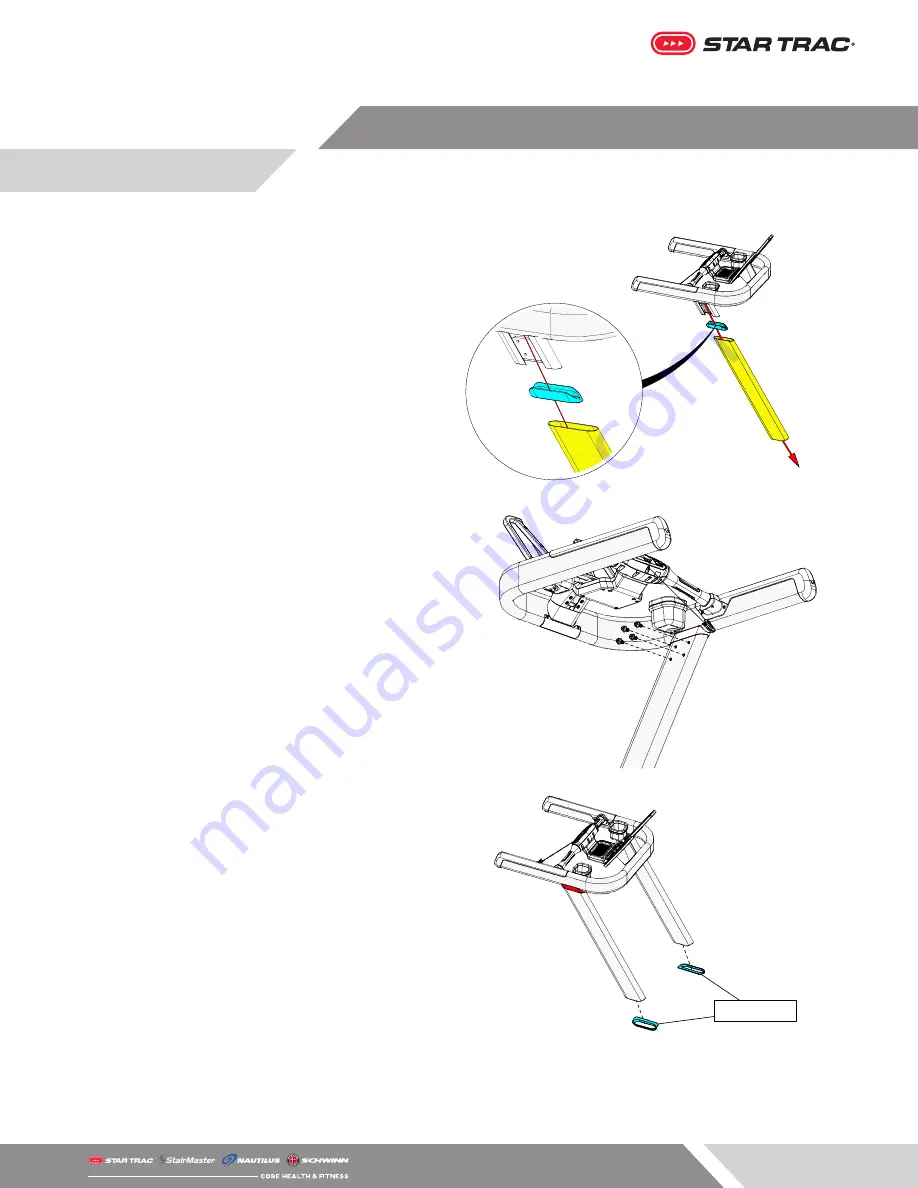
15.
Slide the right side handrail grommet (140-3683)
onto the right side upright handrail and slide the
left side handrail grommet (140-3684) onto the
left side upright handrail. Ensure both grommets
are moved up to the middle of the handrails.
NOTE:
Be careful of the orientation of the grommets
as they are left-right specifi c.
FLAT SIDE IN