
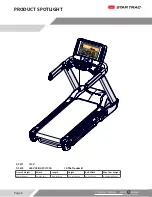


Page 1
WARNING: Electrical Hazard
1.
To reduce the risk of electrical shock, fi re, or injury
to persons, the installer must ensure that the
treadmill is con nected to a dedicated power line
having an outlet with the same confi guration as
that of the plug:
•
20A for 110V models
•
15A for the 230V models
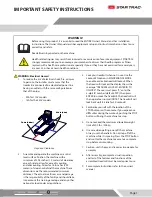
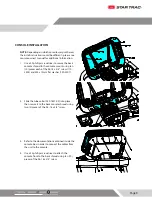
23.6 in (0.6 m)
78.8 in (2.00 m)
23.6 in (0.6 m)
78.8 in (2.00 m)
Required Clearance
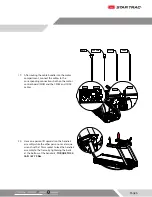
2.
Assemble and operate the machine on a solid
level surface. Position the machine with a
minimum of 39.4 inches (1.0 meters) of clearance
on each side to allow for ease of mounting
and dismounting. Allow for 78.8 inches (2.00
meters) of clearance behind the machine. These
dimensions are the recommended minimum
distances. The actual area for access and passage
is the responsibility of the facility and should take
into account this training envelope and any other
national or local codes or regulations.
3.
Lock your treadmill when not in use. Use the
Lockout EN option in MAINTENANCE MODE
to enable or disable treadmill lockout. When
the treadmill is locked, the display shows the
message “TREADMILL LOCKED, ENTER ID TO
UNLOCK”. The user must press “0”, enter the
3-digit ID number (default=999), then press
ENTER to unlock the treadmill. The treadmill will
then operate as normal (NOTE: The treadmill will
lock back up if it is idle for 30 seconds).
4.
Familiarize yourself with the location of the
STOP buttons on the console. If you experience
diffi
culties during the workout, pushing the STOP
button will bring the machine to a stop.
5.
Do not exceed the maximum allowable weight
limit of 500 lbs. / 226 kg.
6.
Use care when getting on or off the machine.
Always use the handrails. Do not step off of the
machine while it is moving. Press the STOP button
and wait for the machine to come to a complete
stop before dismounting.
7.
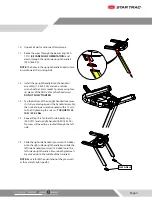
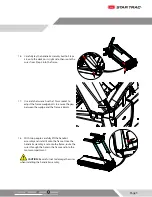
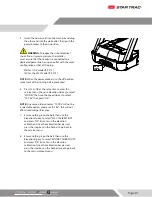
Caution: unit is heavy and requires two people for
assembly.
8.
After assembly, a complete visual inspection,
and test of the features and functions of the
assembled treadmill must be made prior to use.
9.
For complete instructions refer to the owner’s
manual.
IMPORTANT SAFETY INSTRUCTIONS
Before using this product, it is essential to read the ENTIRE Owner’s Manual and ALL installation
instructions. The Owner’s Manual describes equipment setup and instructs members on how to use
correctly and safely.
Read all warnings posted on the machine.
Health related injuries may result from incorrect or excessive use of exercise equipment. STAR TRAC
strongly recommends you to encourage your members to discuss their health program or fi tness
regimen with a health care professional, especially if you or they have not exercised for several years,
are over 35, or have known health conditions.
WARNING!