


93
z
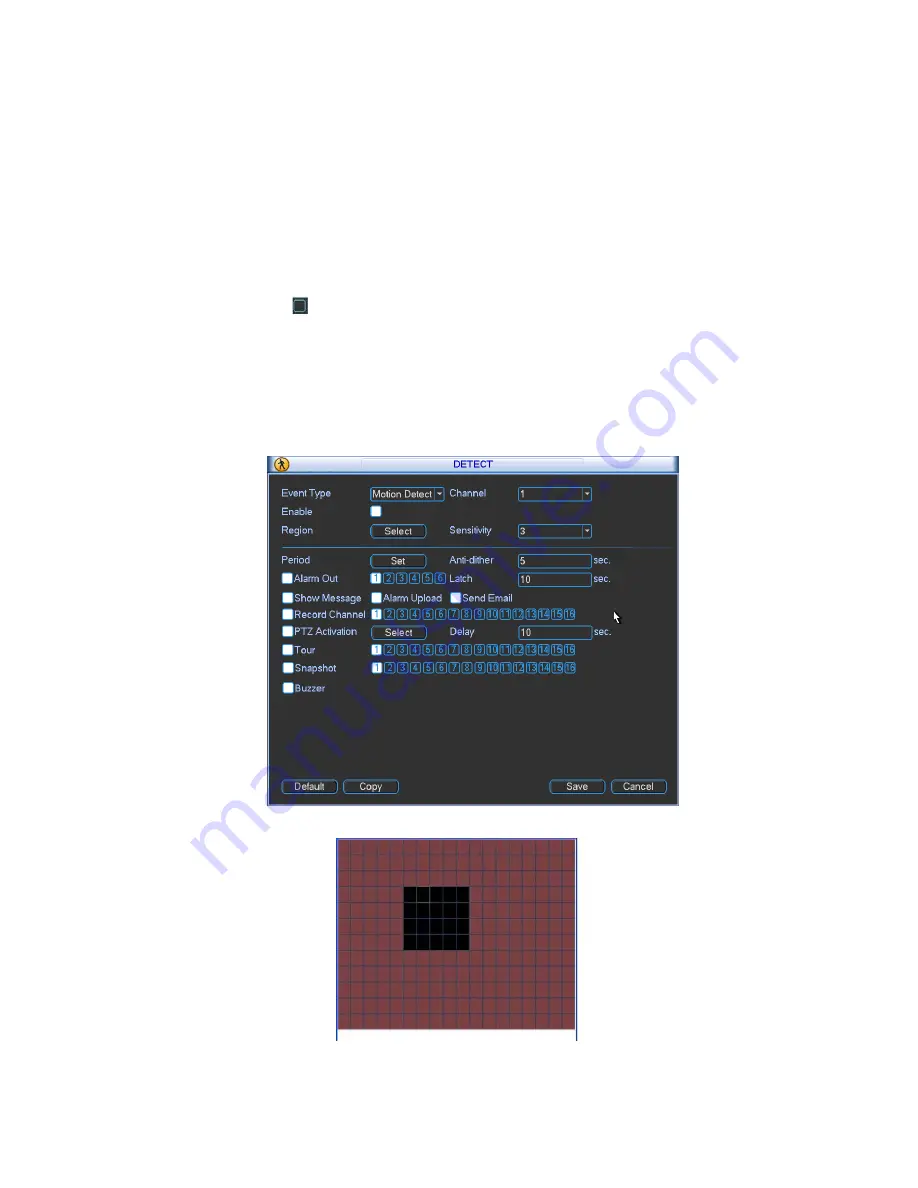
Period: Click set button, you can see an interface is shown as in Figure 4-24. Here you can
set for business day and non-business day. In Figure 4-24 click set button, you can see an
interface is shown as in Figure 4-25. Here you can set your own setup for business day and
non-business day.
z
Anti-dither:
Here
you
can set anti-dither time.
z
Alarm output: when alarm occurred, system enables peripheral alarm devices.
z
Tour: Here you can enable tour function when alarm occurs. System one-window tour.
Please go to chapter 5.3.9 Display for tour interval setup.
z
Snapshot: You can enable this function to snapshoot image when alarm occurs.
Please highlight icon
to select the corresponding function. After all the setups please click
save button, system goes back to the previous menu.
Note:
In motion detection mode, you can not use copy/paste to set channel setup since the video in
each channel may not be the same.
In Figure 4-22, you can left click mouse and then drag it to set a region for motion detection.
Click Fn to switch between arm/withdraw motion detection. After setting, click enter button to exit.
Figure 4-21
Figure 4-22
Summary of Contents for N6 Series
Page 1: ...N6 Series Standalone DVR User s Manual Version 5 1 0 ...
Page 62: ...52 Figure 2 19 2 3 3 General 1 5U series Please refer to Figure 2 20 for connection sample ...
Page 87: ...77 1 5U Series 2U Series Figure 3 12 ...
Page 108: ...98 Figure 4 28 Figure 4 29 Figure 4 30 ...
Page 116: ...106 Figure 4 46 ...
Page 156: ...146 Figure 5 66 ...
Page 161: ...151 Figure 6 11 ...
Page 181: ...171 Figure 7 32 Figure 7 33 Figure 7 34 ...
Page 224: ...214 Samsung HA101UJ CE 1T SATA ...