


11Beamage-3 User
’s Manual Revision 4.0
45
Standa Ltd. All rights reserved
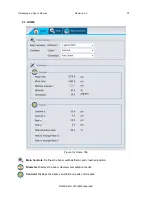
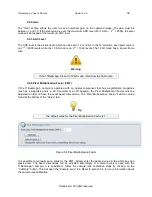
It is possible to save the data in the Acquisition file. To do so, select the
“
Save this data in the Acquisition
file
” option at the bottom of the “
Measures
” section.
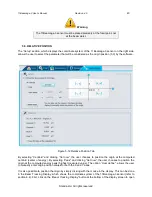
5.6. CAMERA LENS
Prior to profiling a beam with a camera lens, one must adjust the Pixel Magnification Factor of the lens
(see section 5.2.8).
The
“
Camera lens calibration
” section allows the user to calibrate the PC-Beamage software when a
camera lens is used with the 11Beamage-3. Th
is panel is accessible by clicking “Calibrate” in the Pixel
Multiplication factor section in the Setup panel or in the Show/Hide Options in the Ribbon.
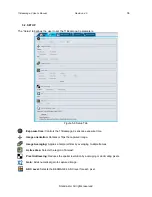
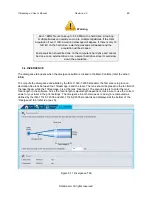
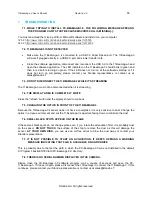
Figure 5-15 Camera Lens Calibration Section
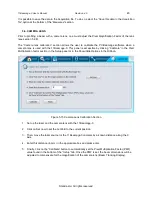
1. Set up the laser and the camera lens with the 11Beamage-3.
2. Click on Set now to set the centroid to the current position
3. Then, move the laser source (or the 11Beamage-3 camera) by a known distance along the X
axis.
4. Enter this distance (in mm) in the appropriate box and press enter.
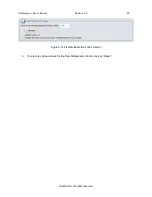
5.
Finally, click on the “Calibrate” button to automatically set the Pixel Multiplication Factor (PMF)
value
found in the bottom of the “
Setup
” tab. Once the PMF is set, the beam dimensions will be
adjusted to compensate for the magnification of the camera lens (Beam Tracking Display).