


11Beamage-3 User
’s Manual Revision 4.0
12
Standa Ltd. All rights reserved
2.
QUICK START PROCEDURE
These steps must be followed in the specified order.
1. Install the PC-Beamage-3.0 software.
2. Install the 11Beamage-3 USB driver by following the 11Beamage-3 Driver Installation Quick
Guide (refer to Annex B). The driver must be reinstalled if a new version of software was updated;
a. If necessary update the 11Beamage-3
’s firmware, using the BeamageUpdater (refer to
Annex C);
3. Connect the 11Beamage-3 to a USB 3.0 port or USB 2.0 port;
a. If multiple 11Beamage-3 are used, please connect them all to the computer;
4. Start your laser and align in the 11Beamage-3 aperture;
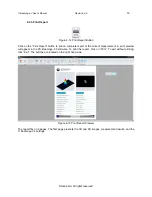
5. Start the PC-Beamage-3.0 software. Select the desired 11Beamage-3 from the displayed list. The
green led button in the “
Main Con
trols”
indicates that communication has been established.
a. If multiple 11Beamage-3 are used, please start multiple instances of PC-Beamage-3.0
before pressing
“Start Capture”;
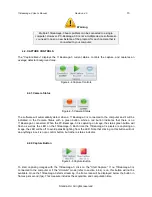
6. Press
“Start Capture”
;
7. Let the auto-exposure find the correct exposure time. This should take a few seconds. If the
exposure time is at 100 ms and your beam is under exposed, please decrease the ND filter
attenuation. If the exposure time is at 0.2 ms and the beam is saturated (maximum is white)
please increase the ND filter attenuation;
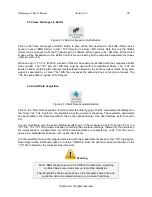
8.
Click on the “
Subtract Background”
in the Ribbon;
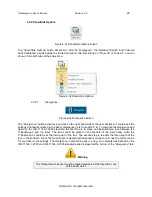
9. A message box will appear. Once this message appears, block your laser beam and click
“OK”;
10. Once the
“Please wait”
message box disappears, you can unblock your laser beam;
11. The measures will appear in the
“Home”
tab on the right-hand side;
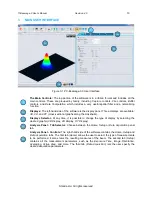
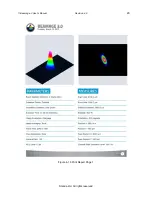
12. Choose the appropriate graphic for your measurement on the left hand-side:
a.
3D display;
b.
2D display;
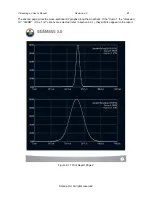
c.
XY display;
d.
Beam tracking display.